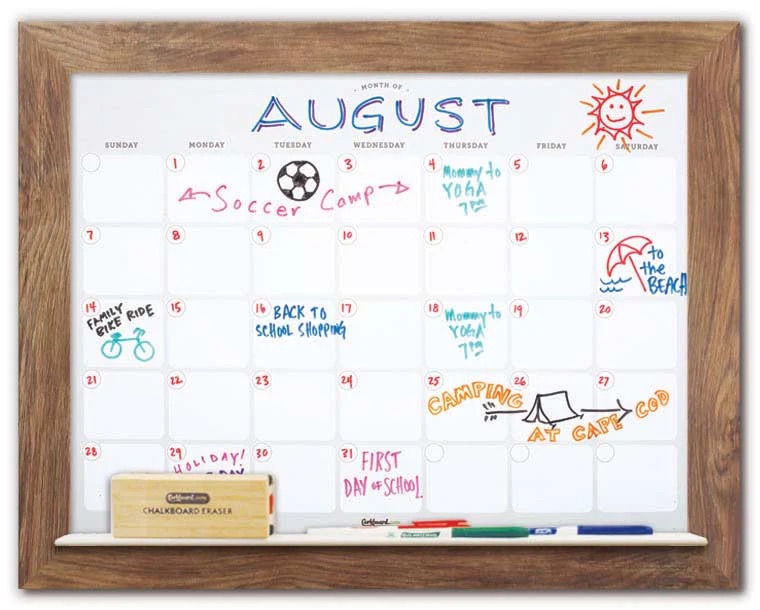
If your family tends not to be prepared for events at the beginning of the month, I highly recommend you implement a 2 month calendar system! This post is all about how I implemented a 2 month calendar system for our family and the benefits we experienced from it.
I love being organized but I started to miss events at the beginning of each month while using our families single calendar system. Even when I realized an event was in a few days, I was not prepared with a gift, outfit, babysitting, etc. The wall I had our family calendar on was tall enough to make a command center on but I knew our family wouldn’t utilize the whole thing with our current lifestyle. We just needed a spot to quickly check our daily, weekly and monthly activities without all the extra fluff.
Prior calendar system- On the first day of each month, I would take down the calendar, erase the previous month and add the new dates and events for the current month. This system quickly became a problem when I realized there was an event coming up in a few days and I had totally forgotten about it since it wasn’t “on the calendar” I checked daily.
Small Change for Big Rewards-
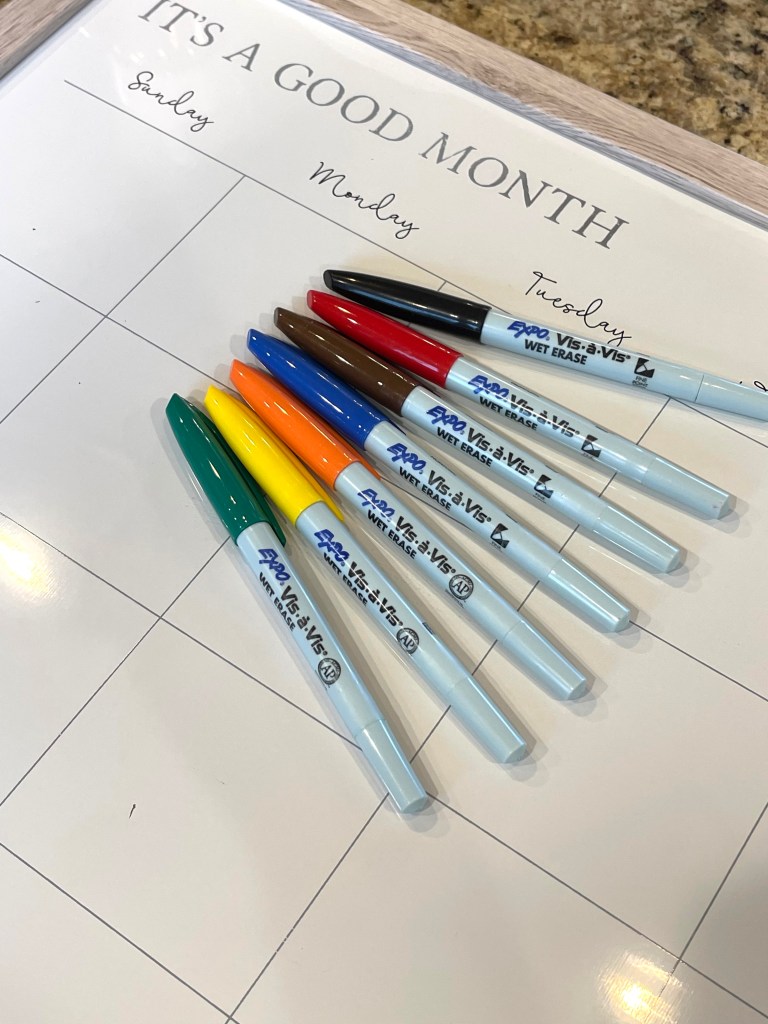
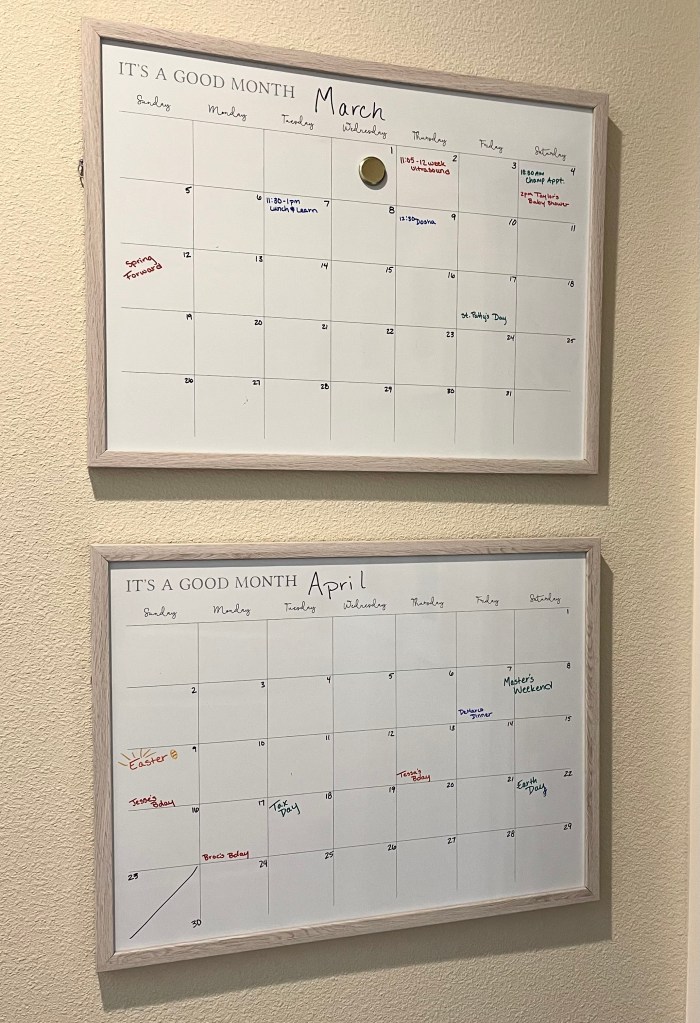
NEW 2 month calendar system-I decided the easiest way to combat this would be to add another calendar to the wall so we would have 2 months up at all times. This simple solution has become a huge success for our family to keep on top of all our events.
Look how nice it is to see two months ahead!
How to implement 2 calendar wall-
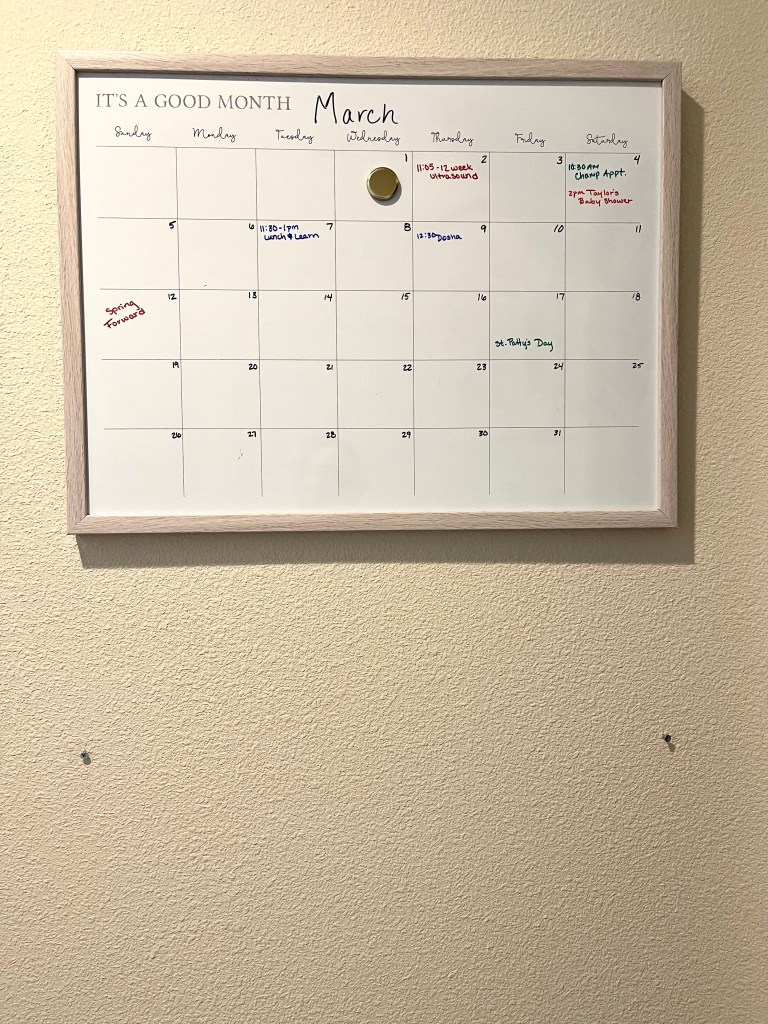
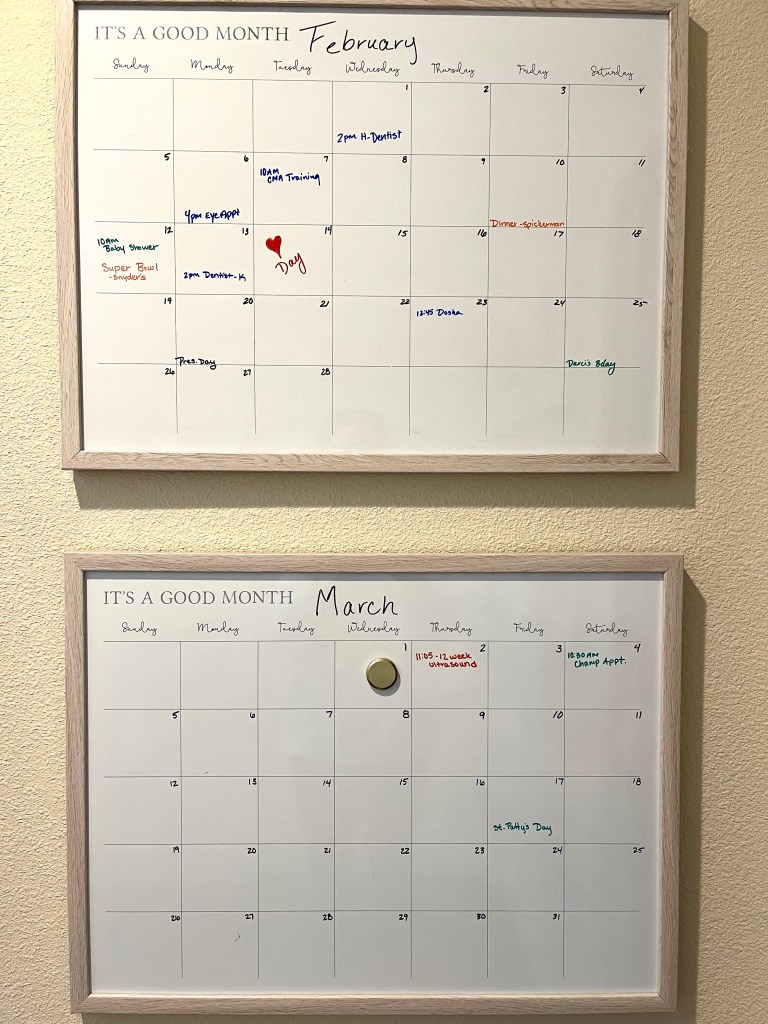
Update Current Month- Now at the beginning of each month, I take down the current month and update any new events that may have come up since I last month. Then, I swap the current month calendar for the previous month on the top hooks.
Switch out Previous Month to Upcoming Month-When I take down the previous month, I erase the whole thing before starting fresh. I then add the actual dates before including all the events for the upcoming month. I replace it on the bottom hooks on the calendar wall, below the current month.
Add Some Creative Touches
I love the creative touches to the calendar to the right. If you are creative and artsy, this would be a lot of fun to make. Add some small touches to the individual events or something that represents the current month. I actually do this on occasion, but it depends on what kind of items I can actually draw! 🙂
Enjoy the process and get creative with your family’s schedule!
I now always know what is coming up for a 2 month span and love feeling in control of our schedule again. This seems like a simple solution but since I lived without it for years, I assume there are others out there that are struggling with their own systems. Here’s to your family being prepared for each and every event you have coming up now that you have a simple solution to stay organized.
Let me know what you think of the 2 calendar system or how your family stays organized in the comments section.
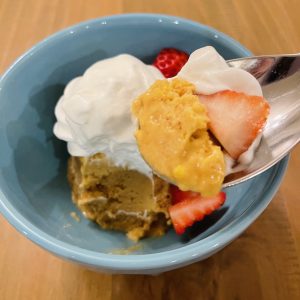
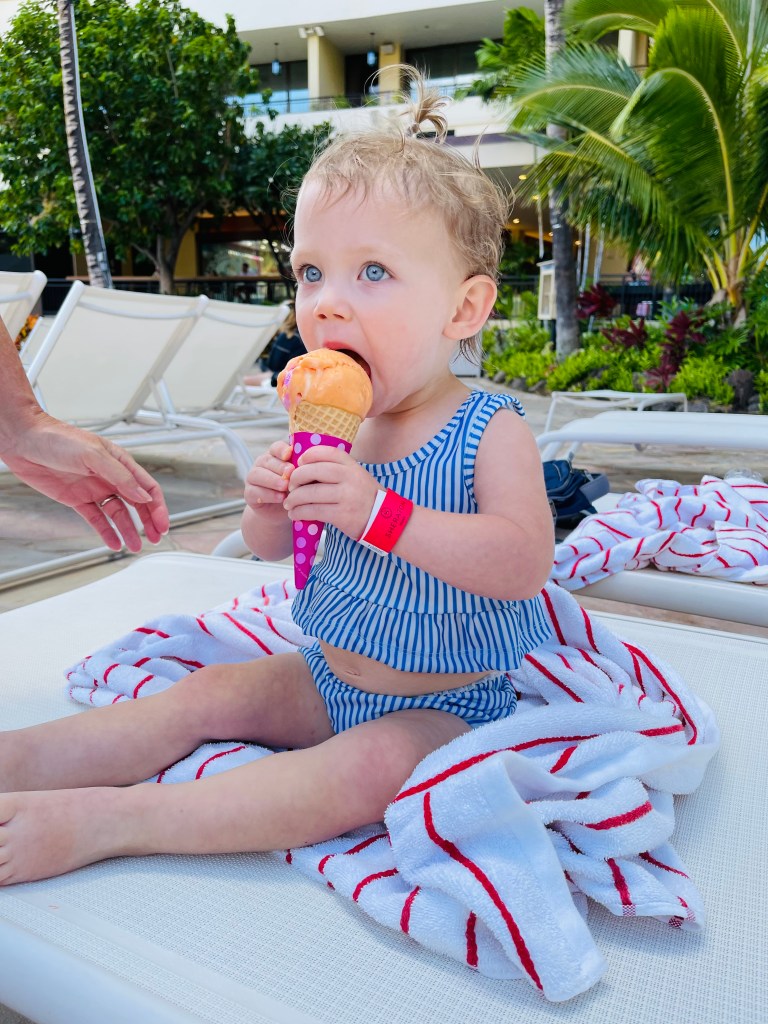
My favorite go to healthy dessert is banana ice cream and it is toddler and husband approved too! I tend to have dessert cravings during pregnancy and this is always a great alternative to try, It’s so easy to prep and make and my daughter loves helping make it before devouring it.
All you need for this delicious treat are a few ripe bananas and a blender or food processor. I prefer to use my food processor because I feel it’s more high powered than the blender we currently have. It’s also fun to experiment with other frozen fruits (mango, strawberry, pineapple, or blueberry).
This is also a great summer treat when you are craving something sweet and cold but don’t want all the added sugar that typical ice cream and popsicles include. You can add any of your favorite ice cream toppings and they all taste great.
I have tried this recipe with some frozen mangoes I happened to have on hand and it just added an extra layer of delight to the dish. Feel free to do the same with any frozen fruit you might in your freezer.
Favorite toppings:
Sliced strawberries or any fruit
Peanut Butter or any nut butter of choice
Walnuts or sliced almonds
Chocolate chips
Jam
Honey
Granola
My daughter loves when we have whipped cream in the house and top it off with a good dose of it too.
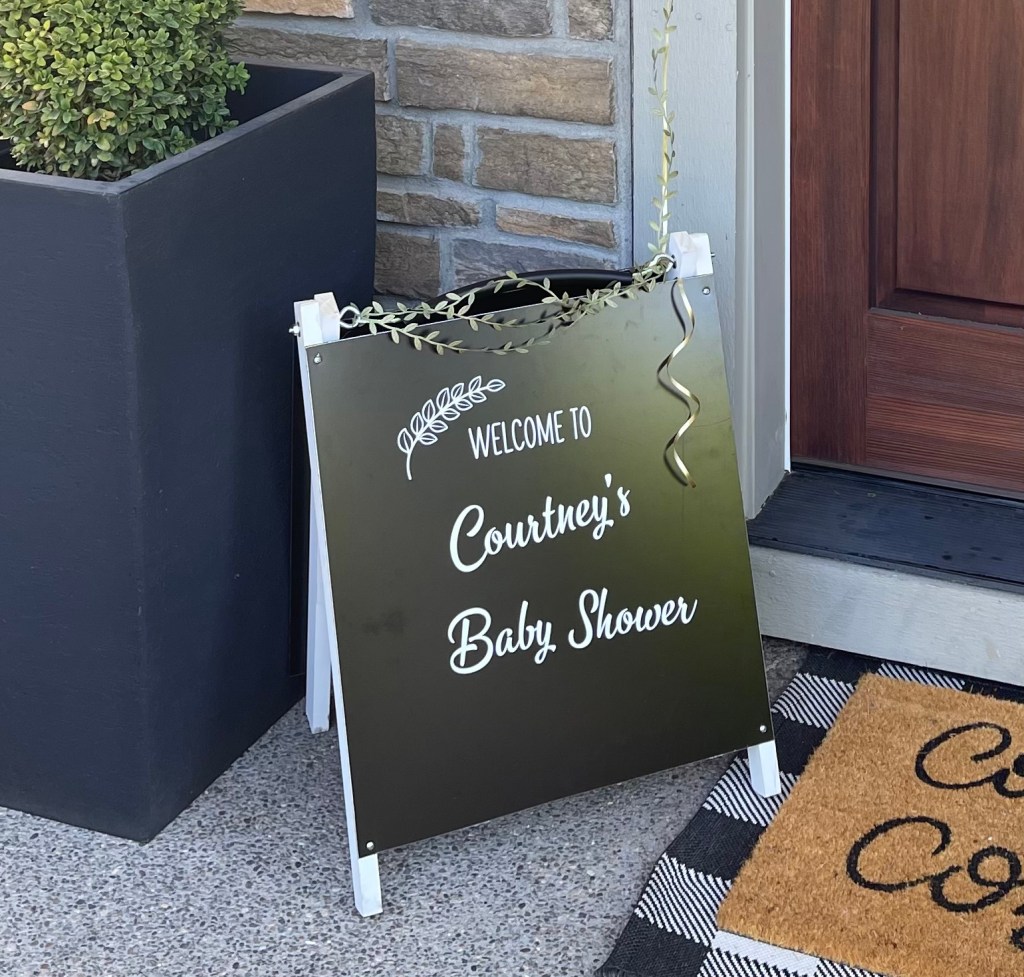
I had the honor of hosting my sisters baby shower while she was pregnant with my niece. She requested a neutral palette with sage green as an accent color. She likes rustic decor so we incorporated some additional pieces that we found at Hobby Lobby as well.
We had fun planning, shopping and prepping for the party together and our mom flew in a few days before to help finalize everything. It was a lot of fun celebrating my sisters first pregnancy and spoiling my niece in the process. I’ve included the signs I made using my Cricut Explorer, our food items, and decor with links to many of the items.
One of my favorite party decor tips includes finding items around my house that I can use or purchasing items that can be used after the party as well. This is usually easiest to do when the party theme is similar to your style. In this case, we got to use some of my sisters decor and food servers as well.
Decor
I have an A-Frame sign I typically use at the front door and for this particular party, I added white vinyl lettering that says, “Welcome to Courtney’s Baby Shower” and set it at the front door. I decided to add a large white balloon to draw more attention to it and that turned out to be a bit of a hassle. With the price of helium, our local grocery store floral department quoted us $100 for the one balloon!! Due to this, I decided to fill it up with my balloon pump and stuck it to the side of the door with tape. It was a windy day so it didn’t stay up very long but my husband was on balloon duty until the party started!
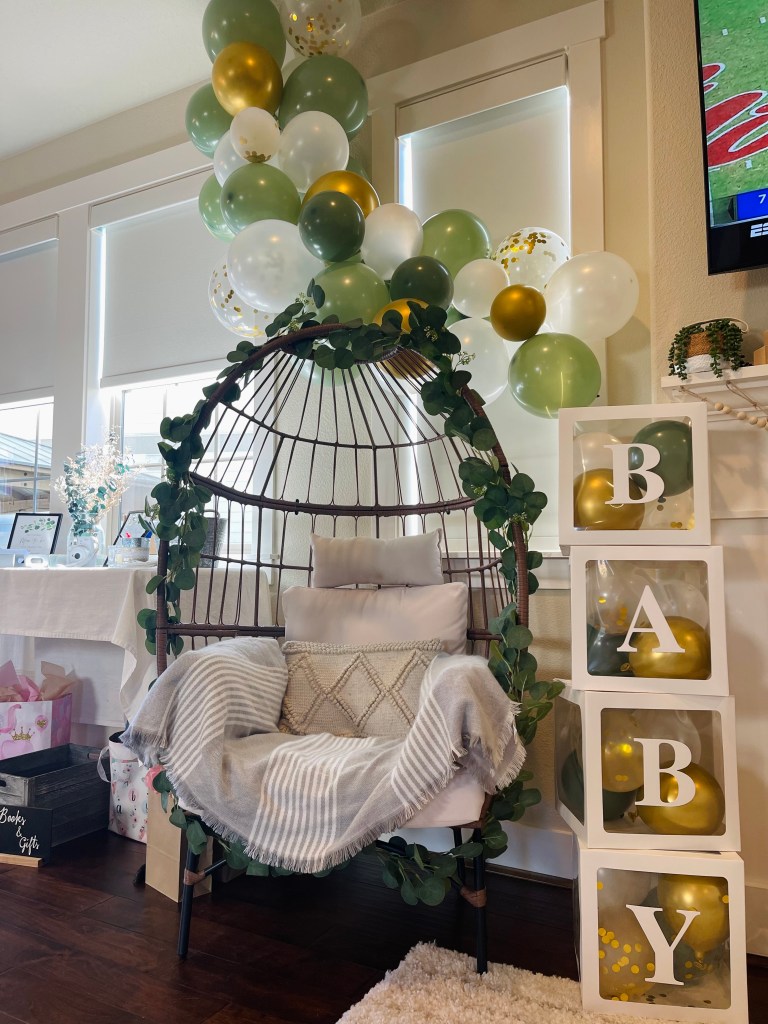
I brought in my outdoor egg chair and dressed it up with some fake eucalyptus leaves my sister had from her wedding. This was the perfect spot for the mom-to-be to sit and open gifts. To make her more comfortable, I included a lumbar pillow and blanket. I added a semi balloon arch above using this 60 piece balloon set. I also put a few in these cute BABY boxes, just fill them up super tiny and you can mix and match four of them.
I added a few extra touches on my mantle including these alphabet blocks that double as a gift for the mom-to-be.
We set up the gift table right next to her chair for easy access when the time came.
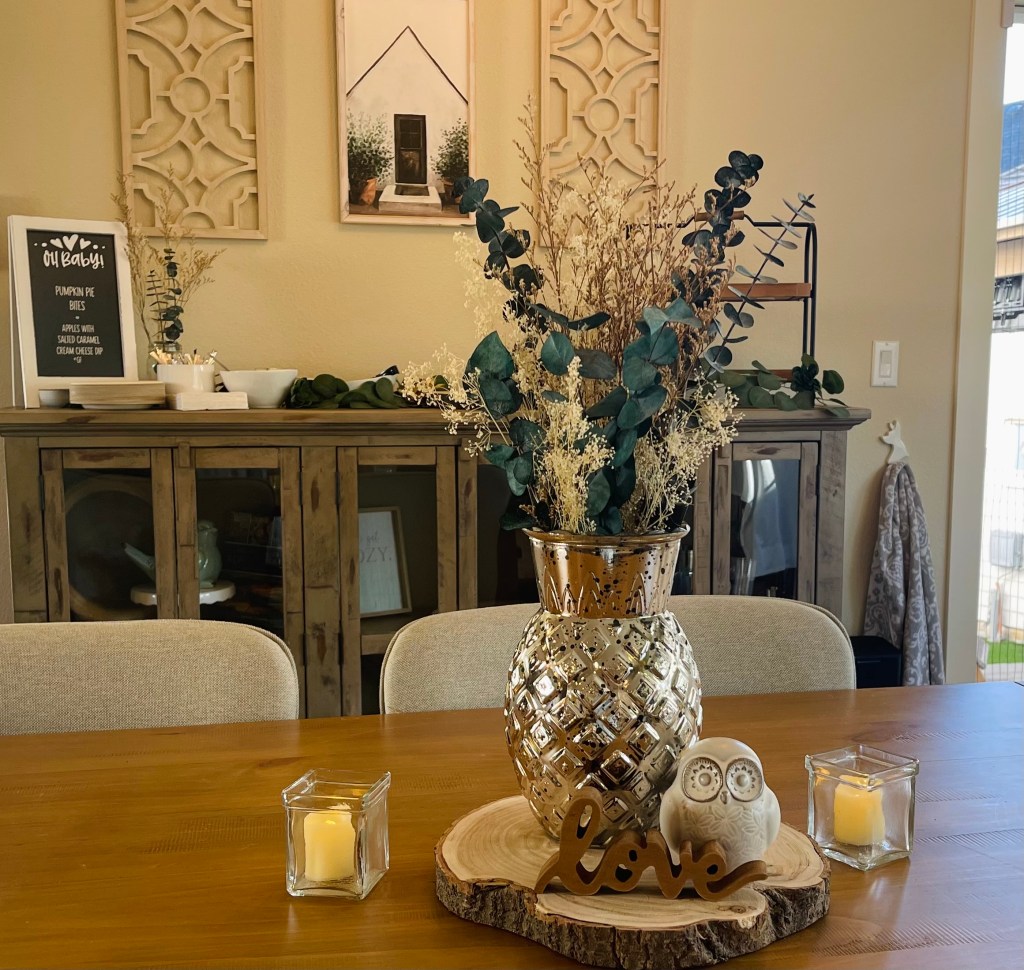
I added a few extra vases with more fake eucalyptus and babies breath around the party, some battery operated tea lights and some extra decor items I had around the house and we found at Hobby Lobby. I highly recommend a stop at Hobby Lobby if you have one nearby for any of your party needs. They have a huge variety of themes to choose from.
Party Games
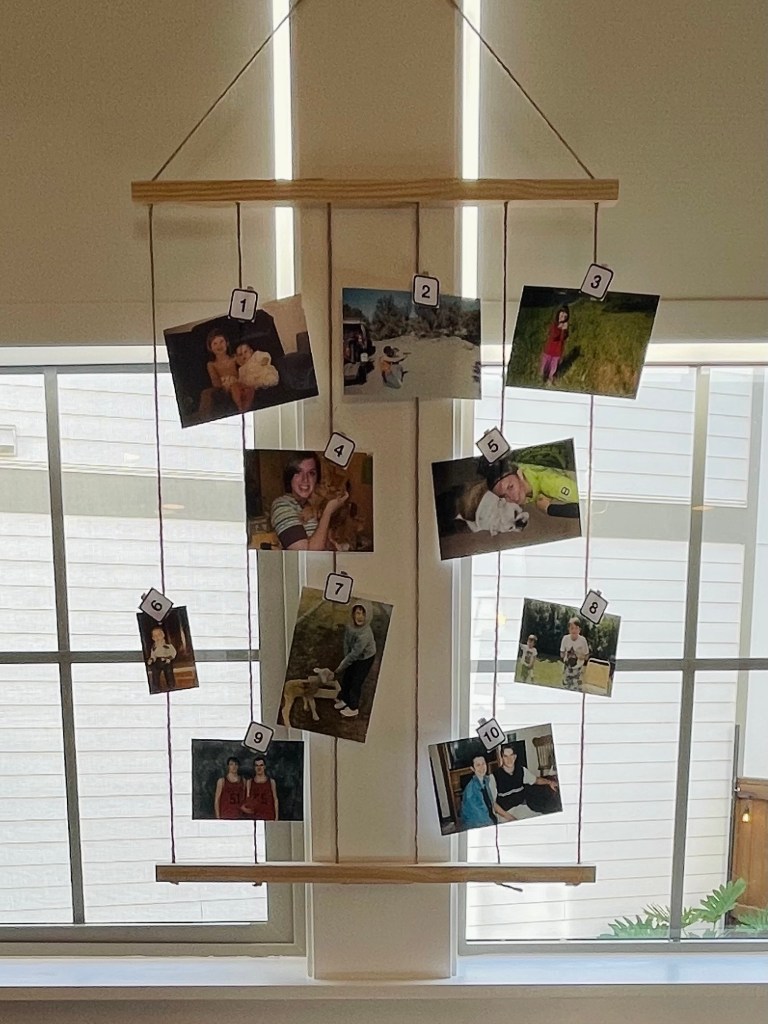
I didn’t get pictures of all the games we played but I have linked some of the templates below. My sister knew what games she wanted to play so I just had to find the extras needed to play each one. For the How Old Were They game, I placed them on a table with lots of pens and made an announcement once all the women arrived so they could work on them right away. I had the rest of the games attached to individual clipboards that my sister already had, you can find them on Amazon.
How Old Were They- For this game, my sister brought 5 pictures of her and 5 of her husband from when they were kids. I found this template on Amazon and printed on my own card stock. The photo holder was another Hobby Lobby find.
The Price is Right- I used Target for the price list on this one. Here is the template from Amazon.
Late Night Diapers- I bought a pack of newborn diapers and asked the guests to write something funny on them using sharpies. Here is the template for the sign.
This isn’t really a game but something really nice to do for busy moms-to-be. Purchase thank you cards with envelopes ahead of the party and set the envelopes out with some pens and this sign. This allows the guests to help save the mom-to-be some time before baby comes.
Favors
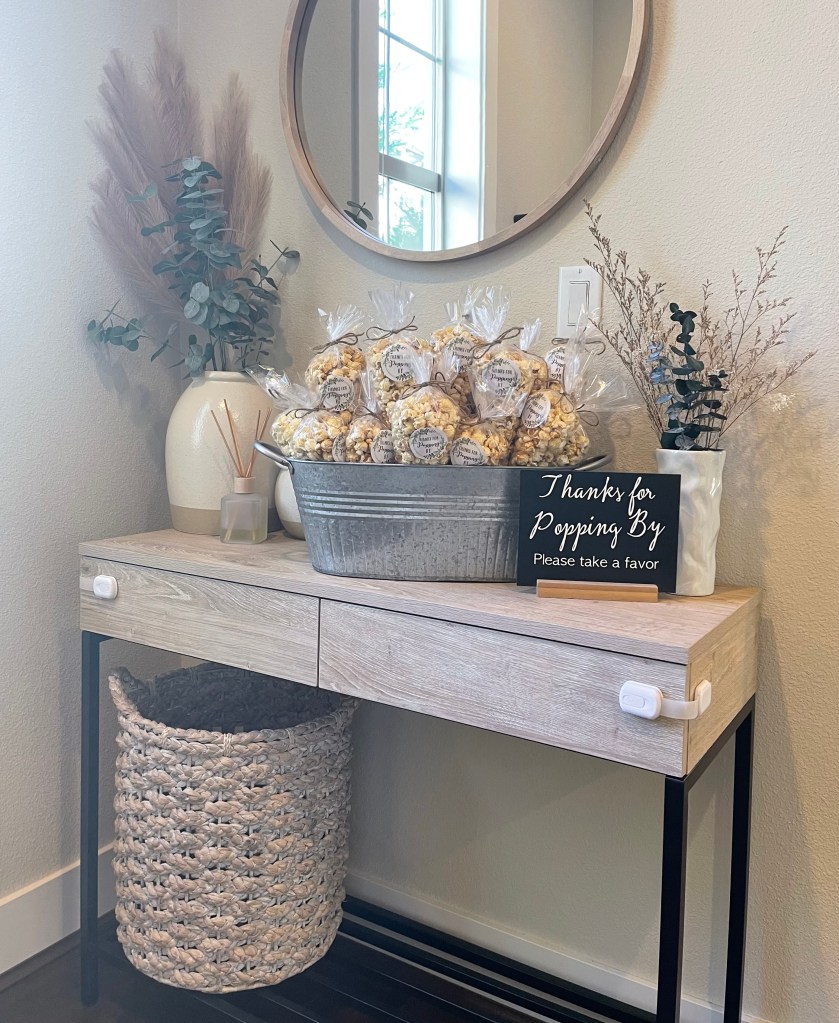
My sister requested Miss Hannah’s Gourmet Popcorn for her favors. They are a local gourmet popcorn shop in our area. The individual bags are pretty speedy so we decided to buy 4 and split them between cellophane bags with these cute stickers on them. I used my Cricut to cut vinyl lettering that said, “Thanks for Popping By. Please take a favor” and attached it to a chalkboard sign I bought from Hobby Lobby.
We placed them all inside a galvanized tub and set them at the front door to make sure everyone saw them as they headed out.
Food and Drink
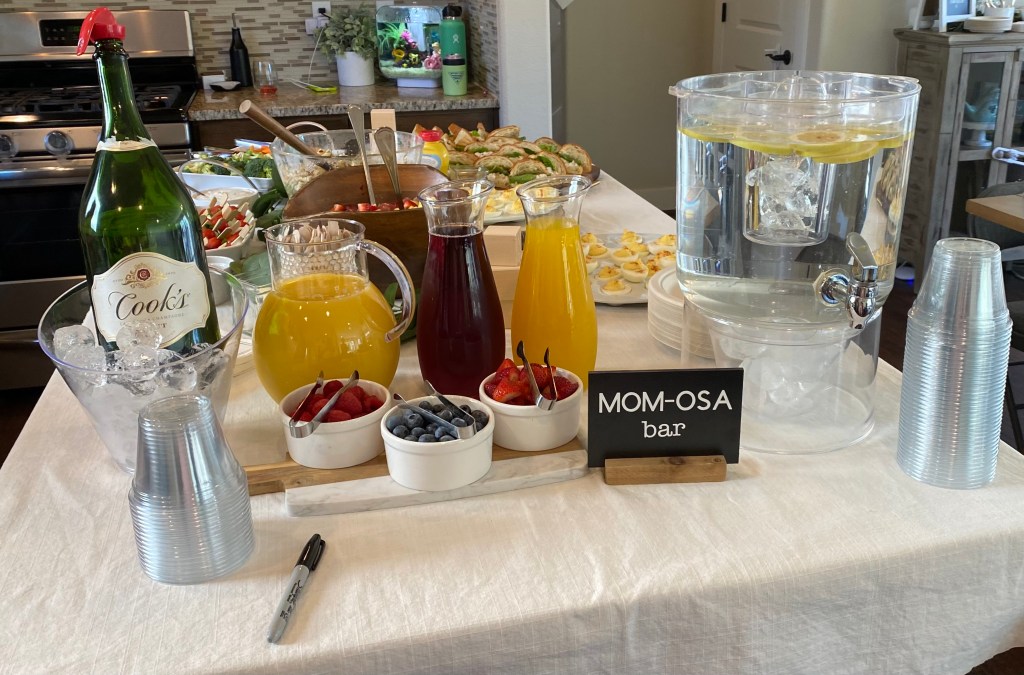
We had a Mom-osa bar with a few juice options (orange, cranberry and mango), Champagne and assorted fruit. I made the Mom-osa bar sign using my Cricut but you can also find some cute templates online.
We also had a water dispenser with some lemon slices.
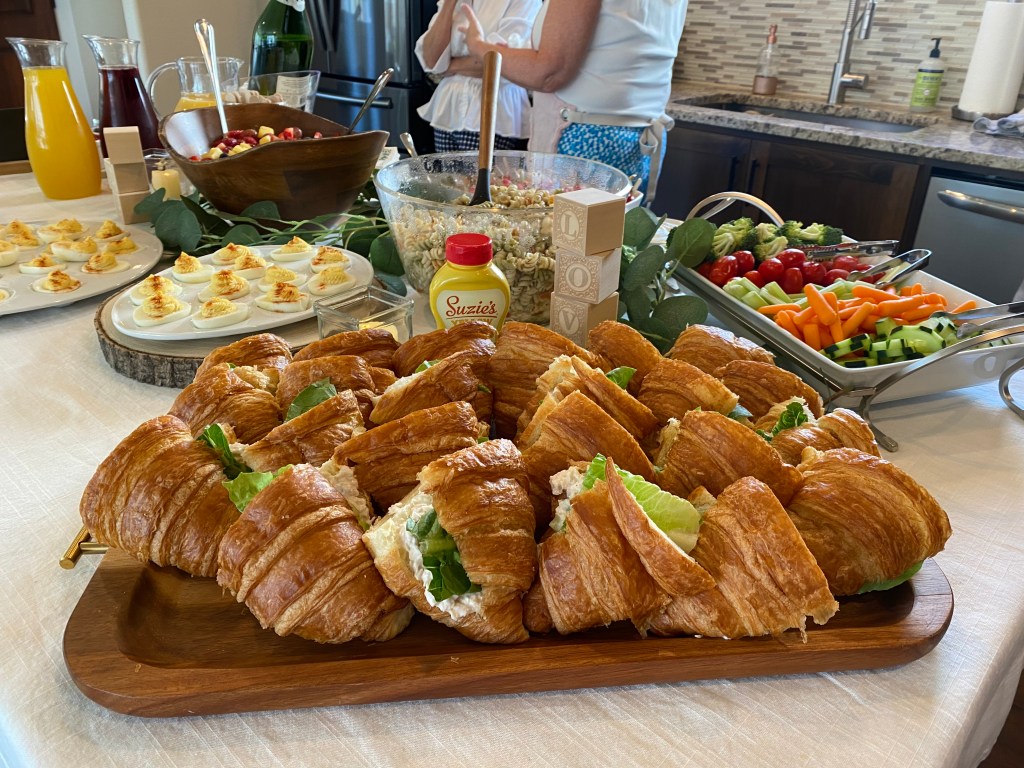
Our main food item was homemade chicken salad on croissants with lettuce and mustard.
Our whole family loves deviled eggs so we made a whole bunch as well.
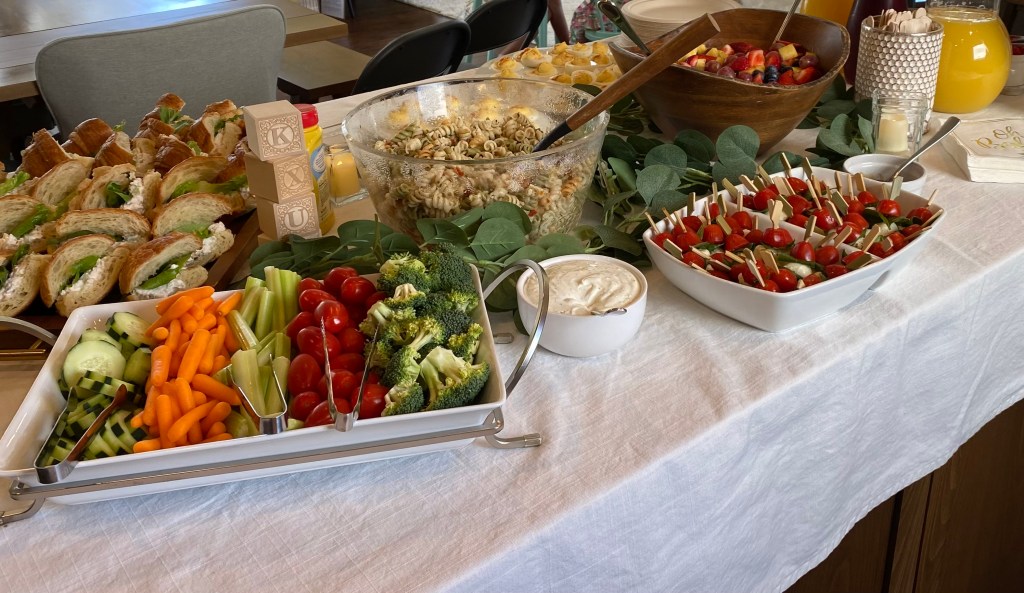
The remaining items included; pasta salad, fruit salad, a veggie tray and caprese skewers.
The “tablecloth” I used for the food table is actually an old Ikea window curtain I recently replaced. They worked so well, I have kept them for future parties. They are easy to through in the washing machine as well.
Dessert Table
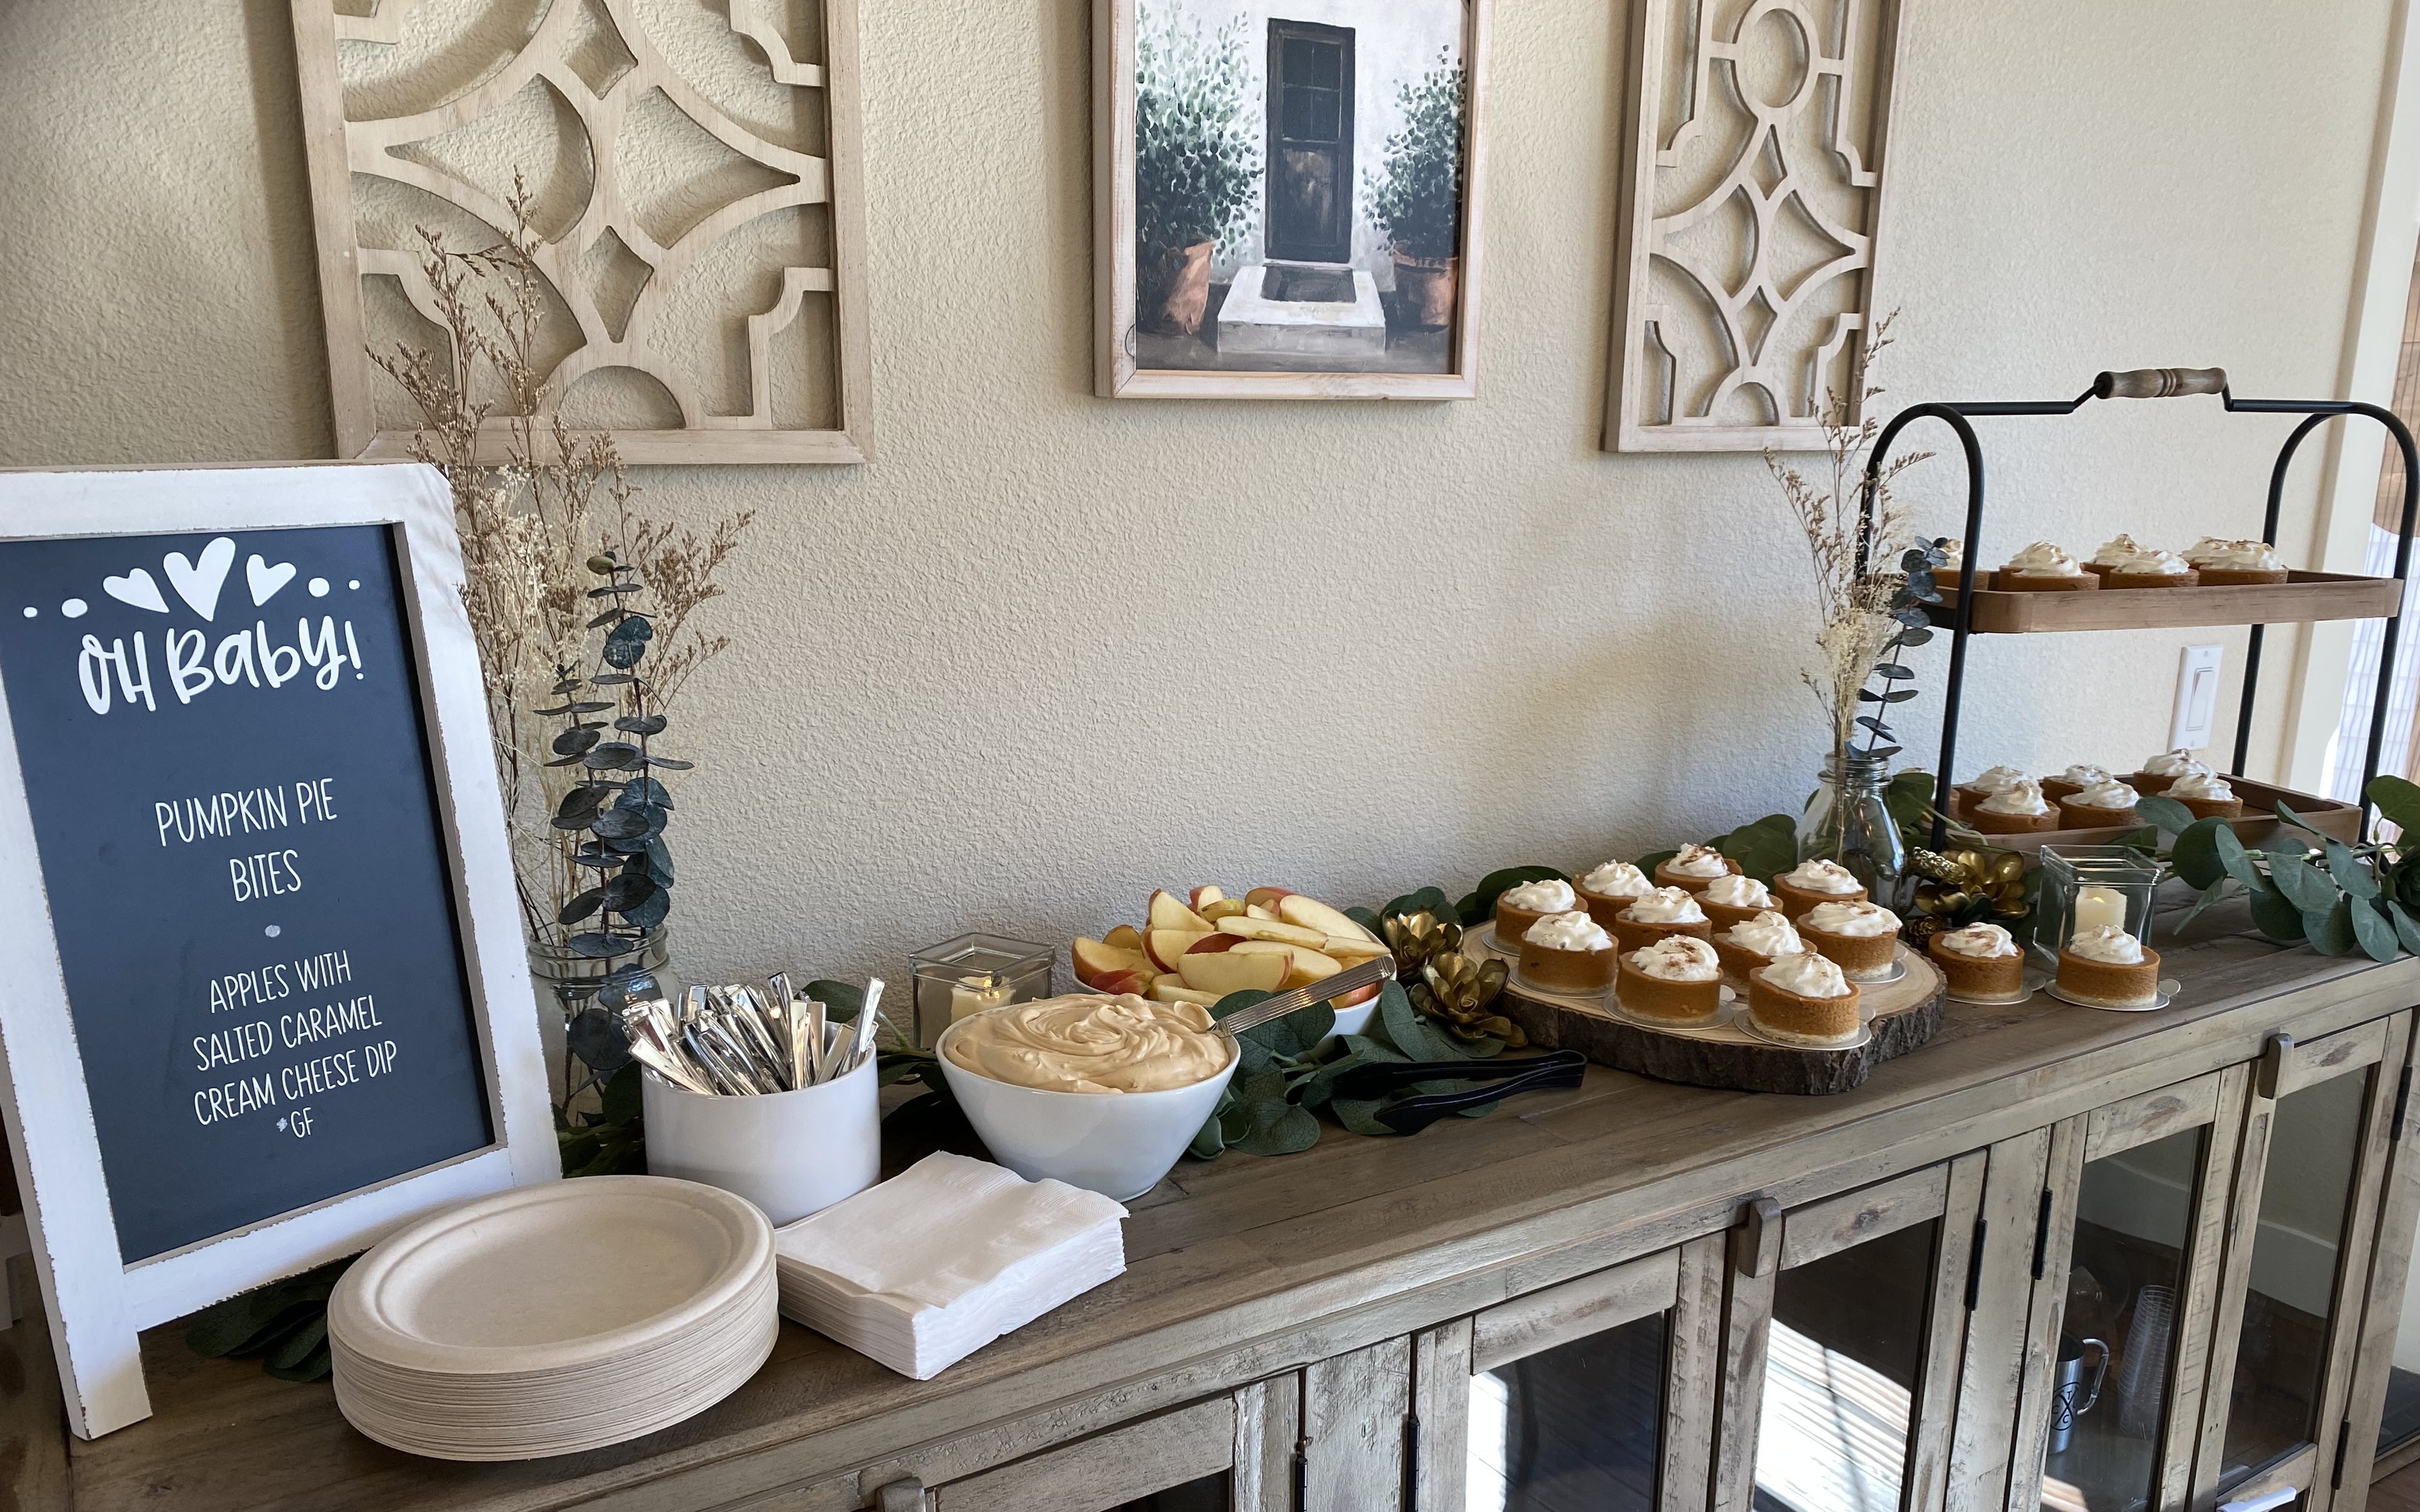
I made a cute little dessert menu with a chalkboard sign I found out Hobby Lobby and my Cricut for cutting the vinyl lettering. We bought a few Costco pumpkin pies and used biscuit cutters to cut them into individual pies. We placed them on these dessert plates and added whipped cream. I recommend waiting to add the whipped cream or allowing guests to add their own. The whip cream began to melt midway through the party. We served them with the cutest little forks too.
We also had sliced apples served with a salted caramel cream cheese dip for our gluten free guests.
We had an absolute blast celebrating the beautiful mom-to-be! Planning ahead and prepping as much as you can prior to the week of the event is crucial for a smooth and stress free time. I made most of the signs the month before and ordering and printed my templates around that time as well. The grocery shopping has to wait until the week of but as long as you get the items a couple days in advance, you can work on prepping the items ahead as well.
I hope you have a blast planning and celebrating your next big party. Feel free to take some ideas from this post and add your own ideas in the comment section.
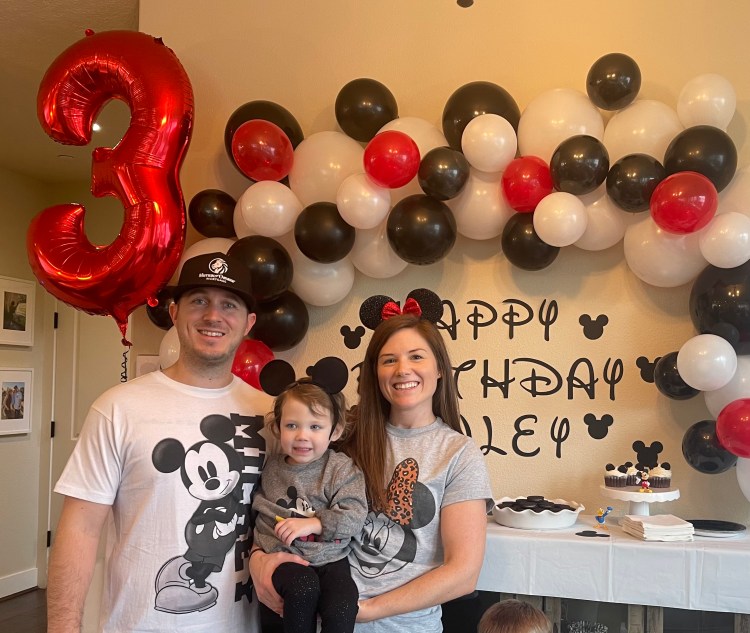
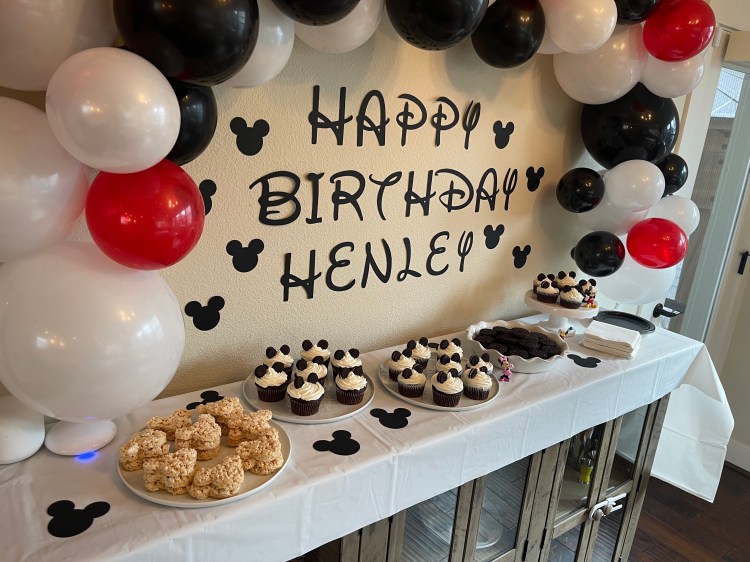
For our daughter’s 3rd birthday party, I asked her for input on what theme she would want. She very quickly said she wanted Mickey, Minnie, Donald, Daisy, Goofy and Pluto at her party! I decided to run with this theme but keep it simple with black, white and some touches of red. This is a great way to keep a theme gender neutral and easy to shop/prep for.
I found these Mickey and Minnie shirts at Target online and they turned out great. Dad’s shirt, mom’s shirt and toddler sweatshirt.
Invitation
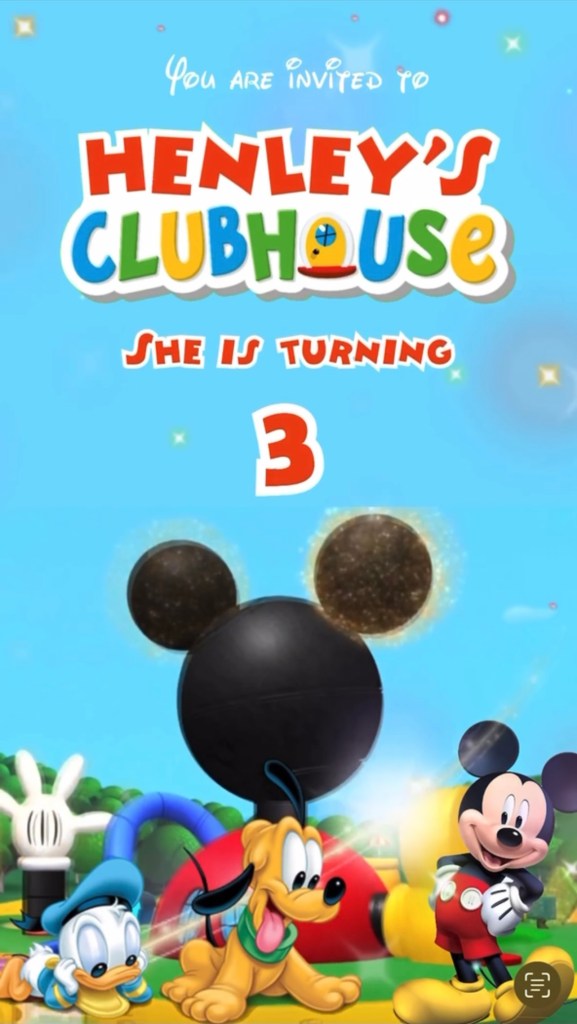
We invited 3 of our daughters friends to keep the party small since we hosted at our house and to keep costs down. I found the cutest personalized invitation on Etsy here that I was able to save and text to the parents. The invitation can be personalized with your Childs name, age and the party details. It is a cute video with the Mickey Mouse Clubhouse theme music and is super easy to send out to your guests.
Decor
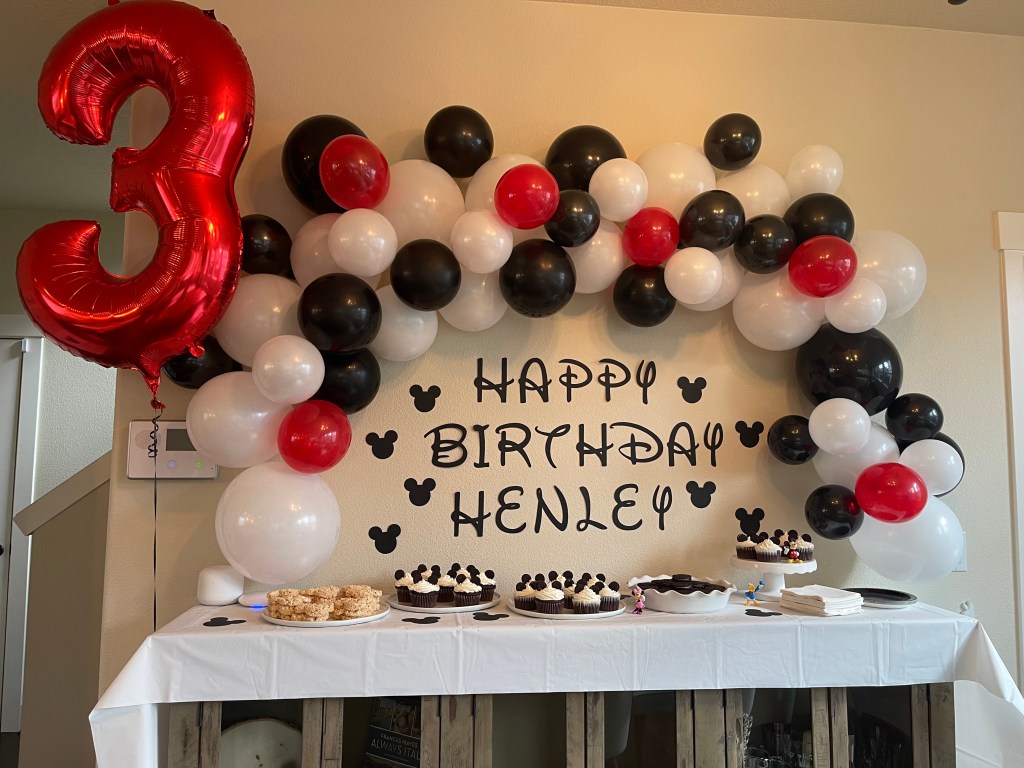
I kept the color scheme black and white with some pops of red. Most of the party supplies were purchased from our local Party City and Dollar Tree. I love that Party City has color coordinated items and it made it super easy to find the items I wanted.
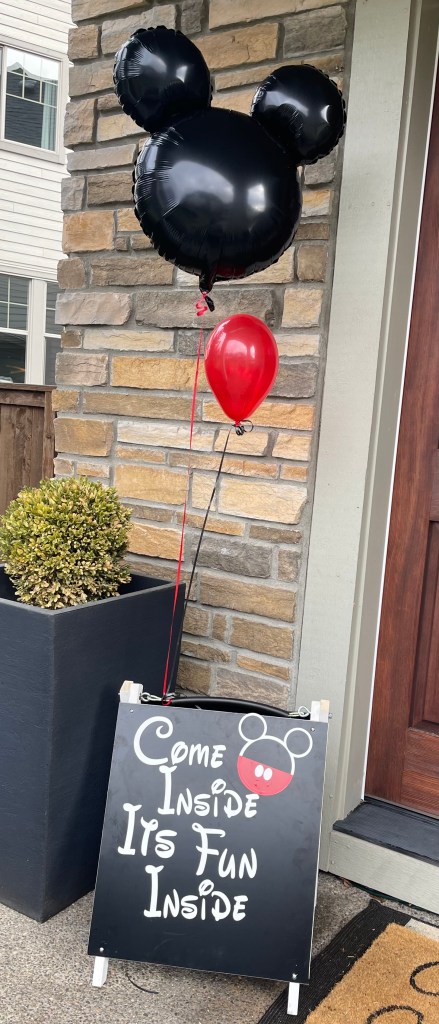
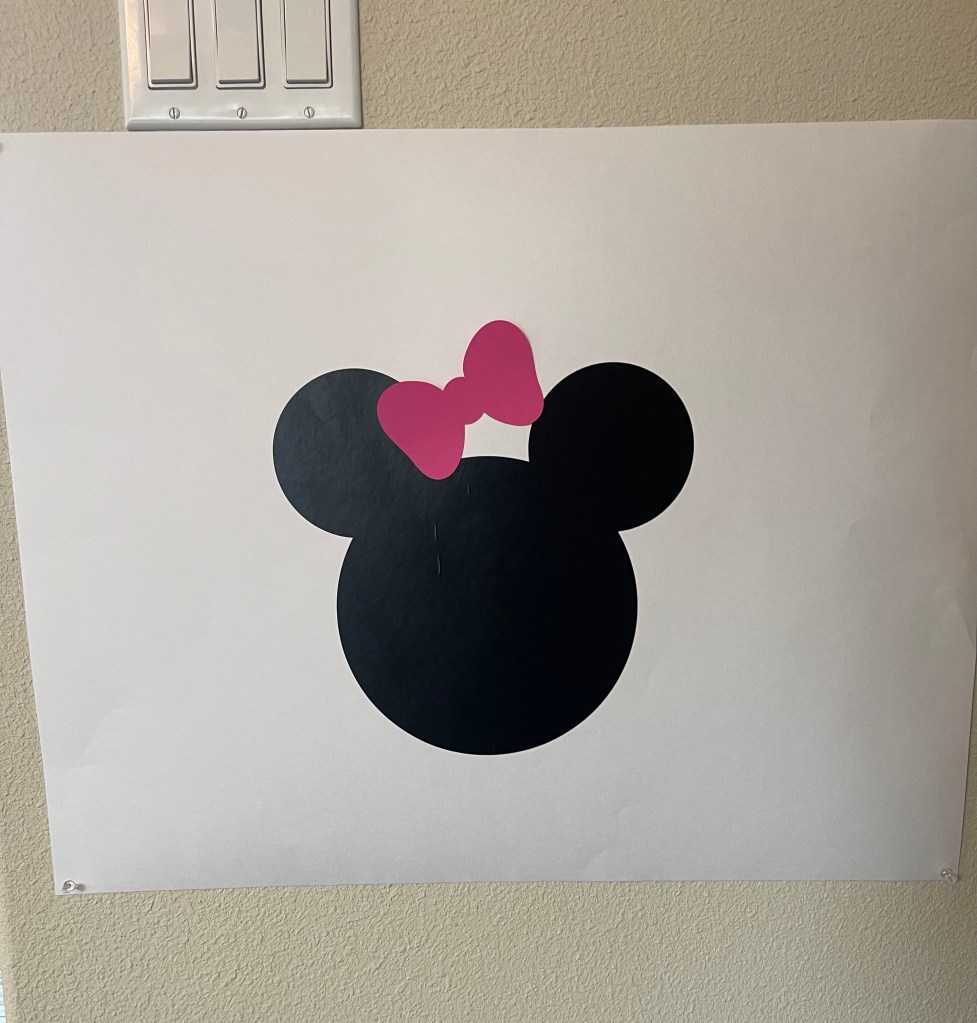
At the front door, guests were greeted with my custom A-frame sign that said, “Come Inside, Its Fun Inside”. I cut the white vinyl lettering using my Cricut Maker and found the Disney font here. With this font, you have to save each letter individually but since I didn’t need too many letters, it wasn’t too much extra work for me. I also added a cute little Mickey Mouse shaped image that I created using Design Space on the Cricut. It was pretty easy to do with the shapes tool; I made two sizes of circles (for the face and ear) then duplicated the additional ear so it matched perfectly. I also used the oval shape and again duplicated it for the buttons on the semi circle pants I also attached. It’s a lot of fun to play around with the design space tools if you have a Cricut and I can usually save money by making my own designs.
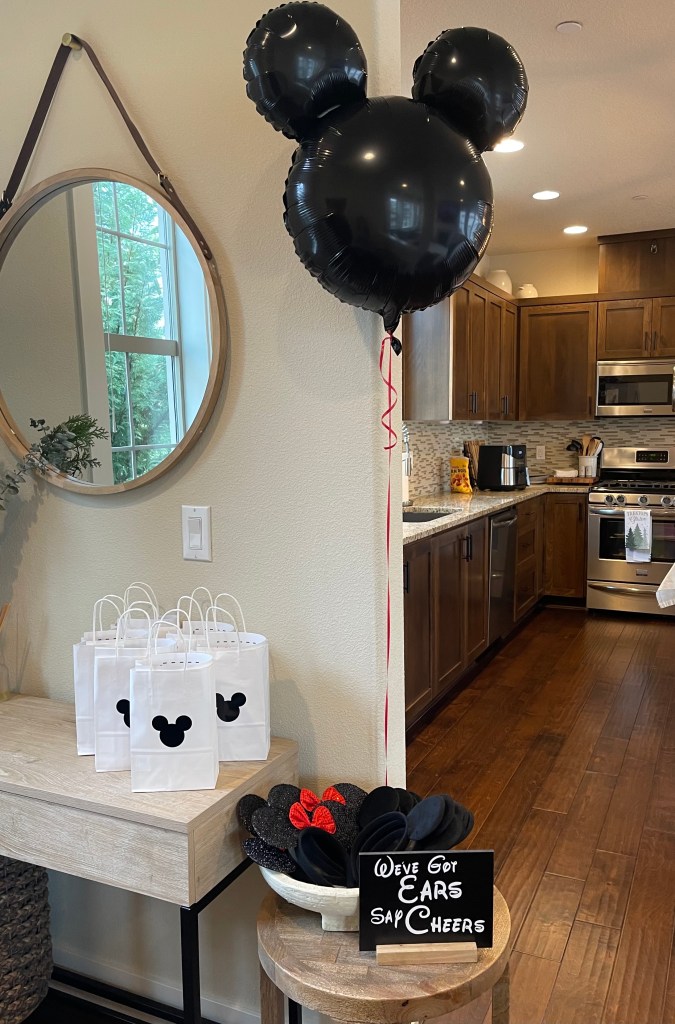
I attached one of the Mickey head balloon’s I found on Amazon and small red balloon to draw extra attention to the sign.
I love making balloon arches and try to add them to every party. I purchased this balloon kit on Amazon for the black and white balloons and found a small bag of red balloons at Dollar Tree. I use a balloon pump like this one to quickly blow up the balloons for the arch in different sizes. I purchased the large, red 3 balloon from Party City.
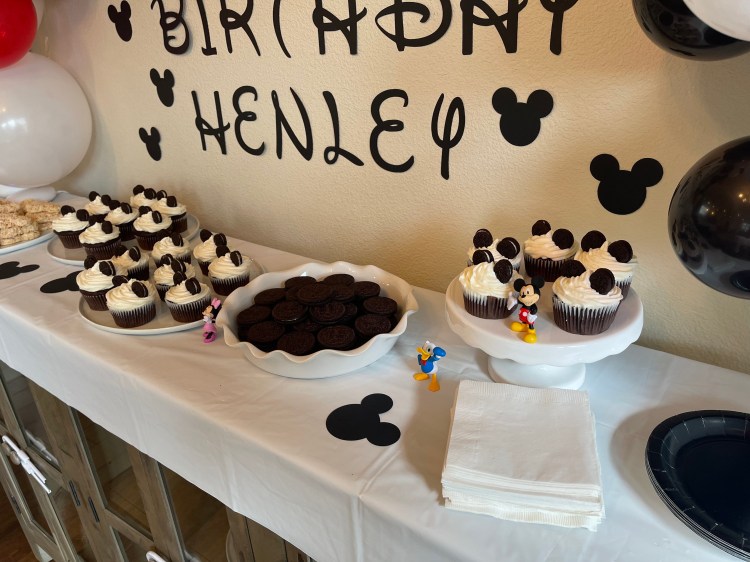
For the HAPPY BIRTHDAY and Mickey Mouse heads, I used my Cricut to cut black card stock using my Disney font. I splurged on the Disney figurines at Party City but, my daughter now has her favorite characters to play with.
Games and Activities
I kept the activities/games simple since 3 year olds don’t have very long attention spans.
Pin the Bow on Minnie- This was a quick and fun game that I made using a large poster board, black vinyl cut with my Cricut and a bunch of “bows” cut from different shades of pink card stock. You can easily find a bow shape on Cricut Design Space.
Personalized coloring pages- I found these coloring pages on Etsy that were a huge hit for the kids. (I didn’t get a picture of them but they are on the below “kids table” I set up.)
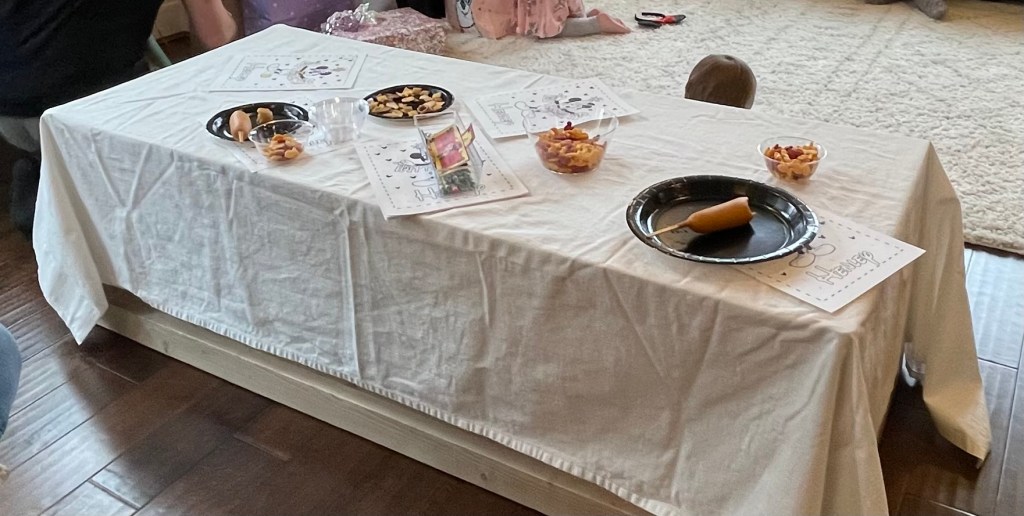
Food and Drinks
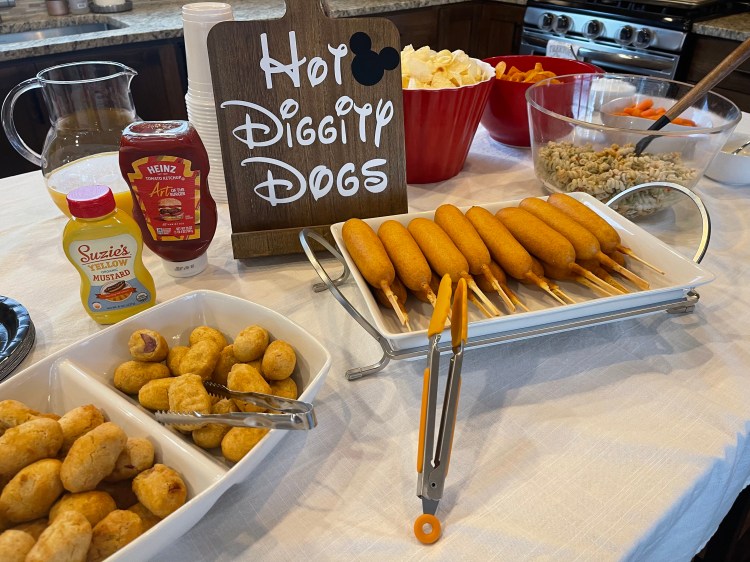
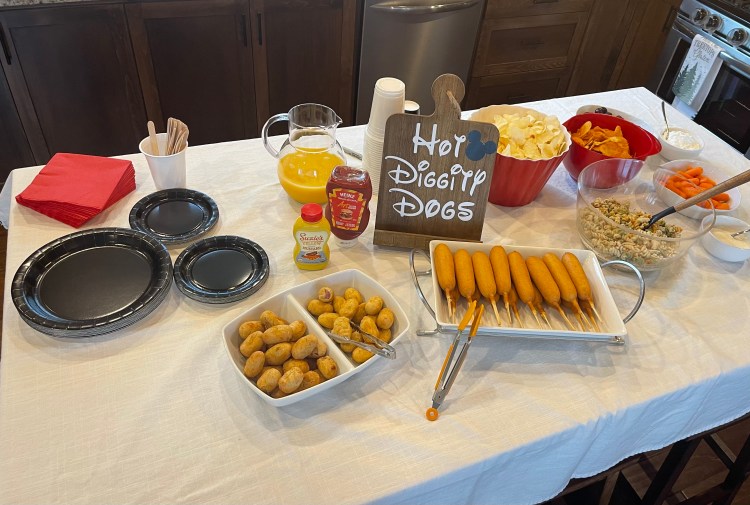
The theme for the food was “Hot Diggity Dogs” so we served regular and mini corn dogs. These are super easy if you buy the frozen versions and stick them in the oven and/or air fryer just before the guests arrive. I oven baked the regular corn dogs and air-fried the mini’s so they would be done at the same time. Most of the kids enjoyed the regular size corn dogs and the adults devoured the mini dogs throughout the party.
We also served pasta salad (that I made the night before), Lays regular and BBQ chips, carrots with ranch and grapes with cool whip. A big hit was the Mickey Mouse goldfish I set out on the tables around the party as well. We had a pitcher of orange juice and bottle water for everybody and our “drink fridge” is always stocked with adult beverages as well.
Dessert Table
This was my favorite part of the party! I made Rice Krispie treats and cut them into Mickey Head shapes using this Cookie Cutter. I used the large version and sprayed it with baking spray between cuts. It was a little tricky to do but I loved the final product.
I stacked a bunch of Oreos in a white platter for a little extra fun too.
I decided to make boxed chocolate cupcakes and my own homemade white frosting. I made the cupcakes the day before and frosted them the morning of so they would be fresh. I added 2 mini Oreos to each one for “Mickey ears”.
The desserts were a hit but I definitely had a lot of leftover Oreos and Rice Krispies due to the size of our party.
Favors
The party favors started as soon as the kids walked in the front door with Mickey and Minnie ears they could wear during the party. I found these cute ones on Amazon.
I found white gift bags at Dollar Tree and added these Mickey Mouse stickers to the front to personalize them. I included a few of the personalized coloring pages from Etsy, small pack of crayons, these Mickey Mouse favor packs, and temporary tattoos I found at Party City. I purchased one set of the tattoo sets and divided them between the bags (they were only $1!).
Our daughter and her friends had a blast celebrating her 3rd birthday. It was really fun to catch up with the parents while the kids got to run around and play. I hope this post helps you plan and prep for your next Mickey Mouse themed party. Let me know your thoughts on the party in the comments below and be sure to subscribe to get my latest posts delivered to your inbox.
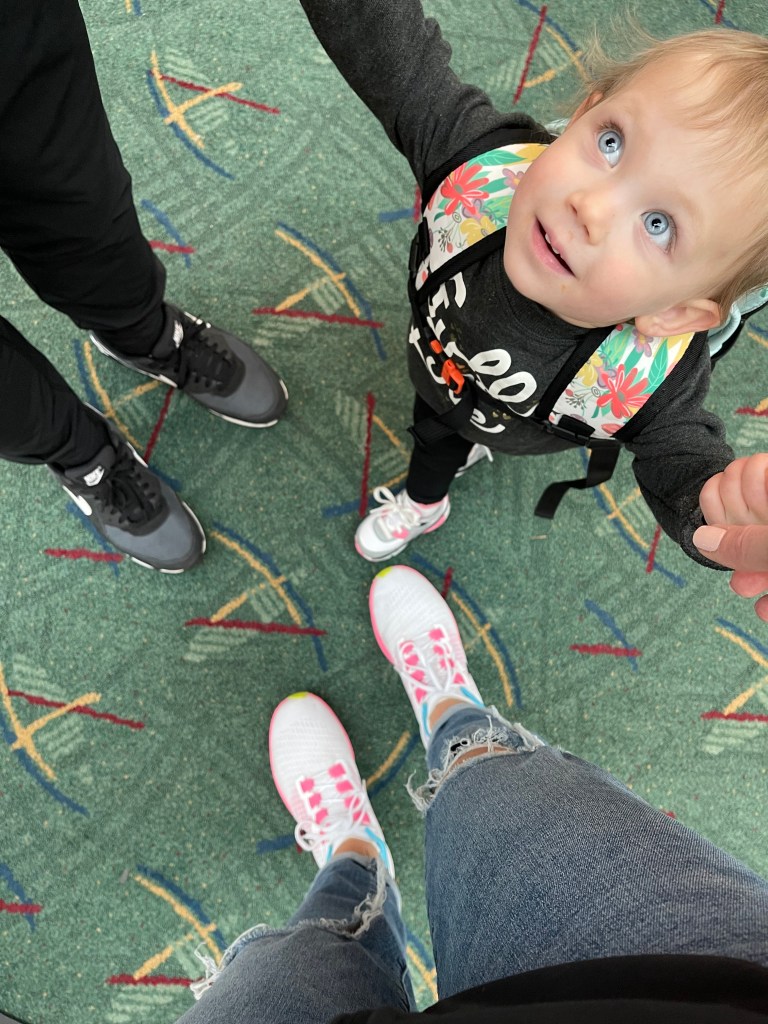
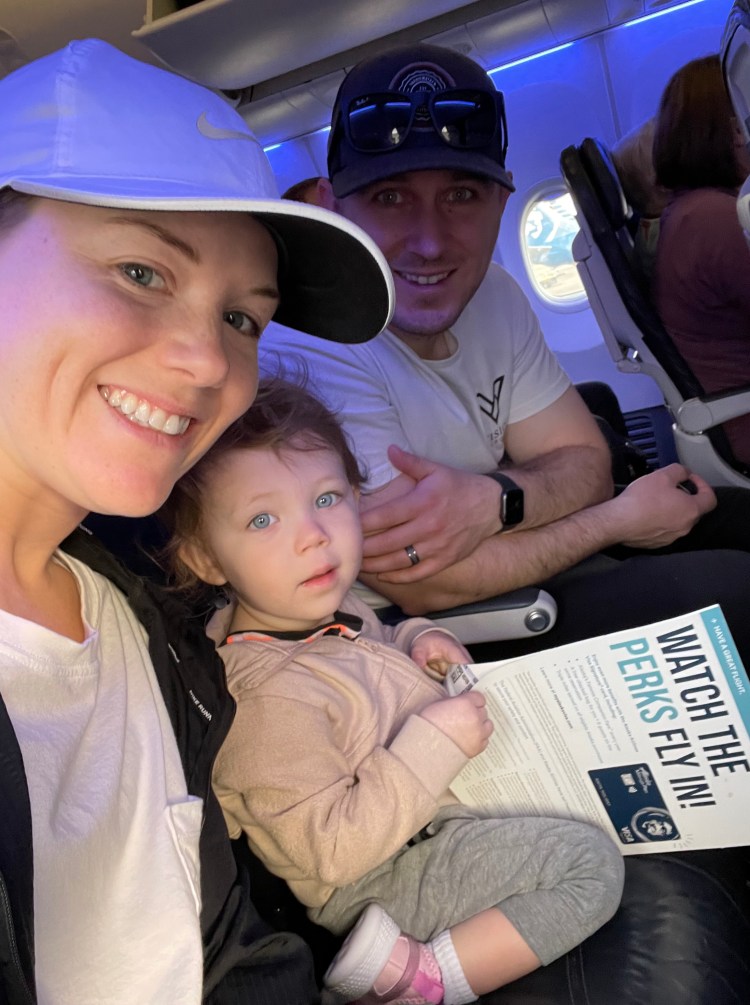
Now that our daughter is a toddler and has flown 8 round trip flights with us since she was a year old, I figured it was time to share some of our flying tips. Most of our flights have been uneventful but there have been one or two that our daughter shocked us with some meltdowns. This post will offer some of our tips and tricks that will, hopefully, help you on your next flight with a toddler.
Booking Your Flight
We have had flights early in the morning, mid afternoon and a few later in the evening. There isn’t one time that we prefer to the others and usually decide based on our schedule and price. Our daughter doesn’t always nap when we try to plan flights around her afternoon nap but has occasionally fallen asleep during the morning flights. Toddlers can be unpredictable so we try to be prepared for anything; nap, snacks, play time, etc.
Packing Tips and Tricks
Since we typically fly with Alaska Airlines and receive a free checked bag per person (perks of an airlines credit card), we rarely carry-on more than our personal backpacks. This makes navigating the airport and planes a lot easier when towing kids. When we fly outside of Alaska Airlines, we typically pay for a checked bag or two. If we can, we try to fit all 3 of us in our large suitcase to save money but that is not always easy to do and stay under the 50 lbs limit. The less you have to pack through the airport, the better!
Backpack for adults. I use this Eddie Bauer diaper bag/backpack, I love that there is a spot for a water bottle since I always have one on hand. There is an additional large pocket on the backside that I carry my laptop and usually one or two of my daughters coloring books in. Other items in my backpack include; snacks, toys, an extra set of undies and pants for our daughter (in case of potty accidents), my wallet and children’s Tylenol. My husband takes his own backpack with his laptop, the many baseball hats he takes on every trip, sometimes a pair of shoes and whatever else I can’t fit in mine.
Backpack for toddler. Found this cute backpack on Amazon and our daughter loves carrying it around the airport by herself. We don’t load it up so she can carry it, it also has a front strap (with a whistle) that allows it to stay up on her shoulders. I usually include a small book, some small toys and her headphones.
Packing Cubes- I don’t use packing cubes on every trip but they have come in handy a few times. I usually use packing cubes when we use our large suitcase and I need to separate our items by individual. When we use our smaller suitcases, I tend to separate my clothing from my daughters by putting them in the separate top and bottom sections. Depending on the situation, you may find you can tuck more in your suitcase without the cubes.
Stroller- We take this travel stroller on long trips and leave it at home for our short trips now that our daughter loves running around. The stroller is small, lightweight and folds up to fit in the overhead bin space. It has a small storage space underneath and I’ve used it to carry my backpack when my daughter isn’t riding in it.
Car seat and travel bag- If we aren’t renting a car seat at our location, we check our daughters car seat. Most of the major airlines allow you to check a car seat and stroller for free with a paid child seat. To protect the car seat and make it easier on us, we use this travel bag.
Airport and Security Trips
Arrive early- We typically arrive 1.5 to 2 hours prior to our departure time. This is plenty of time for us to get our bags checked (we print our bag tags at the self-serve kiosks), get through security (we have TSA Pre-check) and sit and enjoy a small meal or drink before boarding.
Security- My top tip for security, is to apply for TSA Pre-Check. It’s around $85 for 5 years and kids 12 and under are included with parent or guardian. This has saved us so much time and hassle when navigating airports. Even if the line is just as long as regular lines, you don’t have to take shoes off, unpack liquids or laptops, etc. There are still some airports that don’t have pre-check (mostly international) and I recommend making sure you are ready to go before getting to the front of the line. You will want to have your ID/Passports, plane tickets, liquids under 3.4 ounces, and electronics accessible when you get to the TSA agent. Once you are at the scanning belt, it is a lot faster if these items are right on top and ready to place in the bin and through the scanner.
Prior to boarding– Let your kids run around as much as possible. On a recent trip, our daughter spent the whole boarding time running between the two of us, off to the side of all the other travelers of course. I also recommend going to the bathroom right before getting on the plane, for parents and potty trained toddlers. Taxing from the gate and actual takeoff can take quite a while and you don’t want to have a screaming toddler asking to go potty.
Boarding- Families with kids under 2 can board early but, do you really want to be stuck on a plane with an energetic toddler any longer than you have to? We rarely have carry-on luggage so the overhead bin space is not an issue for us either. We enjoy getting on with our normal boarding group and our daughter gets to say hi to all the people she passes in the aisles too.
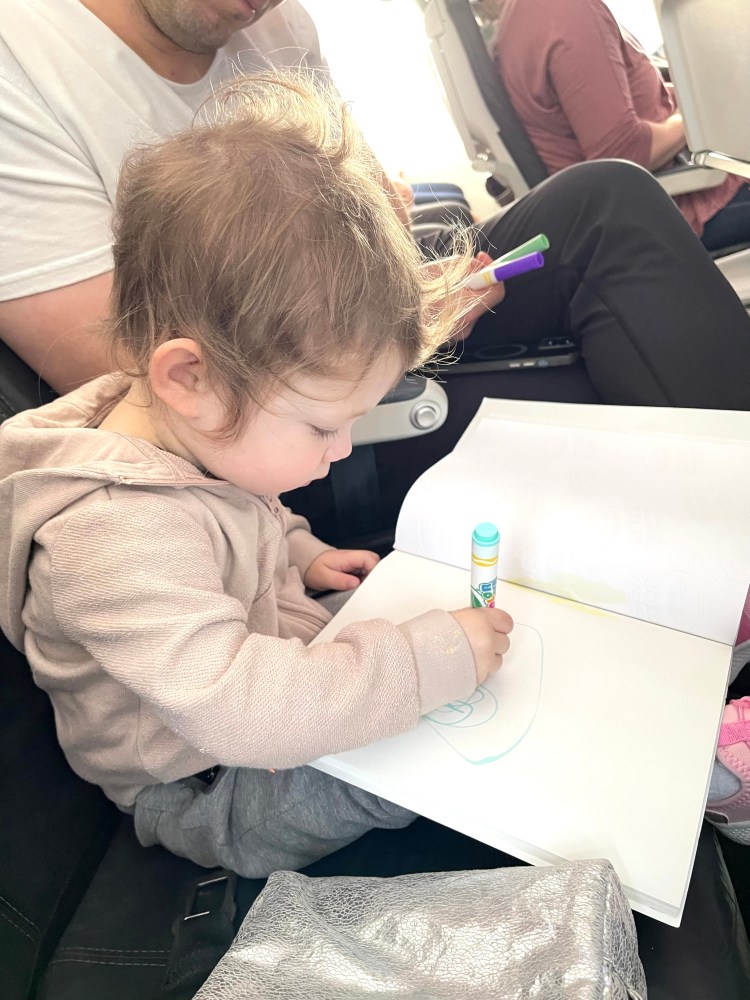
On Flight Entertainment and Snack Ideas
Coloring book and/or blank notebook, plus crayons- We have a blank art notebook our daughter prefers to use but coloring books will work as well. We have a separate small zippered bag with crayons as well. (Dollar Tree is a good spot for a small bag and coloring books)
Magic Marker Coloring Books and Pens- These pens only work on the “magic” paper so they are great for travel. I typically pick them up at Target but you can find them at most department stores.
Small Books- Our daughter has small size Dr. Suess and seek and find type books that are great for travel.
Stickers- You can find lots of different stickers at Dollar Tree and Target. The more you bring, the longer your toddler will usually spend sticking them on a notepad, etc. I recommend bringing something for them to stick it on so they don’t end up all over the tray table or seat.
Post-its- Another form of stickers that your toddler can stick again and again wherever they want.
Small Toys- Anything small that won’t take up much space and isn’t loud. You don’t want to annoy your fellow passengers. Dollar Tree is always a good spot to check for these.
Play dough- I usually take one or two colors in individual ziplocks to keep them fresh. I stuff them in a small container along with some popsicle sticks, small figurines and a roller and cutter. Our daughter loves making “scenes” with her animals and building cages with the popsicle sticks.
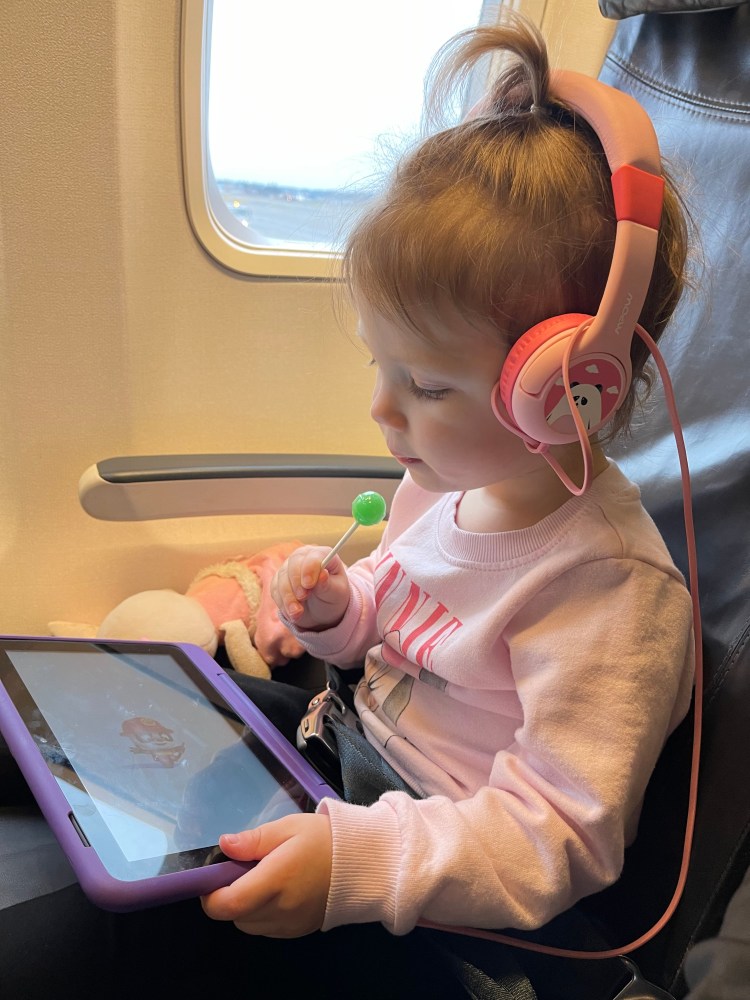
Suckers- We bring suckers for take-off and landing. We use them to allow her ears to pop with the pressure change and occasionally we need to use them as a bribe to stay in her seat.
Snacks- We typically pack crackers, granola bars, applesauce packets, and refill our water bottles prior to boarding.
Tablet- Our daughter uses a kids Amazon Fire Tablet and we love that it comes with its own protective case. You can download the Disney+, Netflix, PBS Kids, many game apps. I always double check that her current favorite movies, tv shows and games are downloaded and the apps are up-to-date. I have made the mistake of not checking that an app was updated and it did not want to open up for us when we were offline and already in the air. My workaround if this does happen, you can usually play free movies from the airline website/app on your phone and they do have kid friendly movies, just may not be their favorite one.
Headphones- Amazon no longer carries the headphones we have but these are similar.
The biggest tip when traveling with toddlers; be flexible! Things may not go according to plan but they will have fun exploring new places and won’t realize things are going wrong. Have fun on your next adventure and be sure to share your own tips in the comments.
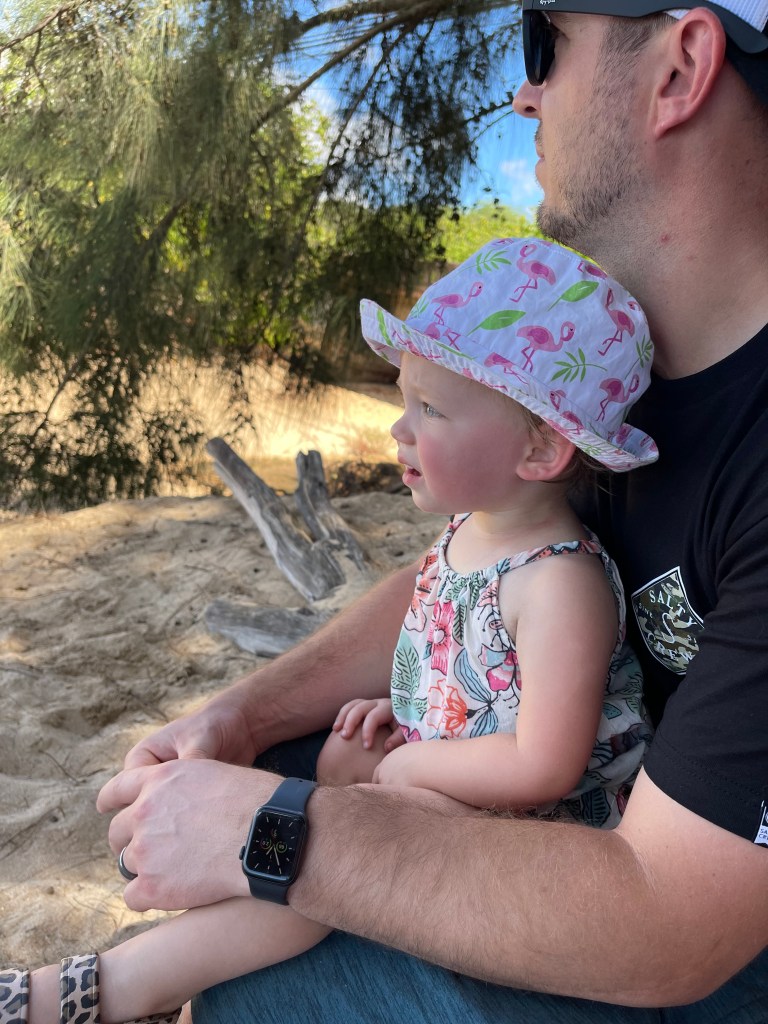
We spent 10 days in Honolulu on the island of Oahu, Hawaii in October of 2021. This post is a summary of our trip; the hotel we stayed at and some activities in the area I’ve also included some extra spots to check out that we didn’t have time for but are “must sees” on Oahu. There aren’t as many toddler tips on this post since we spent a majority of our time with wedding activities.
Atrium at the Honolulu International Airport
Honolulu is different from what you might expect when you travel to Hawaii since it is a large city but, I believe it is worth a visit if you have a chance. If you have the time, there are parts of Oahu that are more of the typical Hawaiian vibe that you may expect. For this trip, my mom was able to come with us to watch our daughter while we attended the various wedding events. It also gave my husband and I a chance to go to dinner on our last night, just the two of us 🙂
The Flight
Since we fly out of Portland International Airport, our flights are between 5.5 and 6 hours, depending on the direction. This is a very manageable amount of time in our opinion and is the longest flights our daughter has been on so far. You can read about our toddler travel tips on this post.
The Hotel
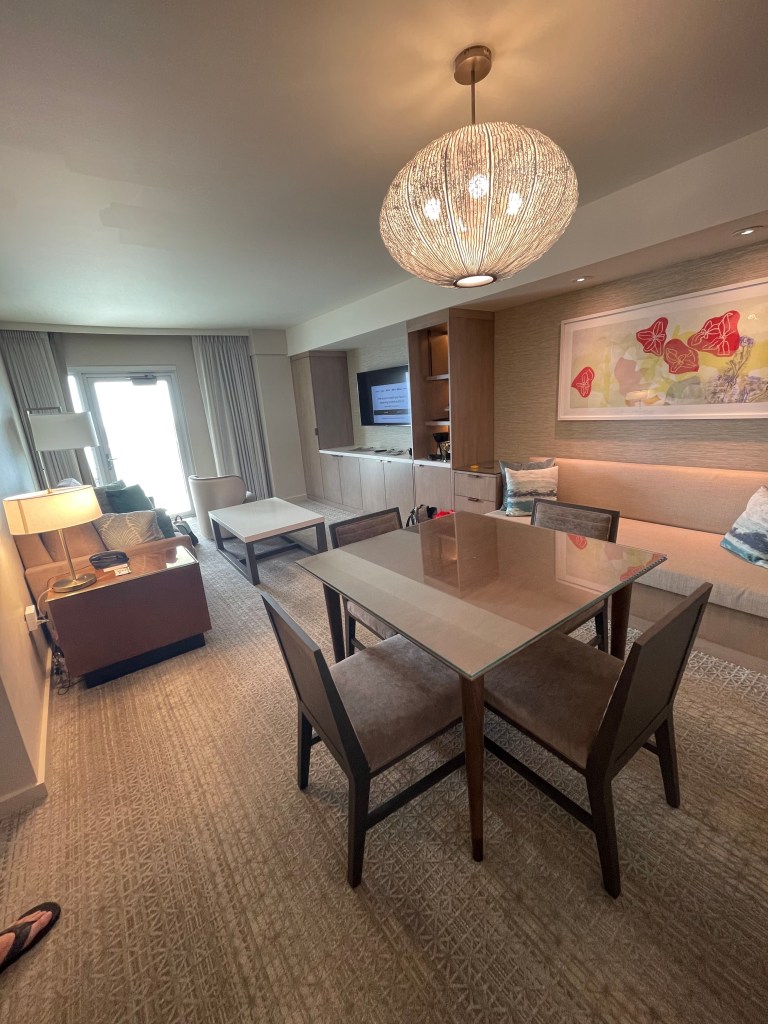
We stayed at the Sheraton Waikiki in one of the Ohana Suites. We choose the Ohana Suite since it is a true 2 bedroom and my mom had her own private room to retreat to. The Sheraton is located between the beach and Kalakua Avenue, which is the main road along Waikiki. For this trip, we wanted to have the ocean view and be in close proximity to the beach and restaurants so we didn’t have to pack up too much when leaving with our toddler in tow.
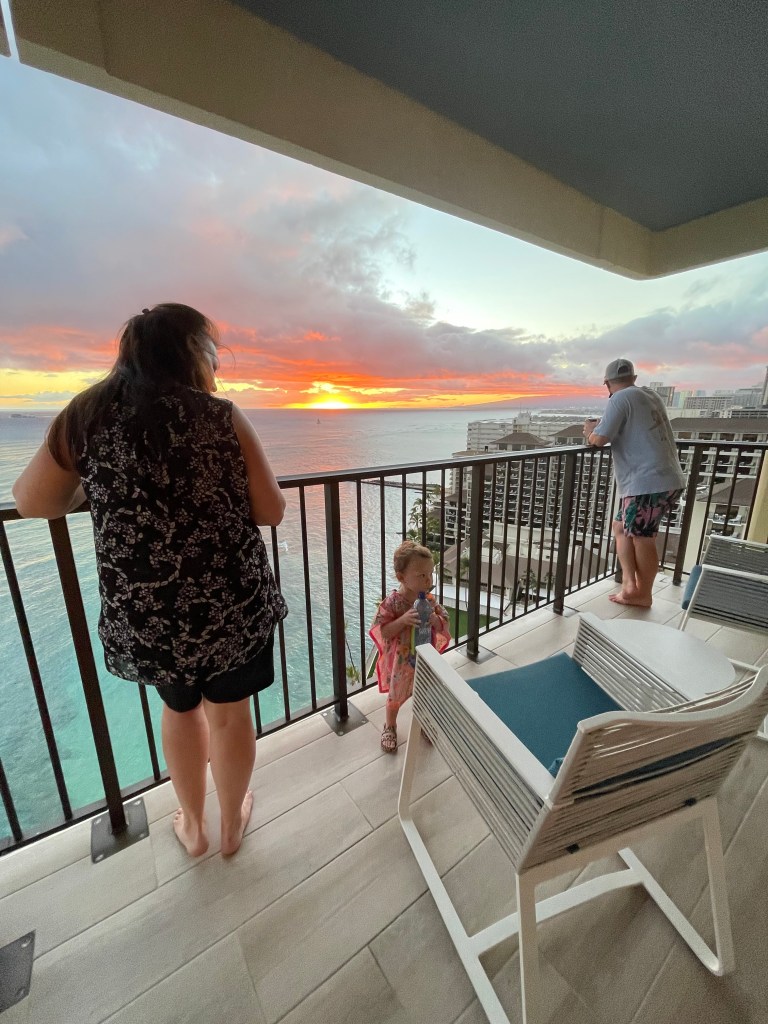
We loved the Ohana Suite and it will be a hard experience to replicate on future vacations. We had an ocean view and a view of the iconic Diamond Head on one balcony and an ocean view with sunsets on the other balcony.
Diamond Head and Ocean ViewOcean with sunset view
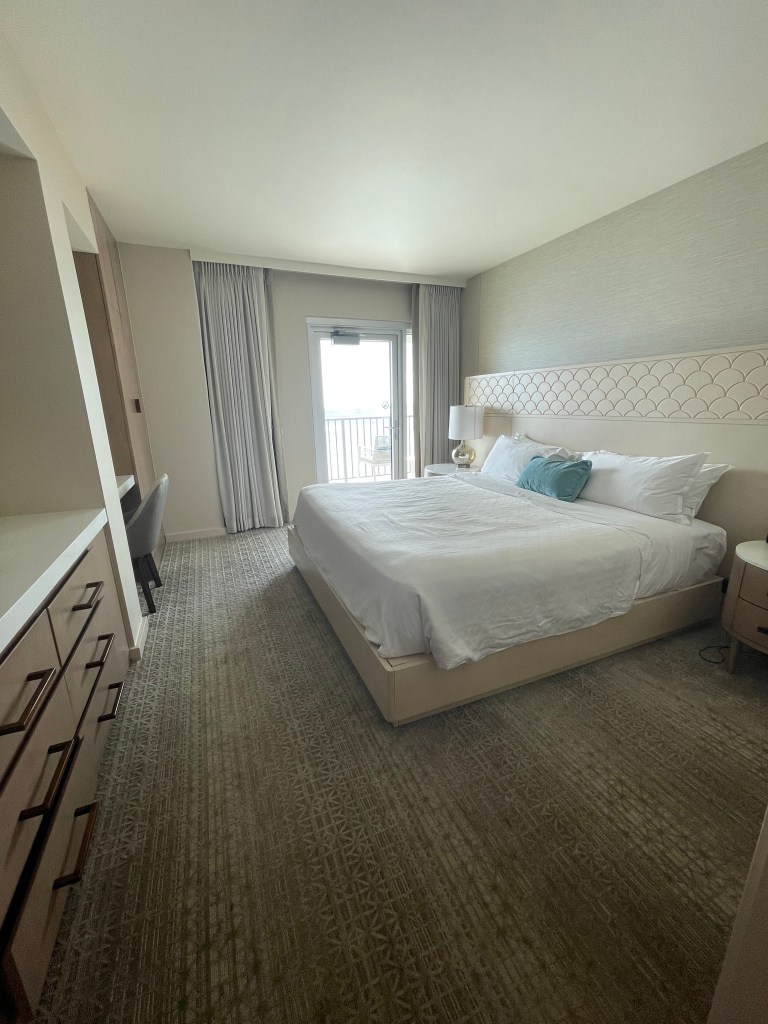
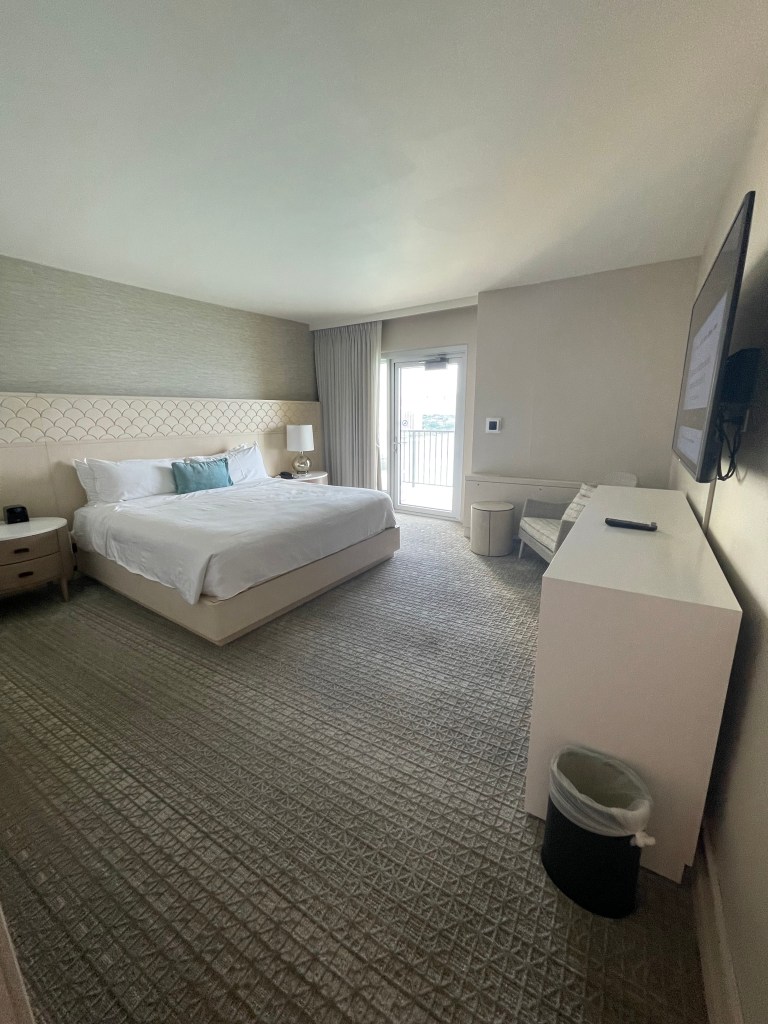
The rooms were both great sizes with smart TV’s in each. The beds were very comfortable and the second bedroom included a small desk as well. The bedroom we stayed in with our daughter had a separate, private balcony with a Diamond Head view and large dresser. There is a living room and dining room with 2 couches and lots of additional storage spaces. The dining table was a good size for the 4 of us and the mini fridge came in handy for our small needs. There isn’t a microwave so leftovers that needed to be reheated were not an option for us. They do have a coffee maker that we used every morning and we did end up requesting additional regular coffee bags since they didn’t get replenished each day.
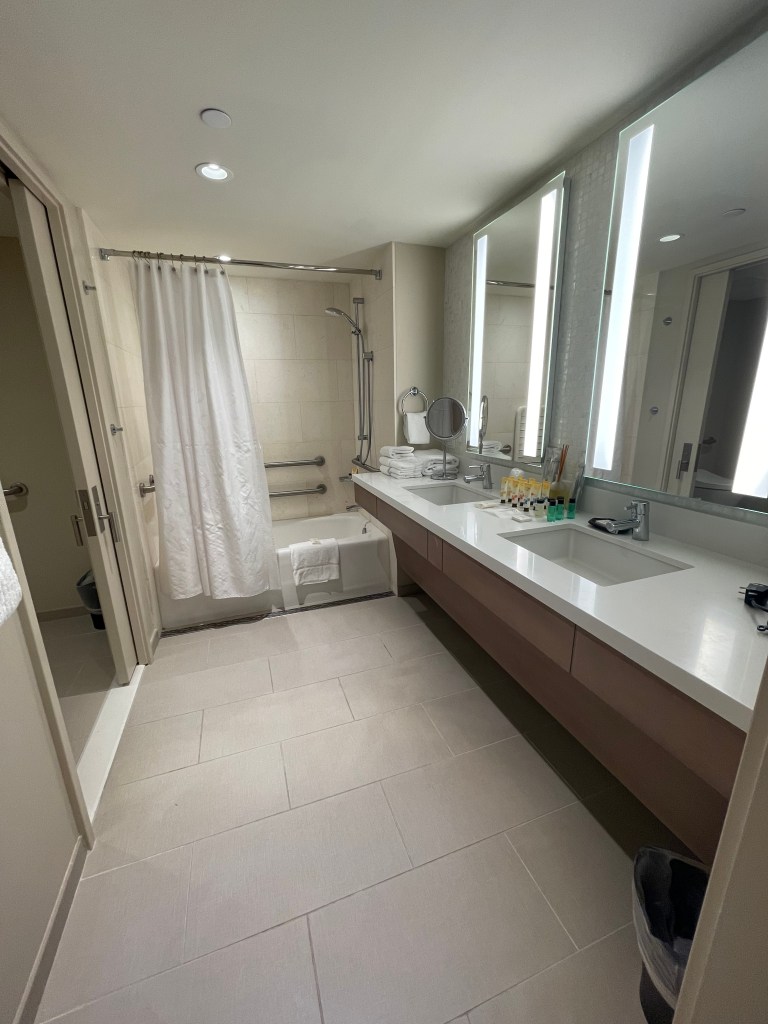
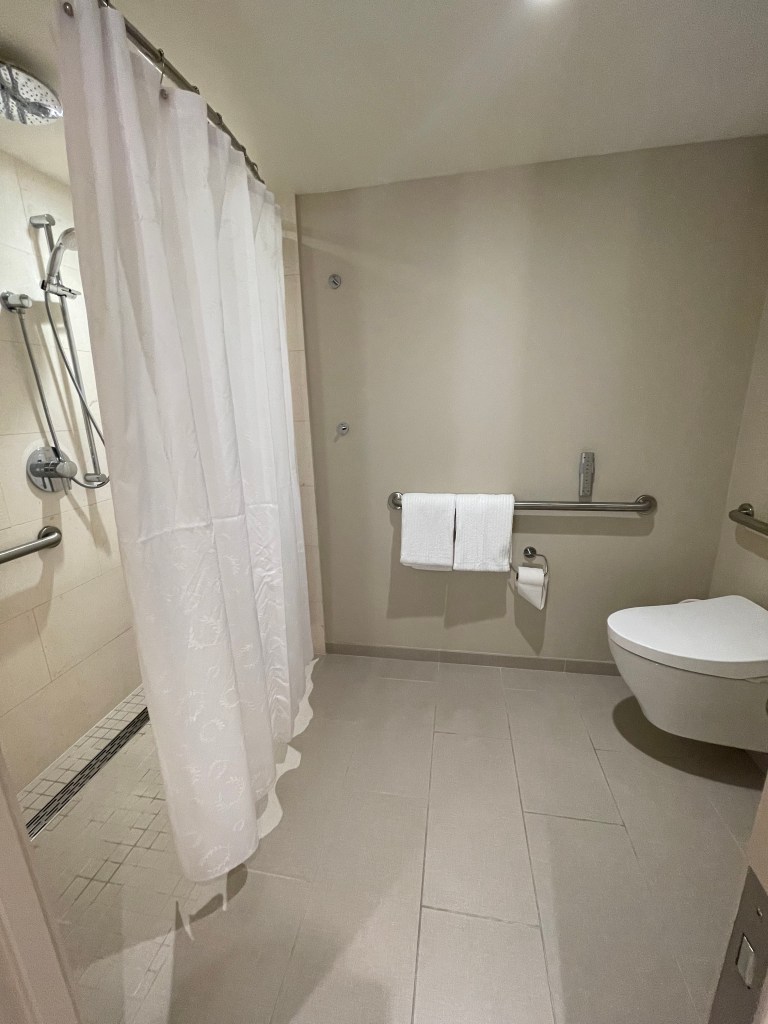
The bathroom was a great layout for 4 people. It had a separate room with a walk-in shower and toilet so we could still use the sinks and additional tub/shower combo if someone was already in that room. The toiletries were super stocked when we first arrived and there were still some unopened bottles at the end of our trip.
Bathroom with double sinks and bathtub/shower comboBedroom with door to large, shared balconyToilet and walk-in shower portion of bathroomLiving/dining room areaLarge bedroom with private balcony with Diamond Head view
Due to renting a car, we had to pay for parking. The on-site daily self park fee is $45 and the valet was $55 so we opted for the extra $10 a day and it was well worth it from our experience.
Hotel extra’s
Our daughter spent a lot of time walking around the hotel property, hanging out by the pool, and visiting the mall across the street. We mostly ate at the surrounding restaurants and fast-food options since we were out and about a lot. The mall between the hotel and Kalakaua Ave (the main road parallel to Waikiki beach) has a lot of restaurants in a variety of styles from fancy to fast food/food court to wine bars.
There are also some little shops on the property you can go to but we found most of it to be the typical resort, tourist trappings. If you are looking for some of those items, especially the Hawaiian cookies, this is the place to look.
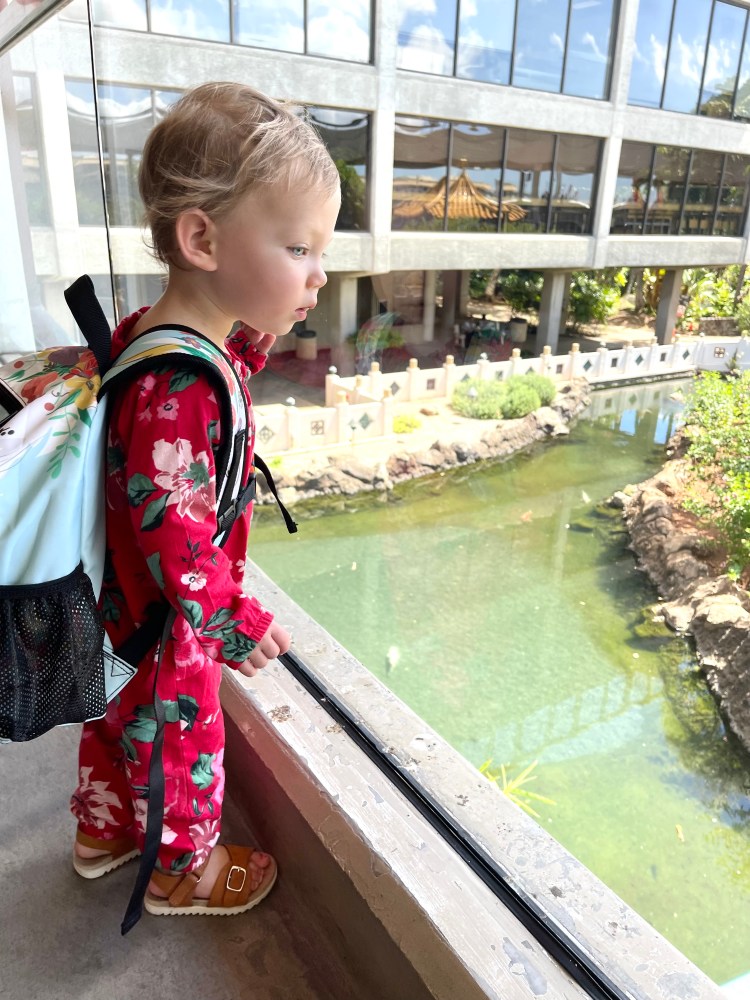
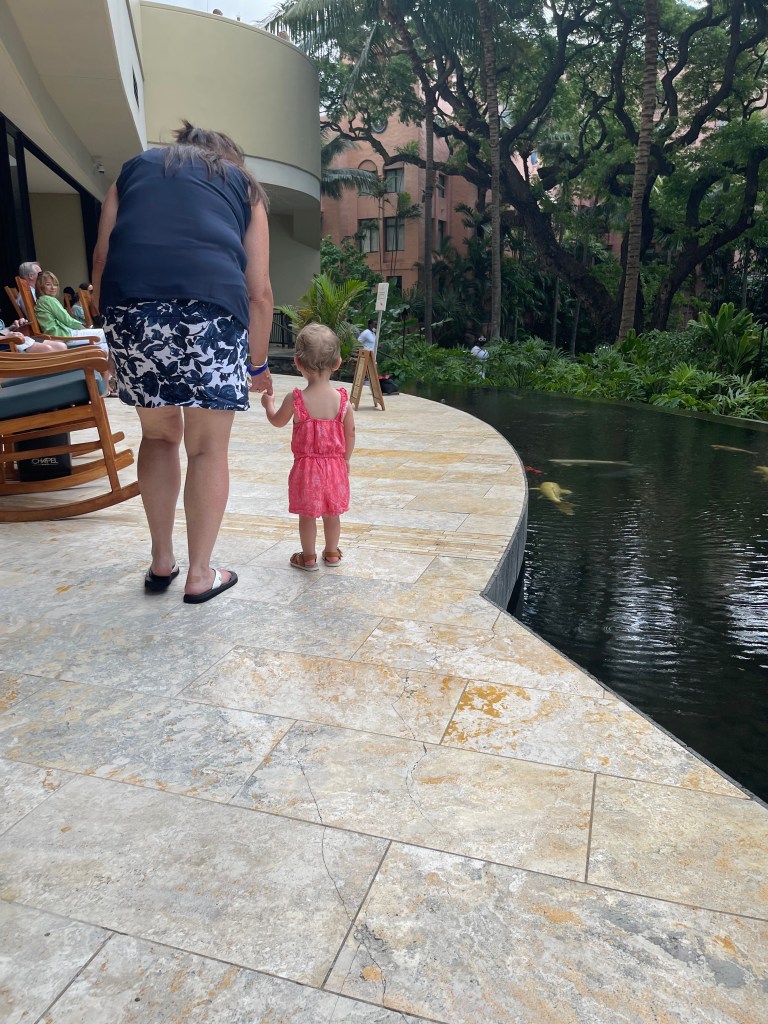
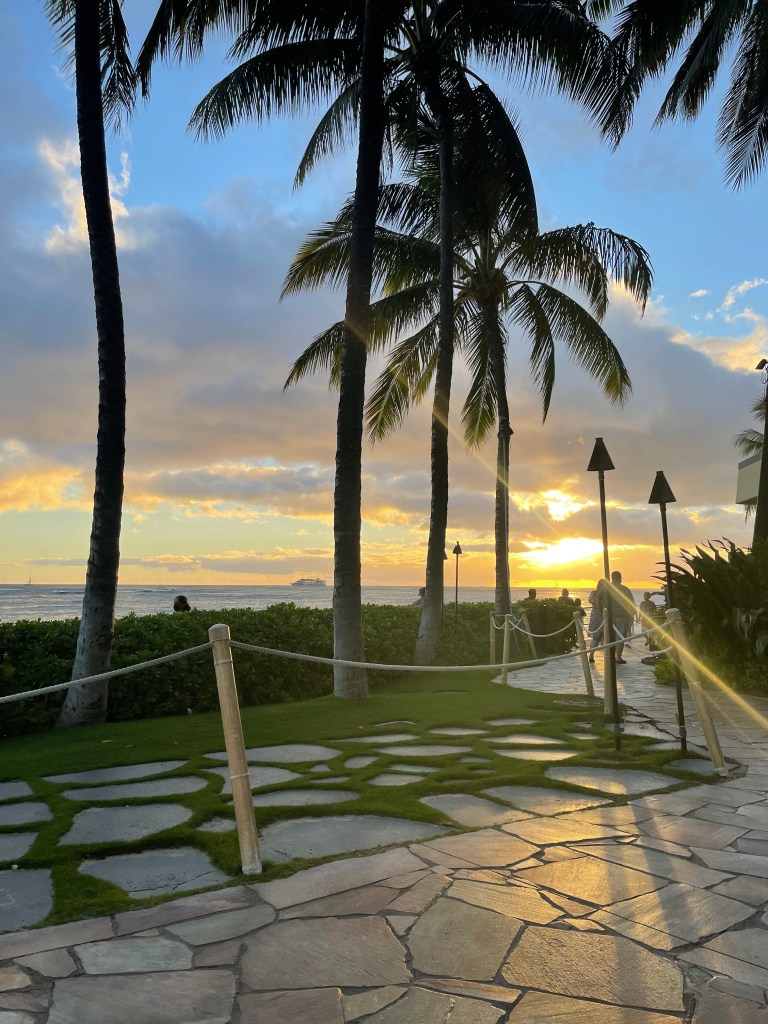
A fun Koi pond for our little adventurerWalkway between pool and beach at sunset
Pools– The Helumoa Pool, is the main pool and includes a fun water slide and rock features. There is also a small kids waiting pool that our daughter spent a lot of time in. There is also an Edge Infinity Pool that is only for those 16 years old and over. We could see a line forming every morning before it opened at 8AM so this is definitely a popular pool that fills up fast.
There are a few restaurants on property:
RumFire- Lunch and dinner. We had the rehearsal dinner food from here and it was delicious. The pricing is pretty typical of a resort, with entrees in the high $20’s-$30’s.
Edge of Waikiki- Pool bar, lunch and dinner. We had the rehearsal dinner served in this location but the food was brought over from RumFire. We really enjoyed the atmosphere of this location though.
KaiMarket– Breakfast: We didn’t end up eating here but it was very popular based on the line to get in each day.
Honolulu Coffee– This was our go-to morning stop for some coffee and we usually grabbed a pastry.
Baskin-Robbins– Our daughter saw this on her first trip to the pool and grandma treated her to a few more throughout the trip. They definitely thought through the placement of it being in such close proximity to the pool.
Poolside– On one of our last days, we decided to rent a cabana at the pool overlooking the ocean. Since we rented it half way through the day, it was half the price, about $60. For the shade it was nice but probably not worth the price if you can find a good spot with some of the free loungers. We ordered some lunch and drinks while sitting there and the pasta (pictured below) was cold when we got it but otherwise was pretty tasty.
Rental Car
We rented a Chevy Tahoe for this trip since my husband went on a few golf trips with the guys that allowed them to all fit, with their golf bags included. We found the rental company Sixt through the Alaska Airlines website and found the best deals for the type of vehicle we were looking for. This was our first time renting a car seat as well and it that was a super easy process. The car seat was given to us at check in and took no time at all to install. The best part was when we returned the car, we just left the car seat in the car and didn’t have to pack it back home.
Waiting patiently for rental car
Things to do
The majority of our time was spent in and around Honolulu on this trip. Some of the restaurants we went to for the various wedding festivities in Honolulu were (it is fairly easy to Yelp in this area as well:
Maui Brewing Co:
We spent a few different nights meeting up with the bridal party here. It was a great central location for all of us staying around Waikiki area and the food was delicious. For those drinking beer, the drinks were great and those of us that prefer cocktails and wine, the drinks were good but definitely overpriced. We tried a little of everything; from pizzas and burgers to nachos and tacos and it was all delicious. There was live music most nights as well.
Buho Cocina y Cantina:
We had dinner on the rooftop one night with the bride, groom and family. It is a beautiful location and seemed to be kid friendly with the 4 kiddos we had that night. They serve delicious margaritas and everyone was pleased with their food.
I also got to visit for the brides bachelorette party when we finished off the night with some plates and a few extra margaritas. The vibe was much more upbeat/club style atmosphere later in the evening. The food was still good but the service was definitely slower this time. I think they start to focus on the drinks later in the evening.
Duke’s Waikiki:
This is a famous yet touristy spot that we stopped by for brunch. We went for the mimosa flight; you get a bottle of bubbly of your choice and it comes with a bunch of different juices (orange, pog, pineapple and guava). The food was delicious and, of course, priced as you would expect for a tourist destination.
Cheeseburger in Paradise
Great happy hour prices on food and drinks. We had a blast here with the whole bridal party and everyone loved getting our drink on while watching football games on Sunday. It was also some of the best service we had and our group was large. We loved it so much we took my mom and daughter back for breakfast too.
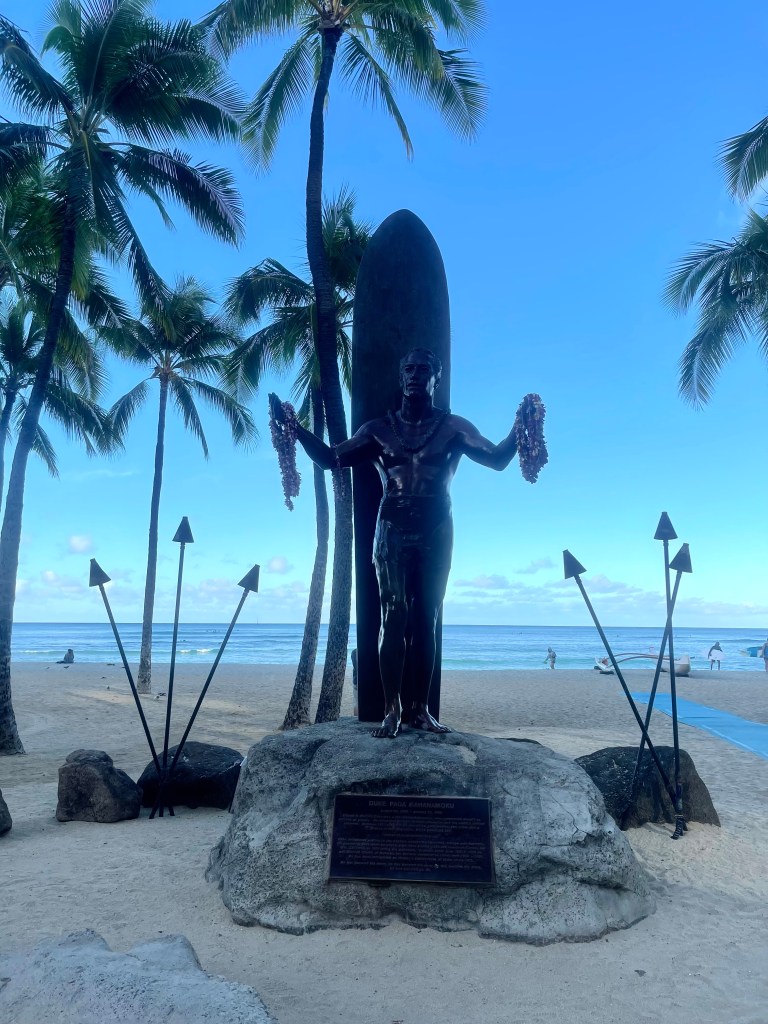
Duke Paoa Kahanamoku
We had a chance to meet up with some friends at Kaimana Beach and our daughter had a blast running around with her new little friend. We decided to walk down to Sans Souci State Park to enjoy dinner at Barefoot Beach Cafe. It is an outdoor cafe with a walk up counter to order from surrounded by the park and an unobstructed view of the ocean. I shared the Kailua pulled pork sandwich with my husband and it was delicious and filling. We loved the low key vibe and calm atmosphere while enjoying our dinner watching the sunset and people strolling along the beach.
Hanging with our friendbridal party beach day
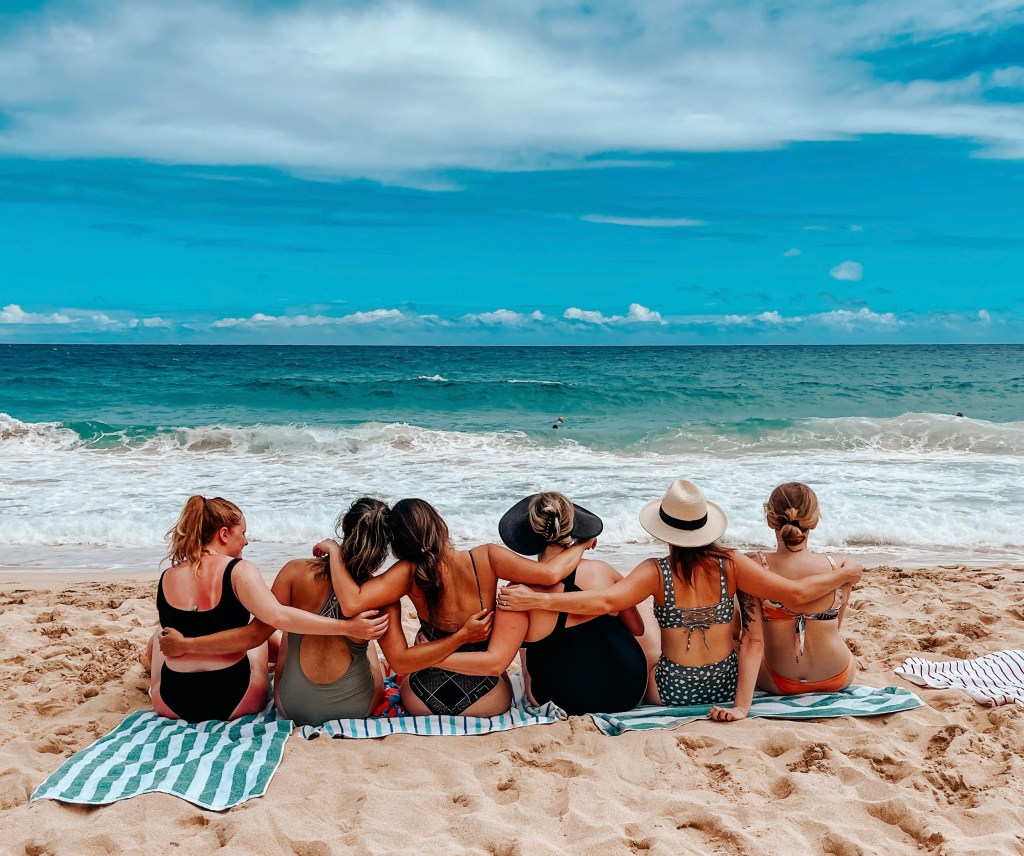
We spent a day at the beach with the bridal party after grabbing some drinks and snacks from a local market. I highly recommend checking out a local market if you have a chance. The deli had some interesting finds I had never tried like spam musubi (not my favorite but my husband kept going back for more), poke (you have to have poke in Hawaii), and the different varieties of shortbread cookies and treats. It was also much cheaper to get alcohol and juices from the markets as well.
Some other attractions in the Honolulu area to check out are:
Diamond Head-If you are in to hiking, Diamond Head is a top spot to visit. You can hike up to the Crater but check the current government website for up-to-date parking and entrance fees.
Pearl Harbor Memorial- I visited the memorial on a different trip and it was well worth a visit. You can enjoy the memorial grounds but I recommend taking the time to boat out to the USS Arizona Memorial as well. It was an experience that has stuck with me after all these years.
Dole Plantation- This was one location I wish we had more time for on this trip. I have never been able to visit but I’ve heard it’s great for families. There are some tours you can choose from but you can also relax and enjoy delicious food and soft serve ice cream at the Plantation Grille on site.
Around the island
We spent most of our days in and around Honolulu with all of the wedding festivities but, on our last full day, we hopped in the rental car and drove around the whole island. Our main objective was hanging out around north shore for lunch and sightseeing through the remainder of the island by car. We decided to plug in Haleiwa and drive straight for it so we could make it in time for lunch. It’s only about an hour drive from the hotel if you cut through a portion of the island but you can certainly make it a longer trip with the scenic route.
Once we got to Haleiwa, we found a public parking lot that we stopped at and decided to walk around the surrounding shops. There is a public restroom and lots of little shops and restaurants within walking distance. We found the famous Matsumoto Shave Ice and each got our flavor combinations of choice. Then we hopped over to the Growing Keiki to find a cute dress and book for our daughter.
We jumped back in the car and headed over the bridge to Laniakea Beach. We parked across the highway and ran down on the beach to catch the sea turtles. This is the beach to go to on Oahu if you are hoping to see turtles up close. Please note, do not try to touch them!!
North ShoreWatching the turtles
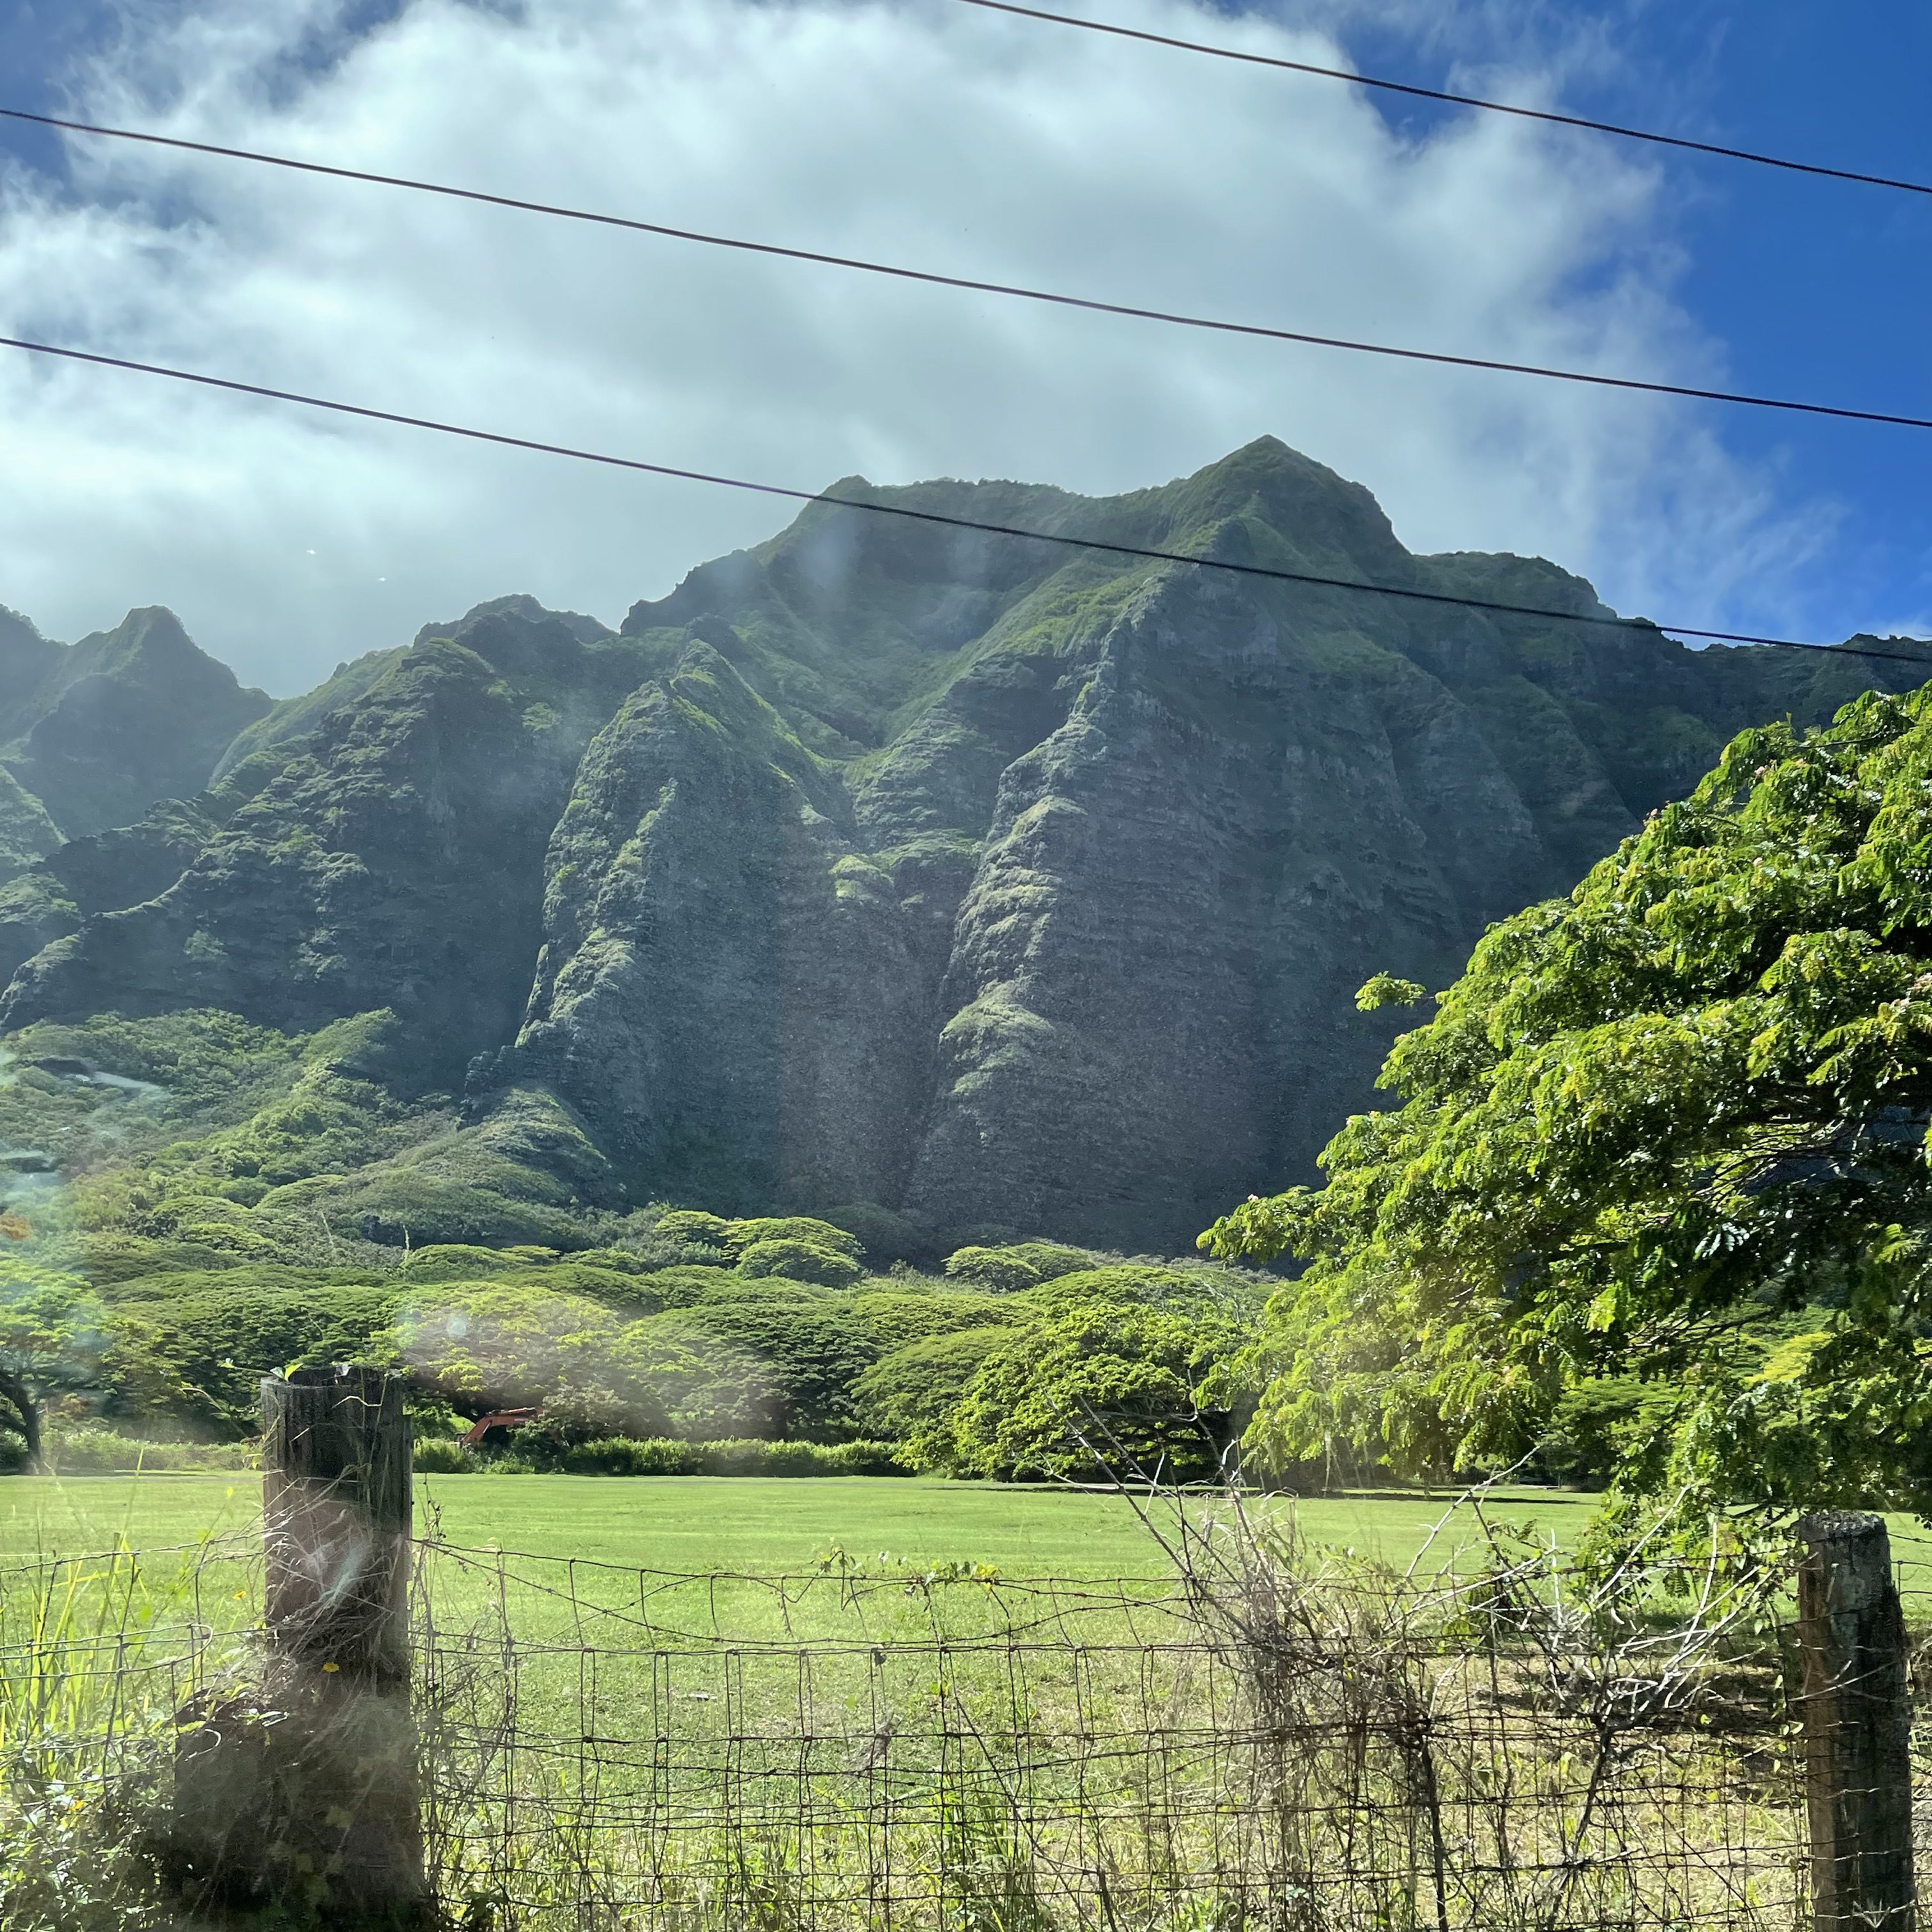
After enjoying the sand between our toes and the beauty of the turtles, we headed around the tip of the north part of Oahu and stopped for some quick snacks and to fill up gas along the way. One of the cool parts to drive by is Kualoa Ranch, just south of Kaawa. It’s called Jurassic Valley and you can tour the spots they used for filming in the Jurassic movies. We didn’t have time for a tour but just driving by on the highway gives some beautiful views of mountains that made it famous. We didn’t have a chance to pull over while driving through but the below picture is a quick snap from the car while driving by. You can imagine what it looks like the rest of that drive. I do recommend stopping for restroom breaks and food and drinks when you can because this part of the island is a little more remote.
The rest of the drive was spent getting back towards Honolulu and enjoying the sites along the way. I highly recommend a trip around the island if you have a day or two to spend. We would have added a lot more stops if we had the time but we also wanted to be able to relax and enjoy some family time on our last day.
Although we spent 10 days on the island of Oahu, most of the time was structured with wedding events so our “tourist” days were spent fitting in what we could with a toddler in tow. If you have a chance to visit this beautiful island, I hope you enjoy it as much as we did. There is certainly a lot to discover here.
One response to “Traveling with Toddler- Oahu Edition”
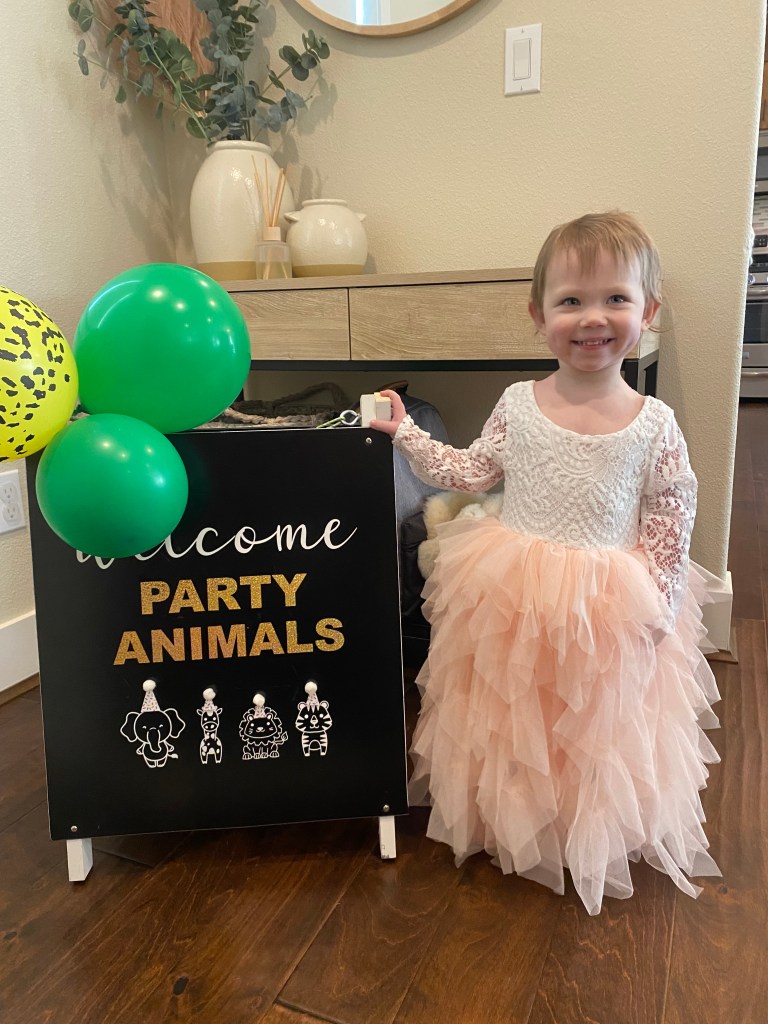
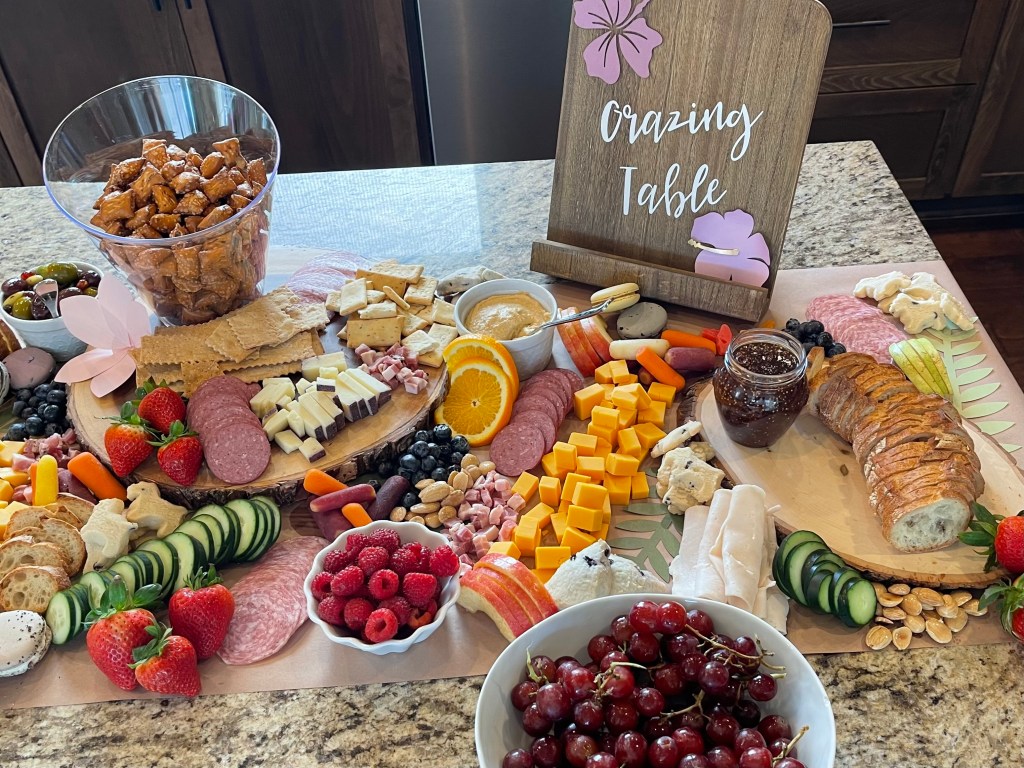
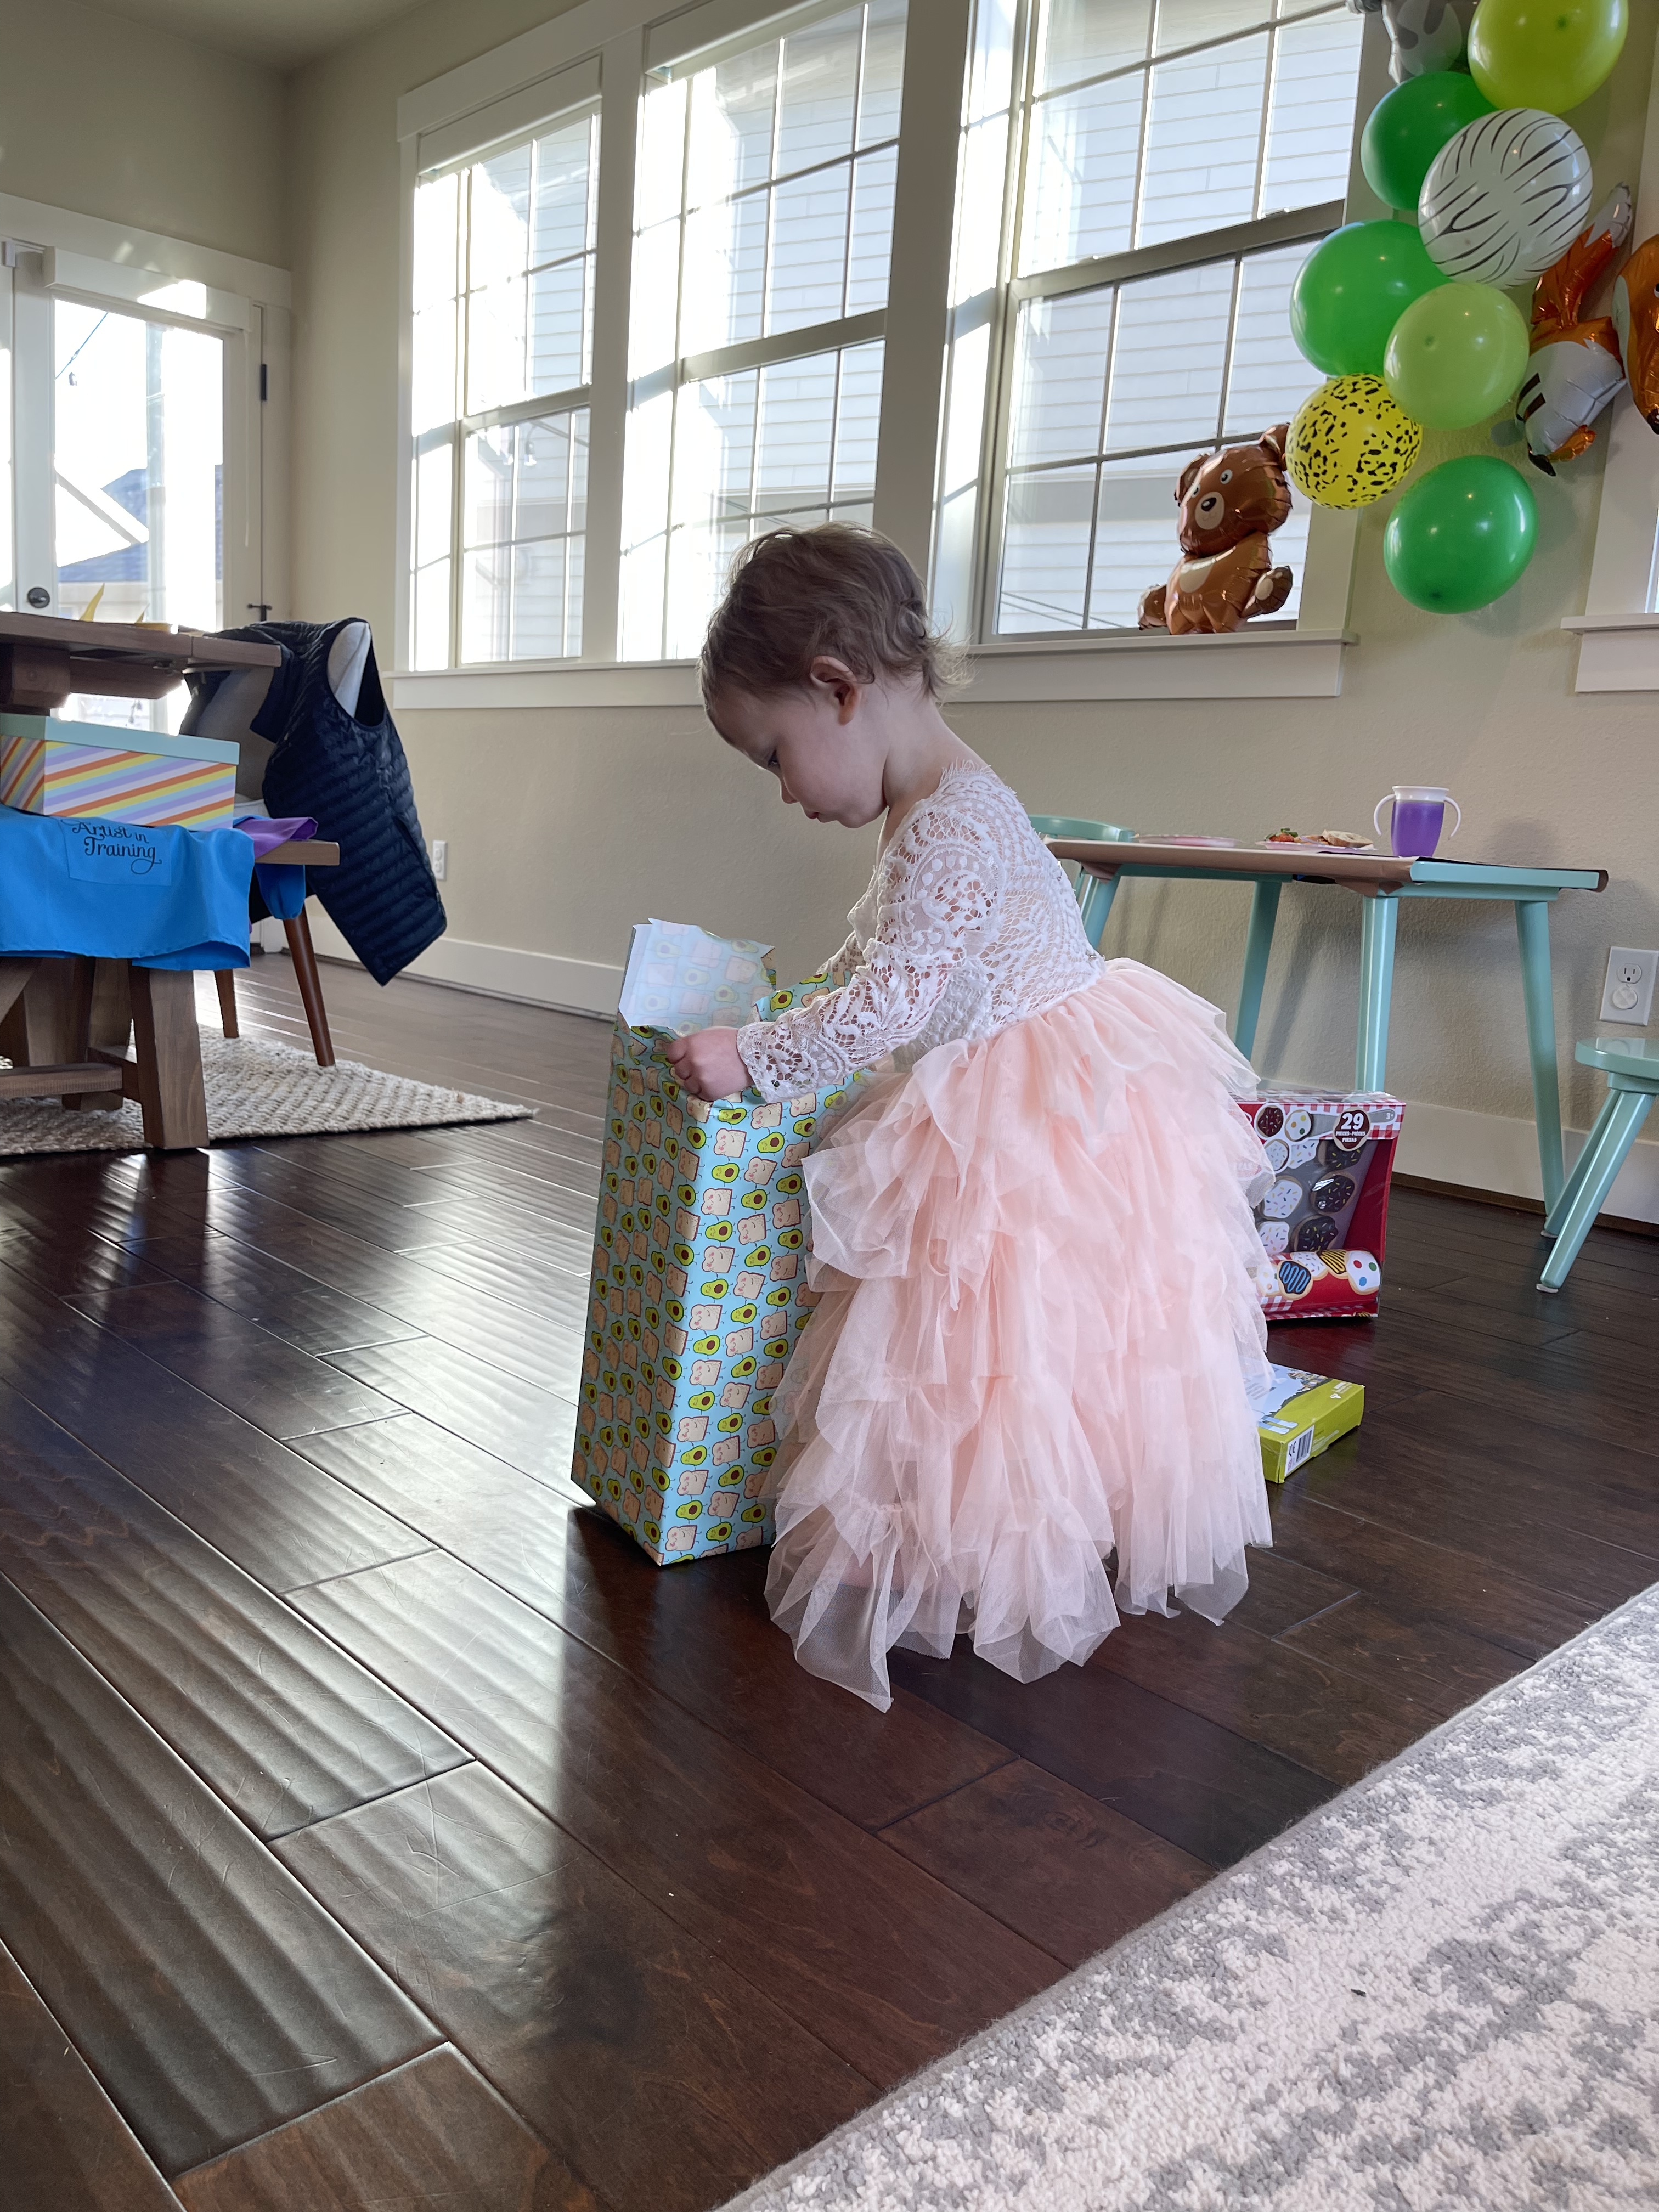
For my daughter’s 2nd birthday, I went for a Wild theme to match her wild personality! I wanted to keep things simple since I was DIYing the majority of the decor and food. I also opted for a “crazing table” since the guest list included adult family members. I do think at this age, an adult-only party allows the birthday kid to enjoy the festivities without being overwhelmed by other children trying to jump in and “help” with blowing out the candles, etc. That’s not to say that other young family members or close family friends kids are discouraged from being there, just that we didn’t invite “friends” she was starting to make at dance class, daycare, etc.
Here are the details from the day, many of which was created using my Cricut Maker and some imagination.
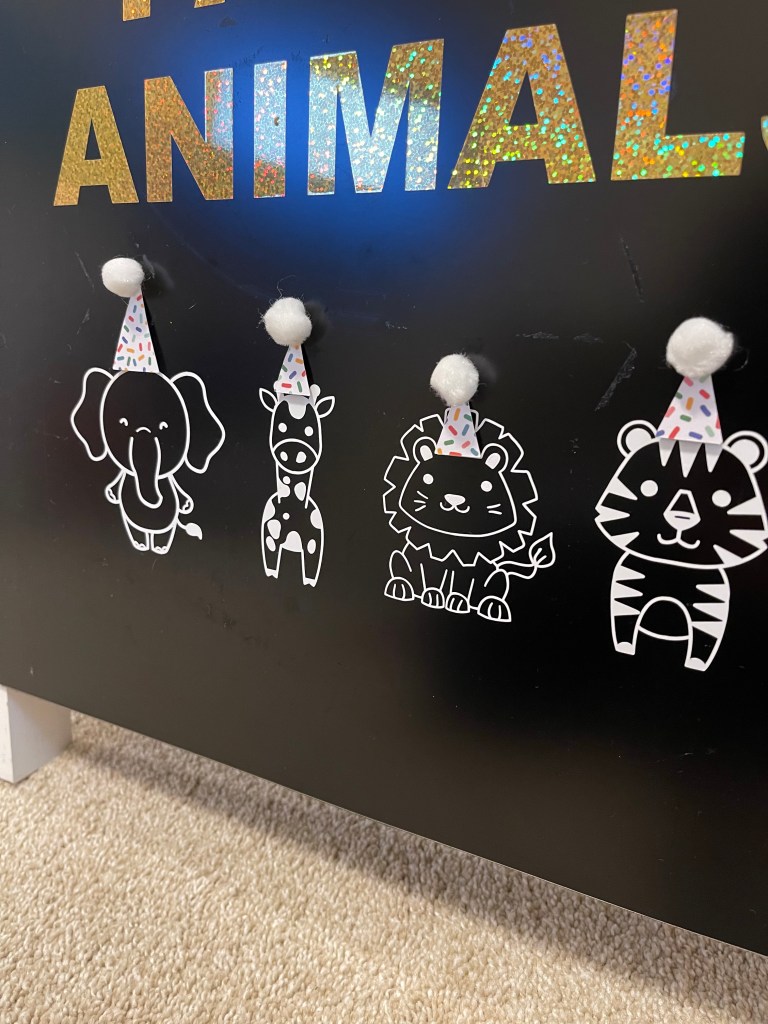
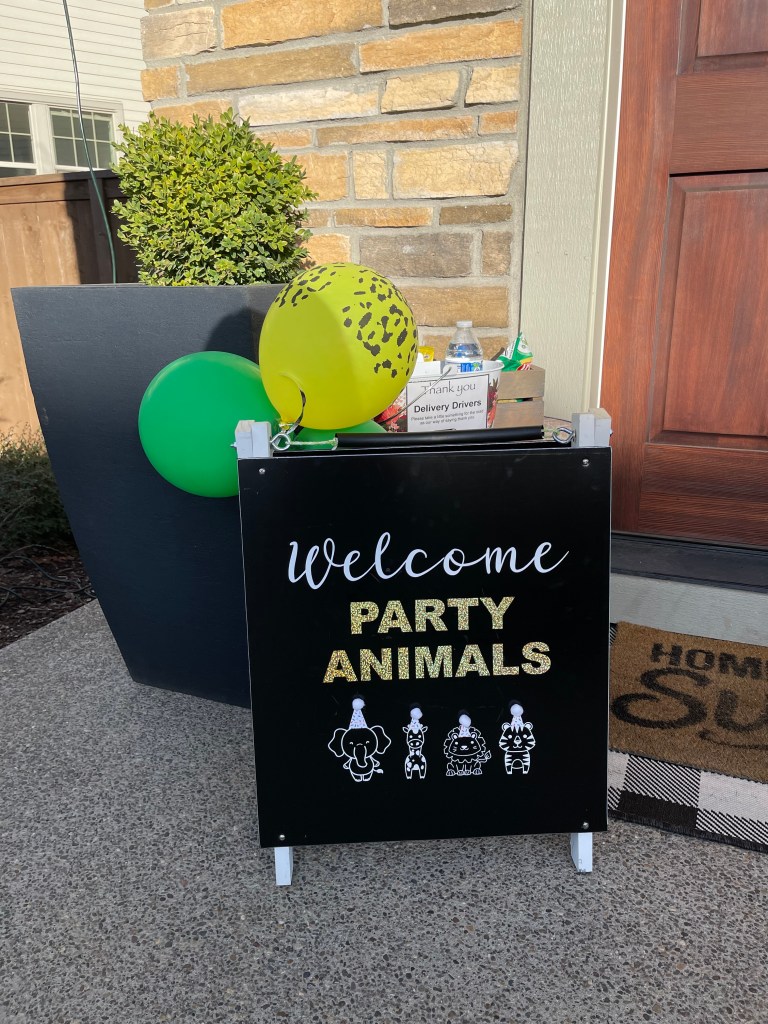
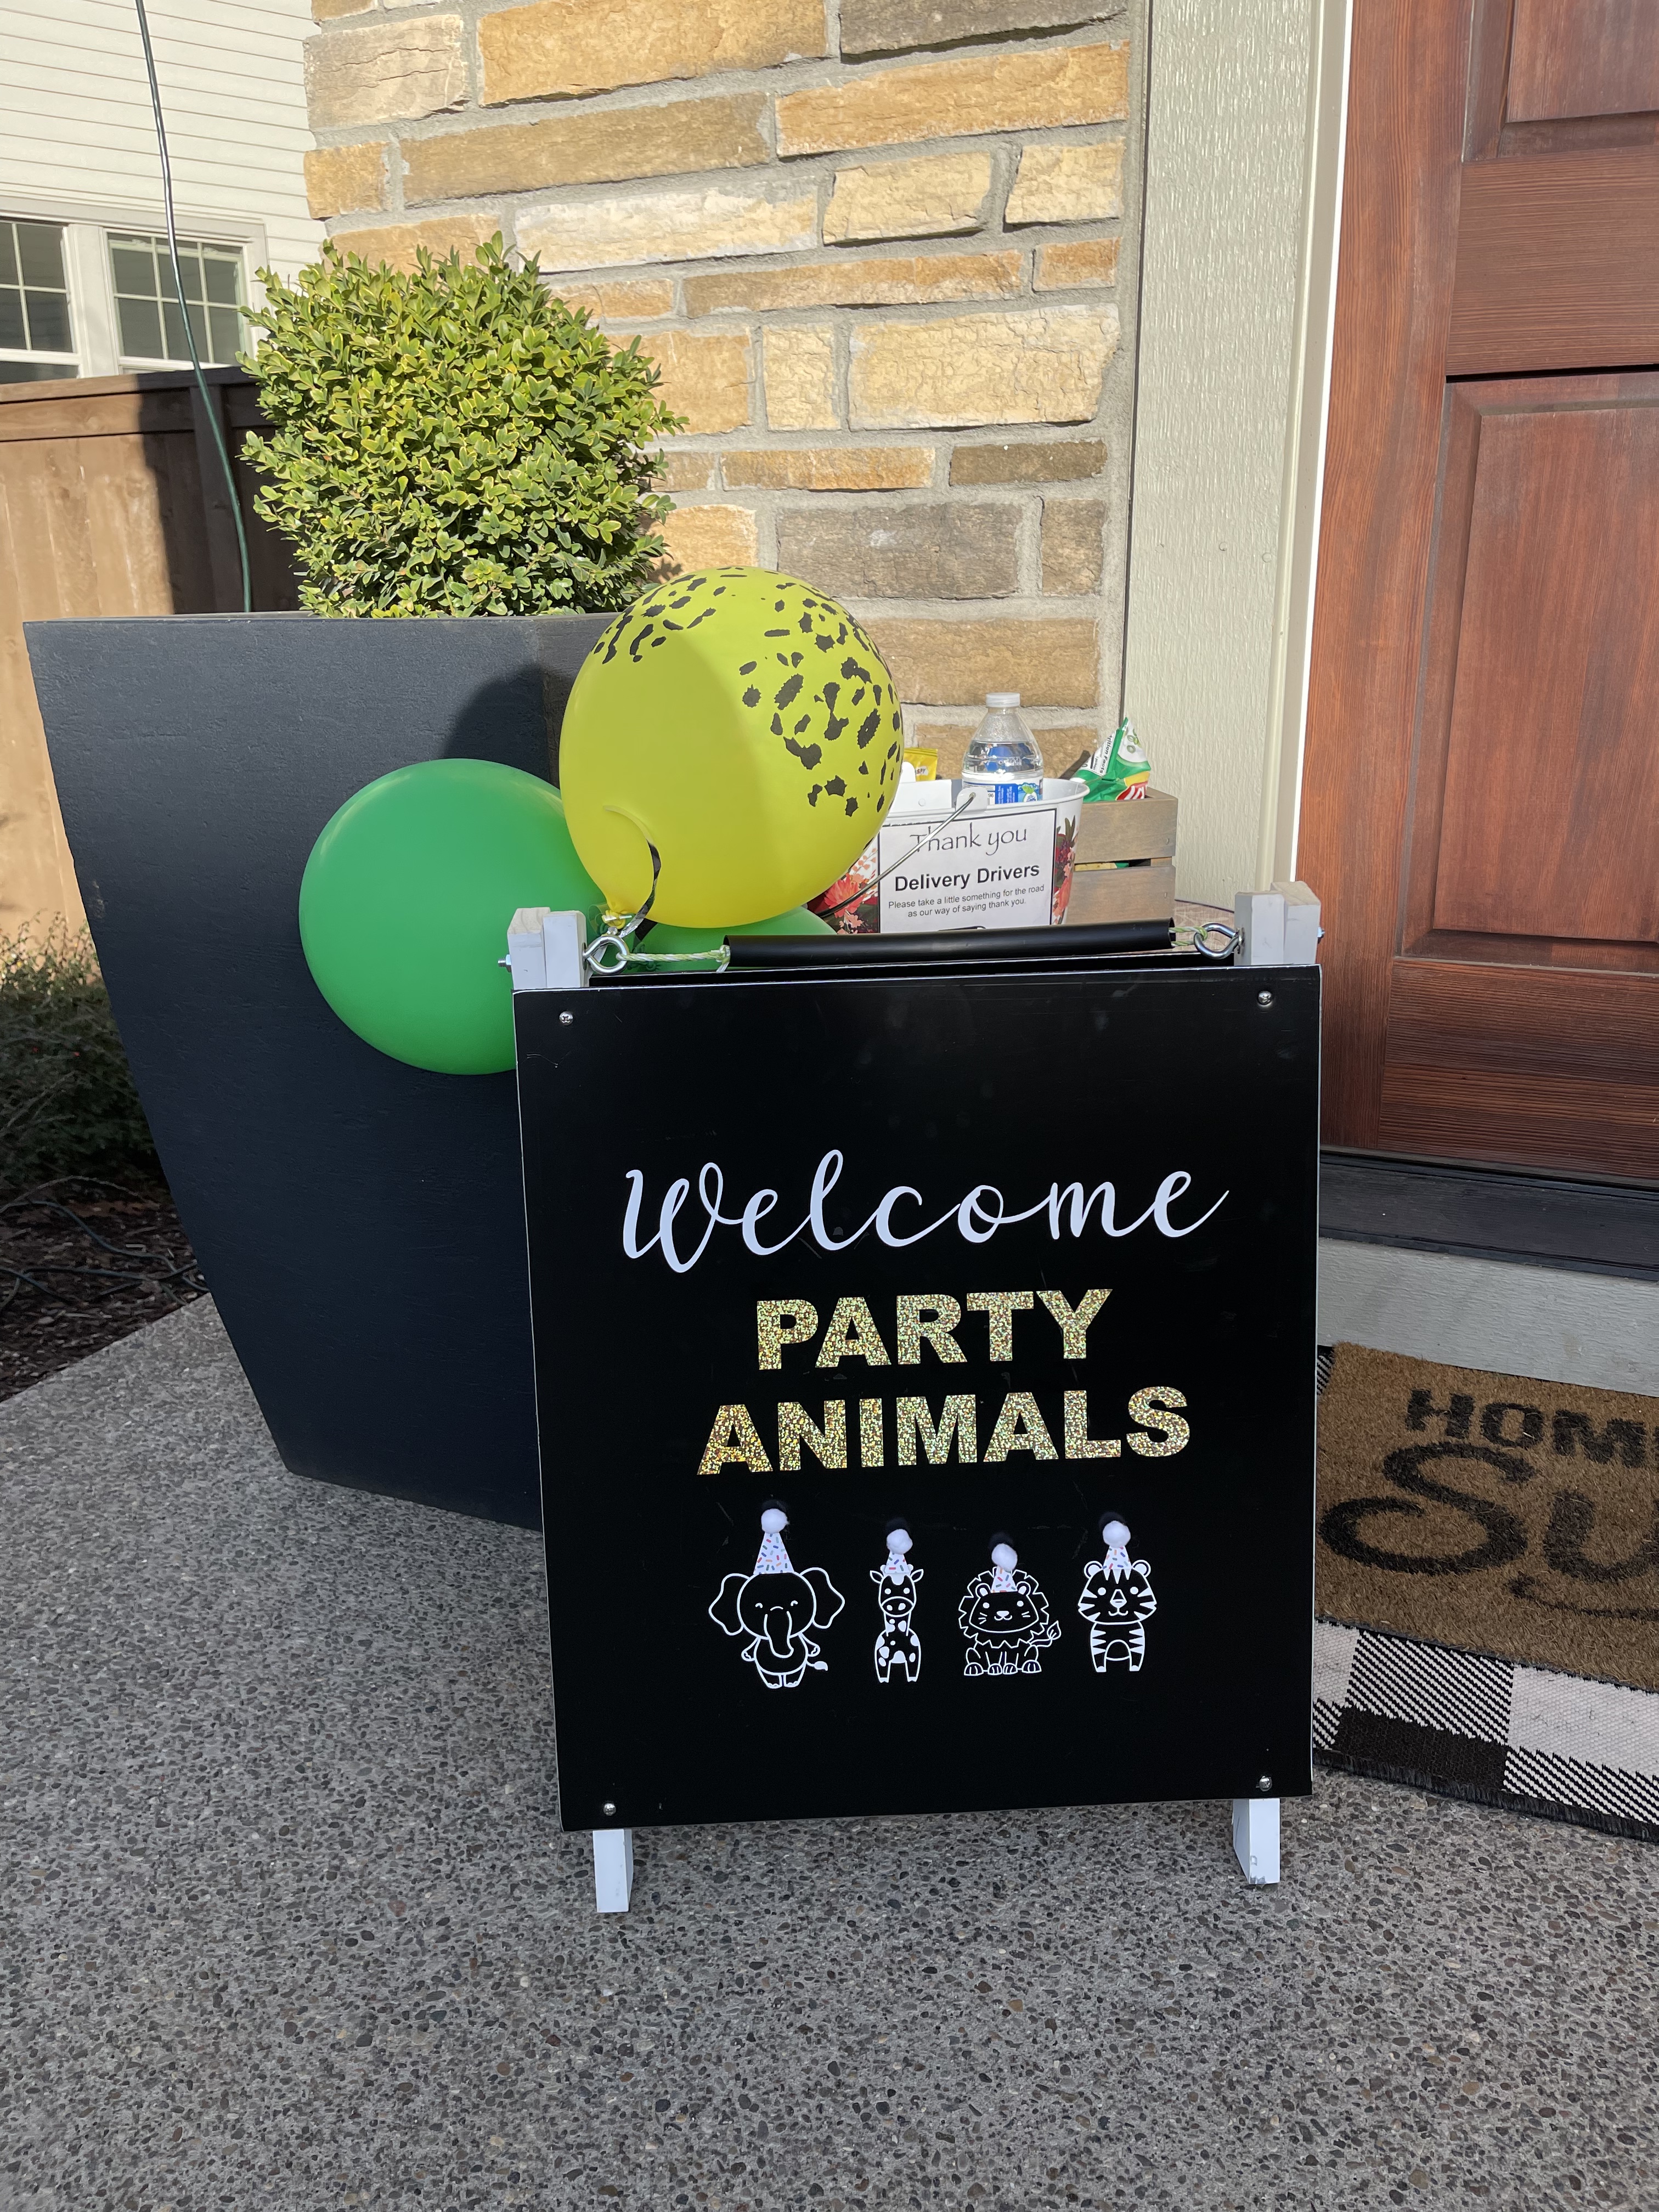
We have a small black A-Frame I attached removable vinyl on that said, “Welcome Party Animals”. I decided it needed a little extra pizzaz so I also cut out small animals in white vinyl, mini party hats from card stock and attached mini Pom Poms to finish it off. It sat at the front door to welcome the guests and was a cute photo prop for our little Wild Child.
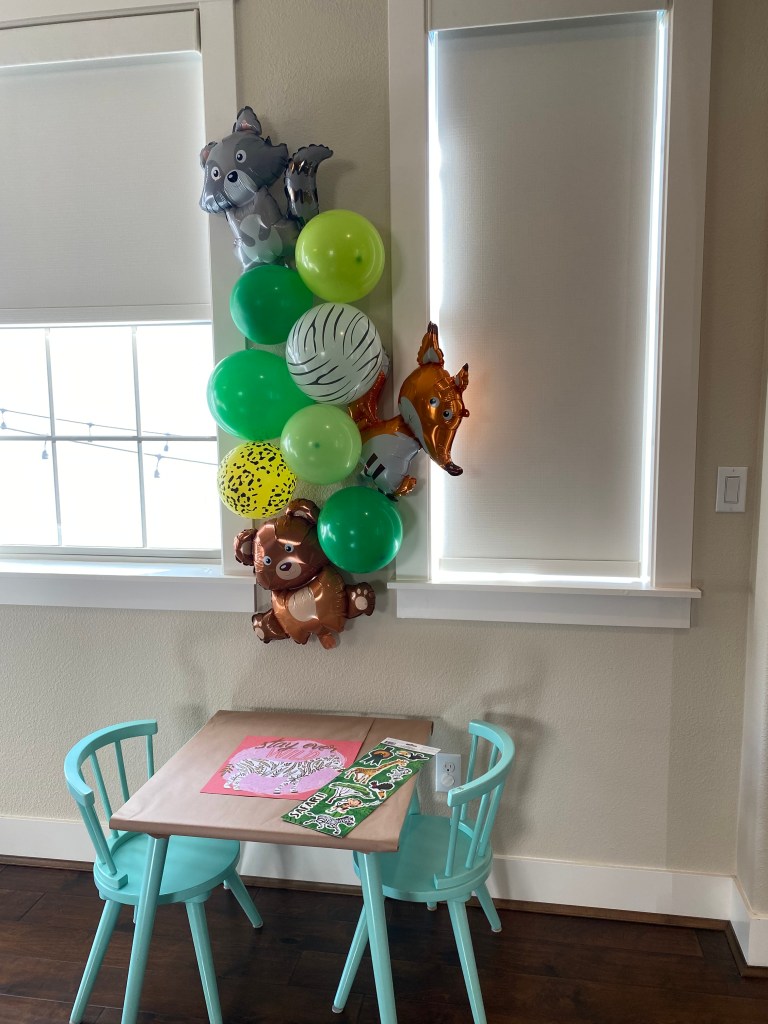
Animals with party hats
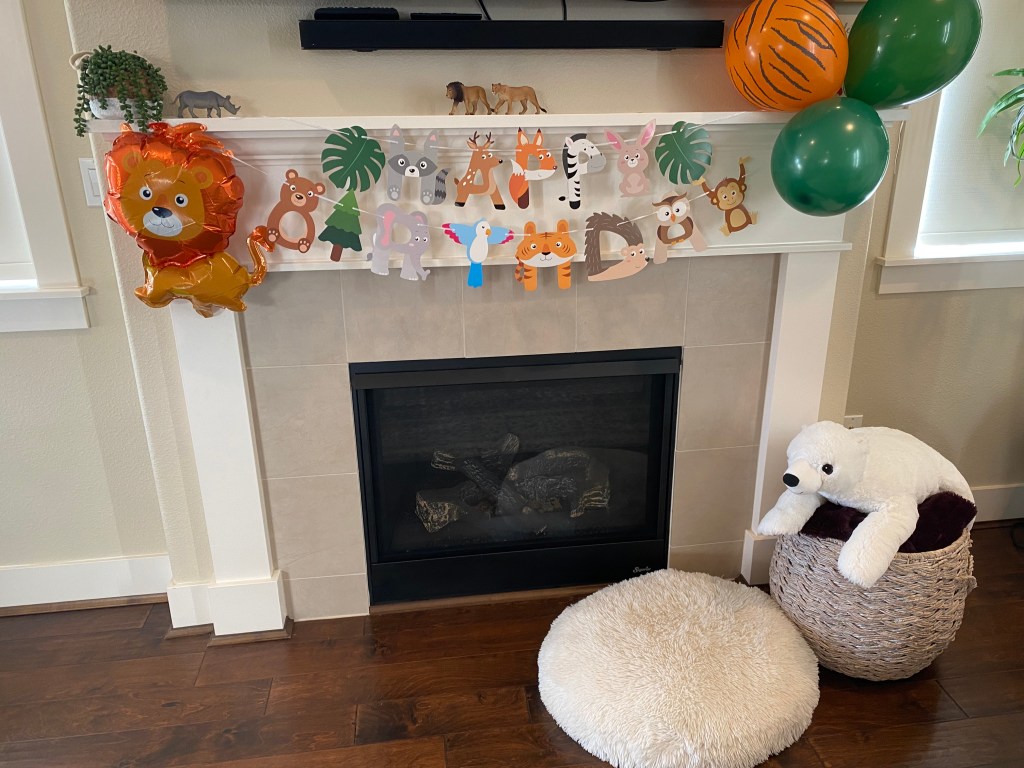
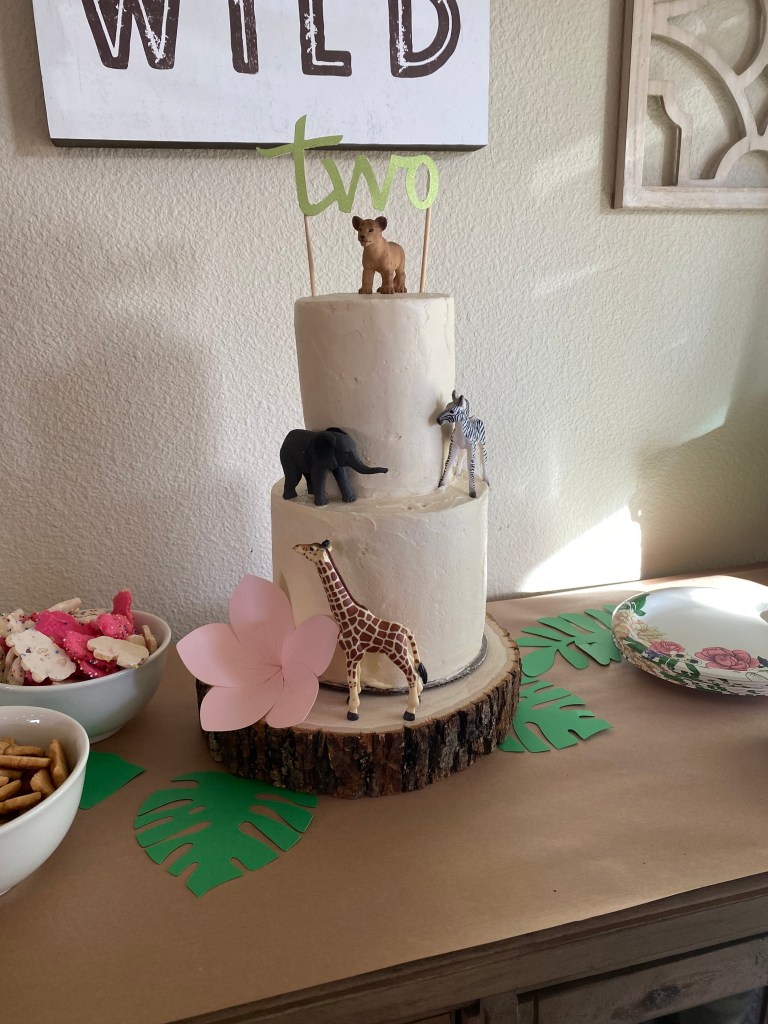
Decor: I ordered the Happy Birthday banner and balloons for the arch from Amazon and was happy with the results. I can’t find them in my order history but these are similar styles; banner and balloons. I use this balloon inflation machine whenever I have a balloon arch to put up. The animal figurines are from Dollar Tree and Hobby Lobby. The quality at Hobby Lobby was a lot better than the Dollar Tree finds but they also cost about $8 each so I had to pick and choose what looked presentable in the cheaper options. Dollar Tree also had unfinished, wooden animal figures. I ended up with a giraffe, elephant and rhino that I spray painted gold (you can spot them in the bottom left of the 2nd picture below). The “Live Brave and Stay Wild” wall decor was also a Hobby Lobby find that is now in my daughters bedroom.
My daughter already had a big white polar bear and white pouf that were originally purchased from Ikea that were perfect additions to the decor.
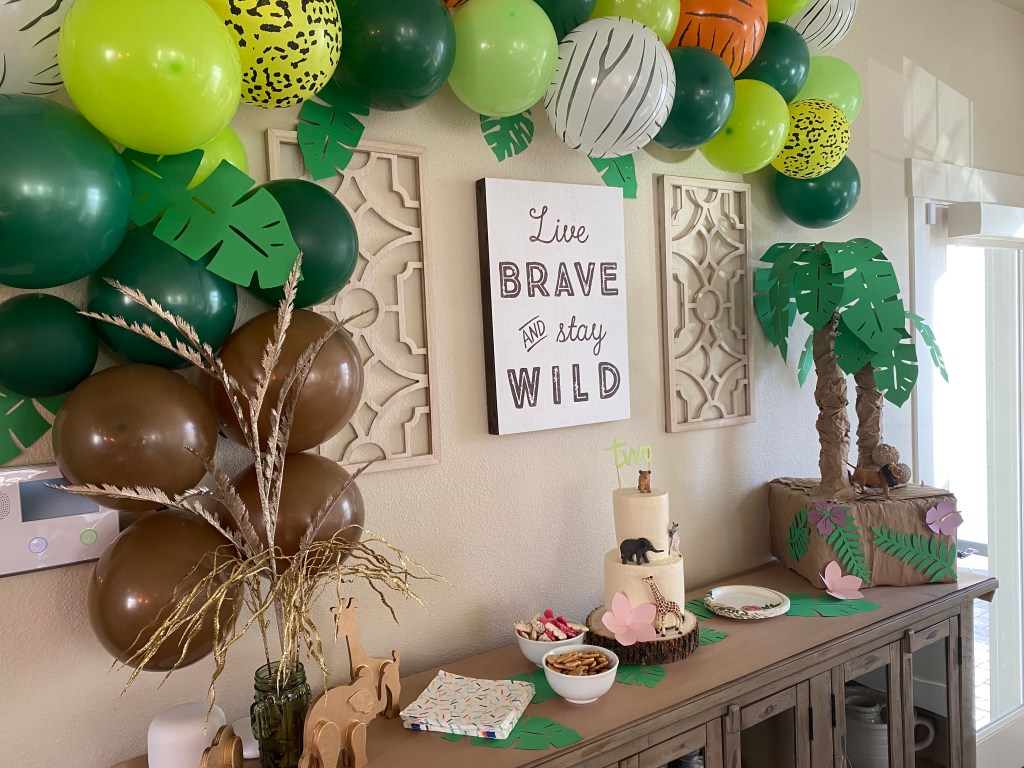
The biggest DIY items in the below photos are the leaves that I attached to the balloon arch, the flowers and the palm trees. The leaves are different shades of green card stock I cut using a generic template on my Cricut, they are attached to the arch with tape. The flowers are also generic tropical flowers I found in my Cricut templates and cut out for a little extra fun. I’m sure you could find some fake versions at a craft store if you don’t have the Cricut option.
The palm trees and stand took me some time and creativity to put together but I love how it turned out. The base is an Amazon box covered in brown craft paper with empty paper towel rolls attached and wrapped in more craft paper. I crinkled the craft paper to give the look of tree bark and attached it using A LOT of hot glue and some specifically placed tape. I ended up using small dowels to make the leaves push away from the base of the trees, otherwise, they just fell flat. I also spray painted them with the gold spray paint I already had to make them blend in a little more to the trees. I finished it off with 3 small styrofoam balls spray painted in the gold paint that looked like coconuts resting at the bottom of one of the trees.
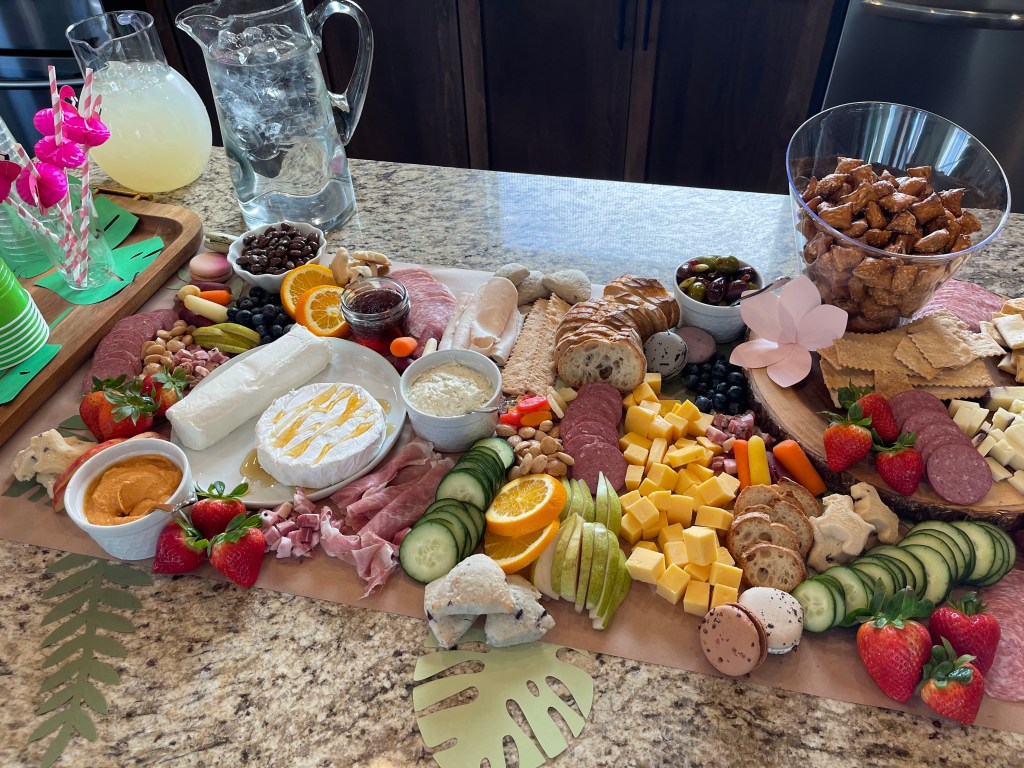
Food: I opted for a crazing table to continue the animal theme! I laid out craft paper on my kitchen island, placed some wooden rounds, white plates and serving containers around on it and just started placing food items in places I thought it looked good at. I did try to place like items on the board at one time so they were spaced well. For instance, I started with crackers and bread, moved on to meats and cheeses, then filled in with the fruits, veggies and treats. The “Grazing Table” sign was made using a cookbook stand I believe I got at Hobby Lobby years ago, white vinyl for the lettering cut on my Cricut and the tropical flowers were also found on my Cricut design space and cut from different shades of purple card stock.
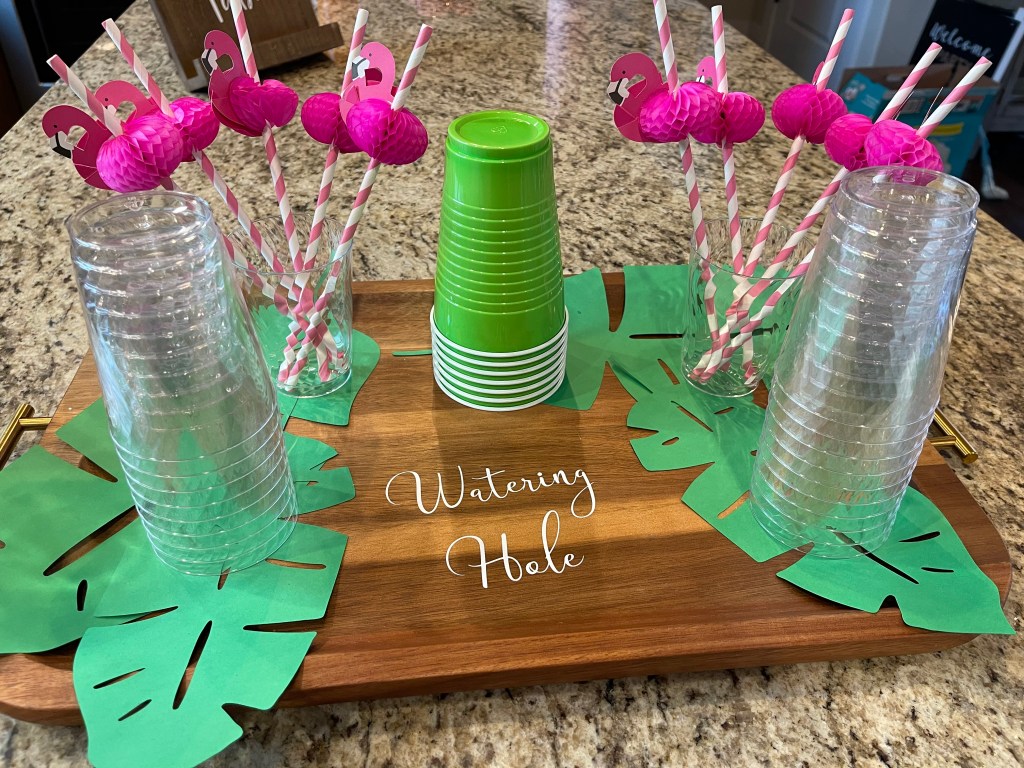
I served ice water and lemonade with these cute flamingo straws I have had in my party supplies and never had a chance to use before. I added more of my Cricut cut leaves and cut the “watering hole” from white removable vinyl (can you tell I love this material?!).
Cake: I decided not to spend the money on a cake from a bakery and opted to ask my sister to make a simple two-tier white cake. She did a great job, it looked and tasted delicious. I added my own small animal figurines and the Two topper. I used my Cricut to cut heavy green glitter card stock into the “TWO” and even reversed it to cut an additional “TWO” that was backwards so I could glue them together for extra strength. I attached it to the cake using small dowels glued between the layers. I added another pink tropical flower and placed it on a wooden round I borrowed from my sister. I also served regular and sugar coated animal crackers for some extra fun.
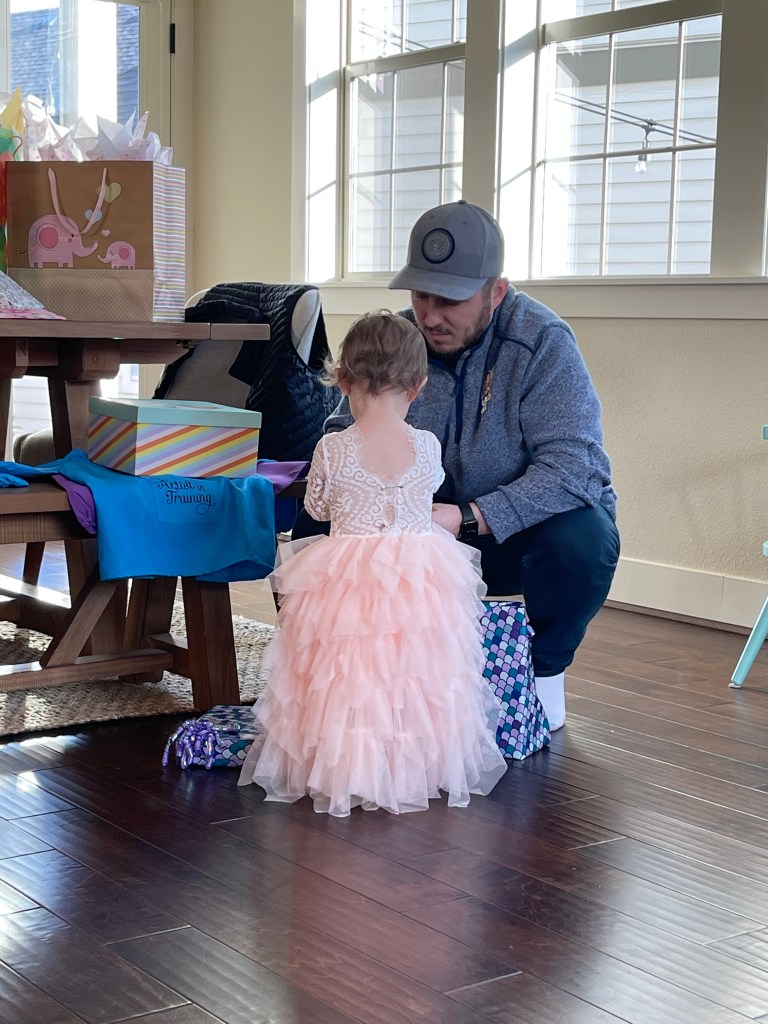
We had a blast celebrating our two year old and enjoyed spending the time with our close family. Our little princess was the star of the party and her beautiful dress from Amazon lived up to the task. I ordered it in a 2T and had to safety pin the back to keep it from falling off her shoulders. If I had more time, I would have ordered a 12 month size and I think it would have fit better but this one did the job.
One response to “Two Wild Birthday Party”
Debbie
Your creativity is amazing and a fun theme for her love of all the zoo animals.
The crazing table was a great idea and looks delightful.
Our daughter turned 2 in January and we put her through some pretty big changes at the same time. It was a month full of wins as a parent, which can feel few and far between. Our little lady showed her resilience through all that she went through this last month and I am one proud momma. From changing up our bedtime routine to the big girl potty and more, she constantly amazes me with her adaptability. This post contains what worked for our family when it came to these major milestones and I hope it can help another parent in their journey.
At the end of 2021, our daughter’s 2nd birthday was approaching, so I began to think about the milestones we would be hitting in the next year. A few of the major ones on our list include; weaning completely from breastfeeding, potty training, joining a gym with a daycare and expanding our family. There are a lot of things that could push our daughter out of her comfort zone within each of these milestones but she has always proven to be a resilient little lady so I was excited to dive right in.
KidsWorld
We began the year by joining a local gym that includes 2 hours of daily childcare so momma could get in more solo time. I love working out at home and showing my daughter what it takes to stay strong and to commit to a healthy lifestyle. But, as she gained independence, my workouts became a juggling act with keeping up with her. Our home gym was set up in the garage and it worked out great for a long time but as the weather cooled down and little miss was more interested in the “no-no” items in the garage, I tried moving my workouts inside. That caused a whole new set of problems; from more distractions for little miss, our “needy” dog always hovering around me and the limited space for all of my routines, I knew it was time for a change. It has been a blessing to get in to the gym and fully focus on my fitness journey with a lot less distraction and a little me time. I have found I am much happier the rest of the day with a lot more patience for the lovely “testy twos” we are currently going through.
As for our daughter, this was a new experience for her as she had never been left in a daycare setting before. The first day, she cried for 20 minutes before they called me to come pick her up. I got in a small run and left feeling defeated that this would be harder than imagined. She lasted a little longer the next few days. By the next week, she was doing great and only asked about me a few times but would get distracted by something fun to play with. After a month of 5 day a week trips, she is a pro and barely says bye to me before heading in to play. We have our weekly routine in place and I have been enjoying pushing myself a little harder with my workouts in the process.
Breastfeeding
Breastfeeding Journey
Another large milestone we crossed in January was an end to our breastfeeding journey. For two years, we had a shared experience that created a lasting bond for us. But, it was time for us to move on. I started with the bedtime routine nursing sessions since my husband was home to help settle her down with me. She was not a fan of the change for the first few nights but quickly caught on that we were going to be skipping that before bed now. Since that was successful, I dropped the nap time nursing session after a few days as well. That was a bit more of a challenge and Little Miss yelled for “daddy” most days but, she eventually calmed down and fell asleep. I will cherish the journey we had for two years and I am thankful for the lessons I learned through the ups and downs of breastfeeding.
Potty Training
We Accomplished Potty Training!! Little Lady started showing interest in the “potty” around 18 months so I introduced a toddler potty for her to get used to. She would usually sit on it fully clothed but loved removing her diaper to sit as well. There was the occasional pee but nothing super routine. I didn’t try to push it, instead, letting her mimic us. After a couple of months, we went diaper free for a weekend and, although the accidents were minimal, it didn’t feel like the right time. Instead of continuing, we took a break during holiday travel but allowed her to sit on potty’s whenever she asked.
After the success of daycare and weaning, we felt like she was ready to tackle the potty again. We jumped in while at home for a weekend and we decided to put her in undies right away. I feel like this helped her catch on more quickly because she didn’t like the feeling of wet undies. I recommend having lot’s of undies on hand if you plan to do the same. She had a few accidents those first two days but we made sure to ask her if she needed to go every once in a while (sometimes that was in 30 minute increments and sometimes we pushed it to an hour, never longer). We had an outing to Costco and she made it through great with no accidents but we pushed it by stopping at the grocery store too.
Our plan for dealing with accidents was to keep it fuss free since she seemed to grasp the fact that it wasn’t a great feeling to have wet undies. The test came Monday when we returned to the gym and she went to the daycare for a few hours. She did have one accident but they said she went to the restroom a few times as well. By that Thursday, she was down to one accident a day (with a few of the instances occurring during naps). Friday of that first week was her first full day with zero accidents and we praised her with high fives, lots of motivating talk and big hugs as we put her in her nighttime diaper.
After a few months, she stopped having accidents during naps but we are sticking with diapers at bedtime since that is a long time for a tiny bladder to wait. I know I have to get up to go the bathroom at night on occasion so why would a toddler be any different. Since she is still in a crib, there is no way for her to get to the potty overnight.
Those are quite a few Big Changes for a Little Lady. We didn’t expect to jump into them all right now but, as we look to expand our family, it felt like a good start. Little Miss is such a big helper with so many things that it seemed fitting for her to be able to handle a few extra “Big Girl” experiences.
My favorite thing about a breastfeeding journey, is the uniqueness within each, individual journey. I’ve only had one journey so far but it was magical and now that it has come to an end, I want to share it with the world. The beauty of this journey is that I will never have the same experience as I did with my daughter the last 2 years. I may have additional breastfeeding journeys but this one was uniquely it’s own.
The beginning was rough, my daughter was tongue tied and my nipples were raw, cracked and red before I ever left the hospital. I was lucky enough to have the latch specialist visit twice before we were released and I was given a prescription for nipple cream before heading home. Our pediatrician was also able to cut our daughter’s tongue tie while we were in the hospital as well so we could work on a better latch before heading home. Honestly though, the latch specialist tried pushing us to use a nipple shield a few times but it was more frustrating than helpful and I eventually just threw it aside and worked through the pain. That pain!! Enough time hasn’t passed yet for me to forget the pain of those first weeks of breastfeeding. I can say I’ve mostly suppressed the labor pains I went through but, for some reason, the pain I had while beginning breastfeeding has stuck with me.
We got thisIt is all worth it“Milk Drunk”
I can’t lie and tell you breastfeeding is easy, or even for everyone, but for me, it was something I had hoped and wished for. When the time came, I pushed through all the obstacles and exclusively breastfed for a lot longer than I expected. My goal was to make it 6 months since statistics say most women have stopped breastfeeding at that point. A few of the things that helped us achieve that included the fact that I was home (thank you COVID) and our daughter never would take a bottle! Yep, you read that right, our daughter NEVER took a bottle! We tried all the tricks; I would leave the room when someone else would try to give it to her, we tried to have a “date day” and head out for a few hours so she would get hungry enough to want a bottle, quickly trying to sneak a bottle in her mouth during a nursing session, and on and on we tried. To this day, she never took a bottle or pacifier and eventually went straight to a sippy cup. I did try feeding her milk on occasion from the sippy cup but since she never really took a bottle for me, I had stopped pumping months before that time and didn’t feel like starting up again just for that reason. She was also eating solids at this point so the nursing sessions where slowly weaning and I finally came to the realization that this is what works for us and to stop fighting it!
I don’t know what our journey would have looked like if I had returned to full-time, in-person work around the 3 month mark though. Our daughter was born January of 2020 so, by the time I was supposed to be returning from maternity leave, everything was shutting down due to COVID. This gave me the opportunity to work from home. We also didn’t have much of a social life, not as much due to being new parents but due to COVID shutting the world down! After spending the rest of the year working from home, my company started to ask about returning to the office full-time so my husband and I had a big decision to make. Since my husband’s job was getting more and more successful and we had put ourselves in a better financial situation throughout 2020, we decided it was time for me to stay home full time with our daughter. This was another big step that created the additional opportunity to continue our breastfeeding journey with no interruptions in our day to day.
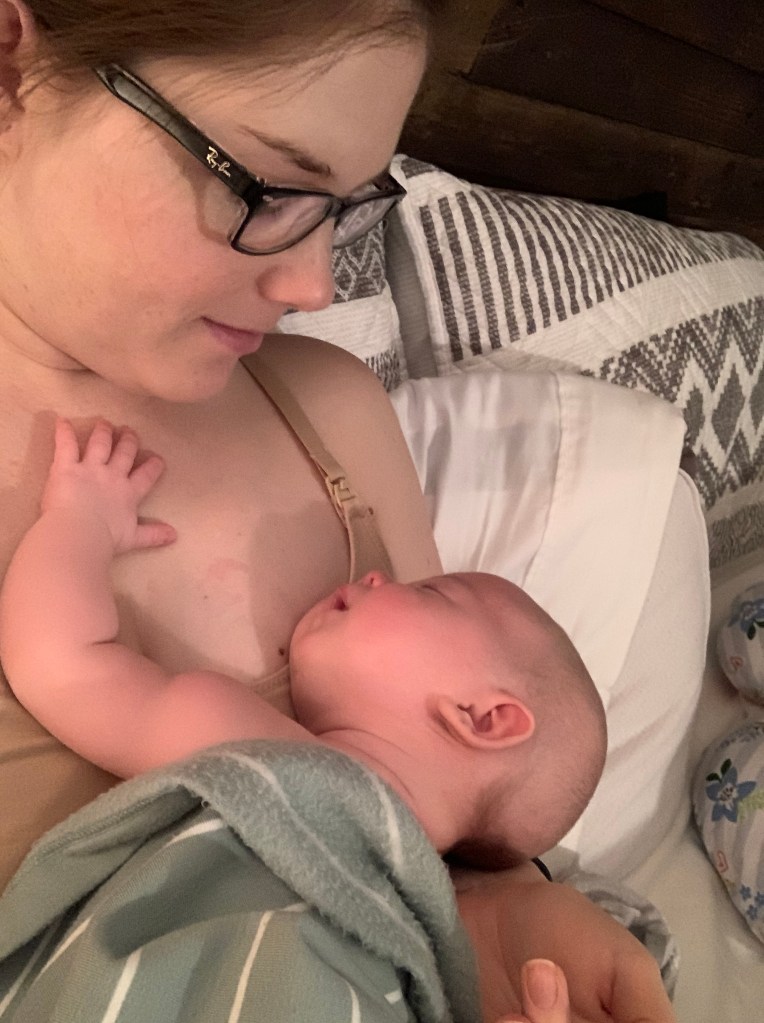
From an infantTo a Toddler
As the year mark came and went, I was amazed how breastfeeding was just a normal part of our everyday. I did have the occasional thought about weaning but it was usually due to my own selfish desires and the thoughts would creep out as quickly as they creeped in. Part of me wanted to be able to wear whatever I wanted without constantly thinking about how to nurse with a particular shirt or bra. There was also the fact that I wanted my hormones to sort out before we started to think of expanding our family again and I hadn’t had a period since before I was pregnant with Little Miss. The final thought that hit me on occasion occurred if I ever nursed in public; I felt that I was being judged for nursing a toddler. It didn’t hit me as much the first couple months after she turned one but as the second half of the year started, I began to get a little more conscious of it. I know there are women out there who have no qualms about it and although I fully support any mom and child, regardless of age, who wants to nurse in public, I had this hangup that I couldn’t shake. There is such a stigma that has been created in the US with regards to how old a child should be breastfed until. There is even a classification for breastfeeding beyond the first year, “extended” breastfeeding. I’m not usually opposed to labeling something in that manner but I think seeing it called “extended” made me feel I was doing something against the norm, which we were according to research, but I knew it was what my daughter and I needed at that time. Just as breastfeeding has so many benefits for an infant, it has just as many for a toddler. Even with the introduction of solid foods, breastfeeding continues to provide your child with additional nutrition and immunity support. Not to mention, the additional intimacy with your child that you will treasure for years.
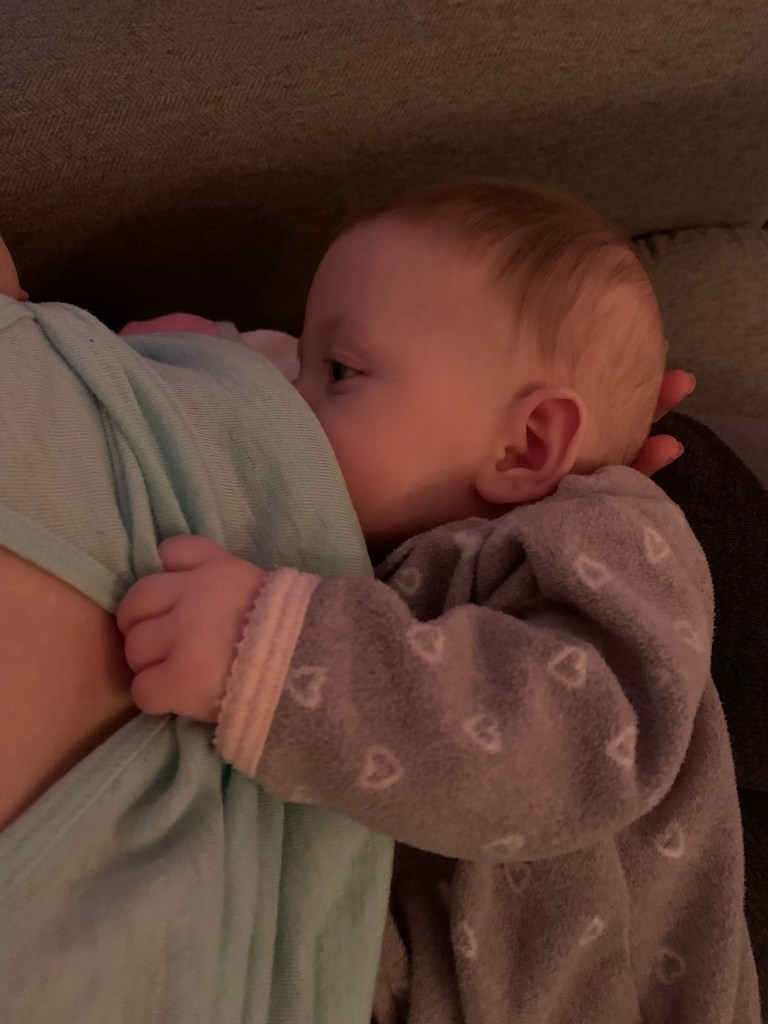
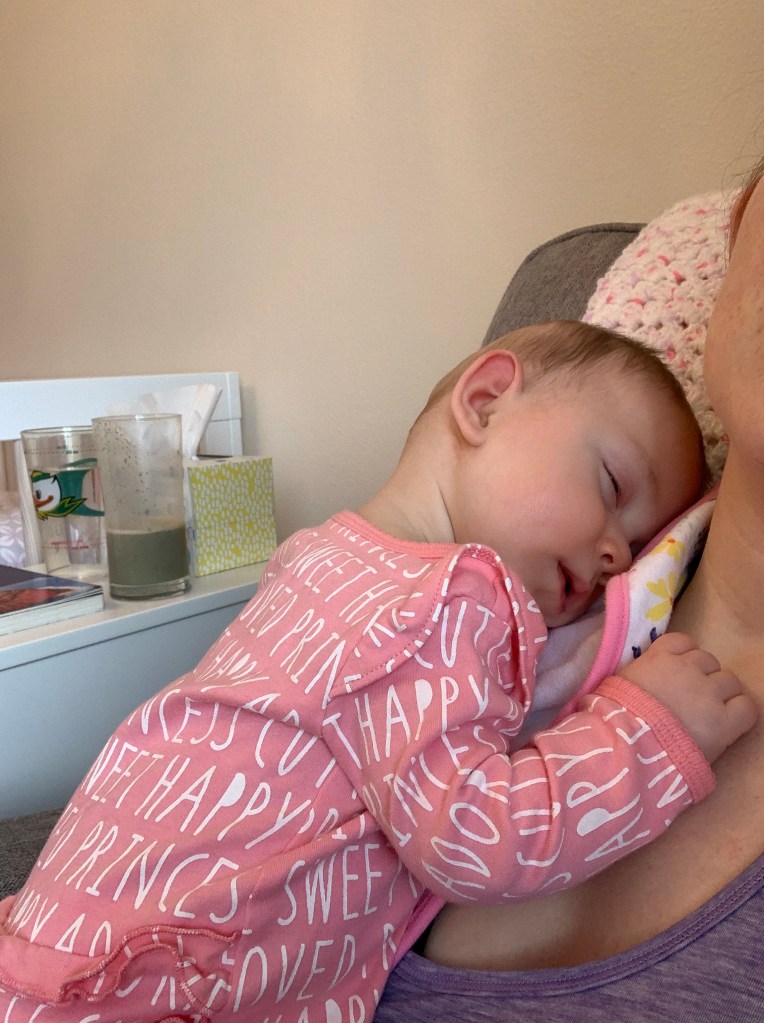
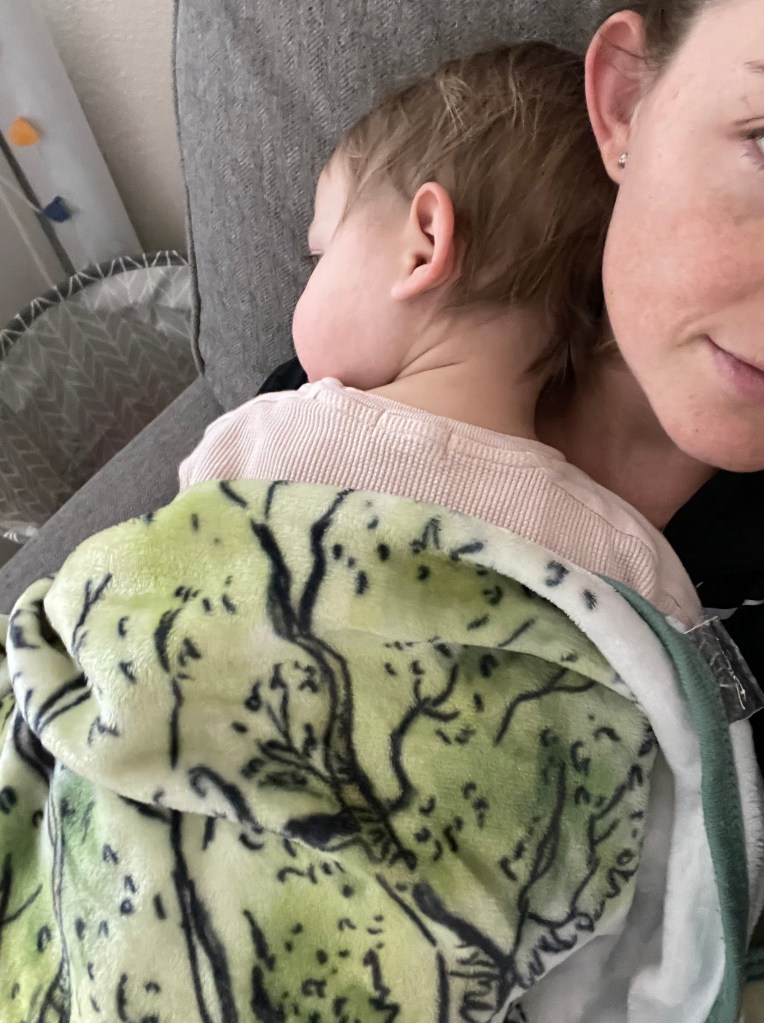
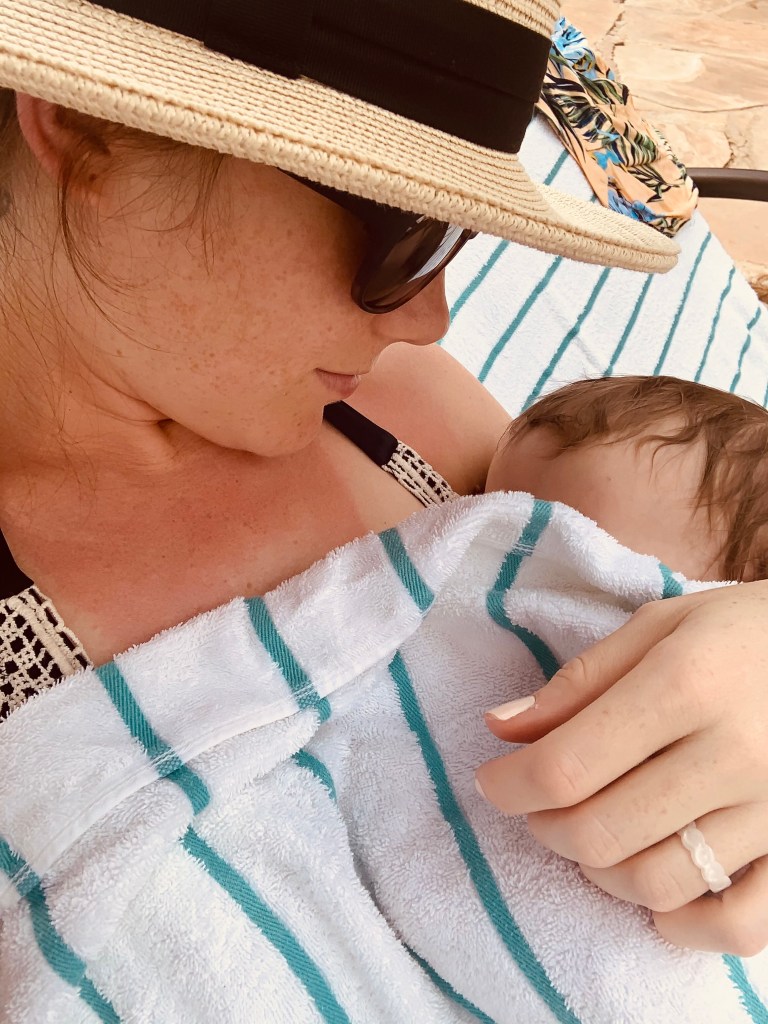
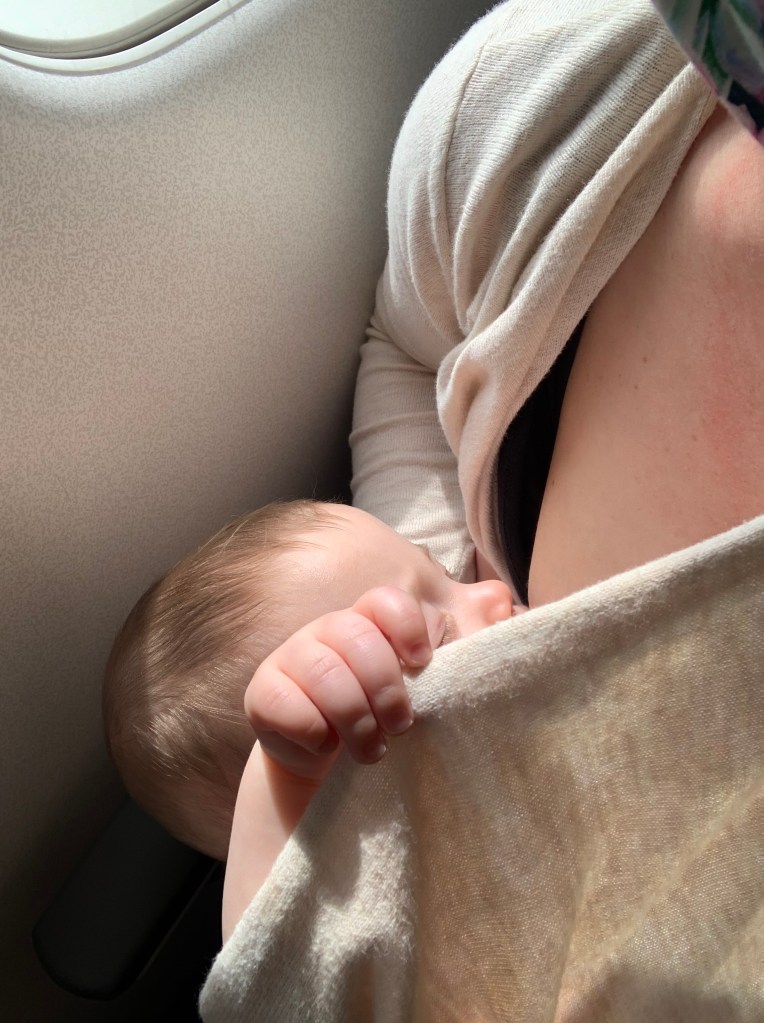
Poolside NursingThe “nursing grabs”Nursing on takeoff and landingMany Nursing Sessions
I am proud of myself for pushing through the pain and discomfort those first weeks that eventually led to months and years of breastfeeding. My biggest advice for a mom starting out her own breastfeeding journey, take it one day at a time! Seriously, especially at the beginning, those days feel so long but you do get through them, it does get easier and the process is one of the most magical experiences I have ever had.
After two years of breastfeeding, it became apparent to me that I was ready to be done and my daughter seemed to be at a good point to move on as well. We were already down to one, sometimes two, nursing sessions a day. It was a part of our bedtime and nap routines so that part was a challenge in itself. I just decided one day, a few weeks after her 2nd birthday, that I would stop nursing during our bedtime routine. The first few nights were rough but my husband was home to help out and she eventually got used to the new routine that first week. Since the bedtime routine was getting established, I decided I would try to take away the nap time nursing as well. That was harder to get a new routine with as my daughter would cry for daddy and not calm down enough to fall asleep the first few days. Around the third day, she at least calmed down enough to nap but it took almost an hour to get there. With each day since, the time it takes her to go down has shortened but she still cries for dad and I end up reading her a book way too many times before she calms. We did throw in potty training at the same time so I am very proud of her for doing so well with so many big changes at the same time. We are officially weaned and I am looking forward to getting the opportunity for another breastfeeding journey with a new little one, someday!
From trying to conceive, to pregnancy, postpartum, and beyond
A few years ago, my husband and I began to talk about starting a family and my biggest focus began to be my personal health. I wanted to have a strong body so I could have a healthy pregnancy for our child. We joined a gym, I completed the Whole30 again, and I quit a few other vices that I knew were holding me back from my optimal health. My fitness goal that year, besides running a mile without stopping, was to be able to do at least 1 unassisted pull up. We started at the new year, and by Mid-March, I had accomplished that goal and felt my body was getting to the strength I knew it could.
We traveled to Italy at the end of March for our big trip to signify the start of “trying to conceive”. We came back from that trip and I was so ready to continue my health journey and continue to push my body to be the best it could be. Little did we know, a little someone was already starting to brew inside. I spent the next 9 months, with the biggest body changes of my life.
Florence, ItalyThe many stages of pregnancyDaily walks
I thoroughly enjoyed those next 9 months by throwing myself into/researching the changes my body and that of our unborn baby’s body were going through. I indulged when I felt like it and I gained the amount of pounds that are on the upper level of the healthy amount. I felt great…until those last few weeks of course, if you have ever been pregnant, you understand…those are the weeks you are so ready to meet that baby and GET THEM OUT! There were times, especially at the end, that I watched the scale a little too closely. I wasn’t always happy looking in the mirror but I was so proud of what my body was accomplishing, I was growing a human!! Then the day came and went in which my daughter was born, and yet, I was stuck in a body I wasn’t familiar with.
Throughout the next few months, I had to dig deep to feel confident and love my body again. Some days, that was super easy when I looked at my daughter and other days, I would quietly sob at the sight of my reflection in the mirror. It helped me to remember that not only did I grow and carry a child but I had birthed her and that made me feel so strong and empowered. That has pushed me to accomplish fitness goals to this day, when I feel like I can’t run that extra half a mile, I remind myself of the labor I went through and I give myself a pep talk and run on, sometimes with a little extra speed too
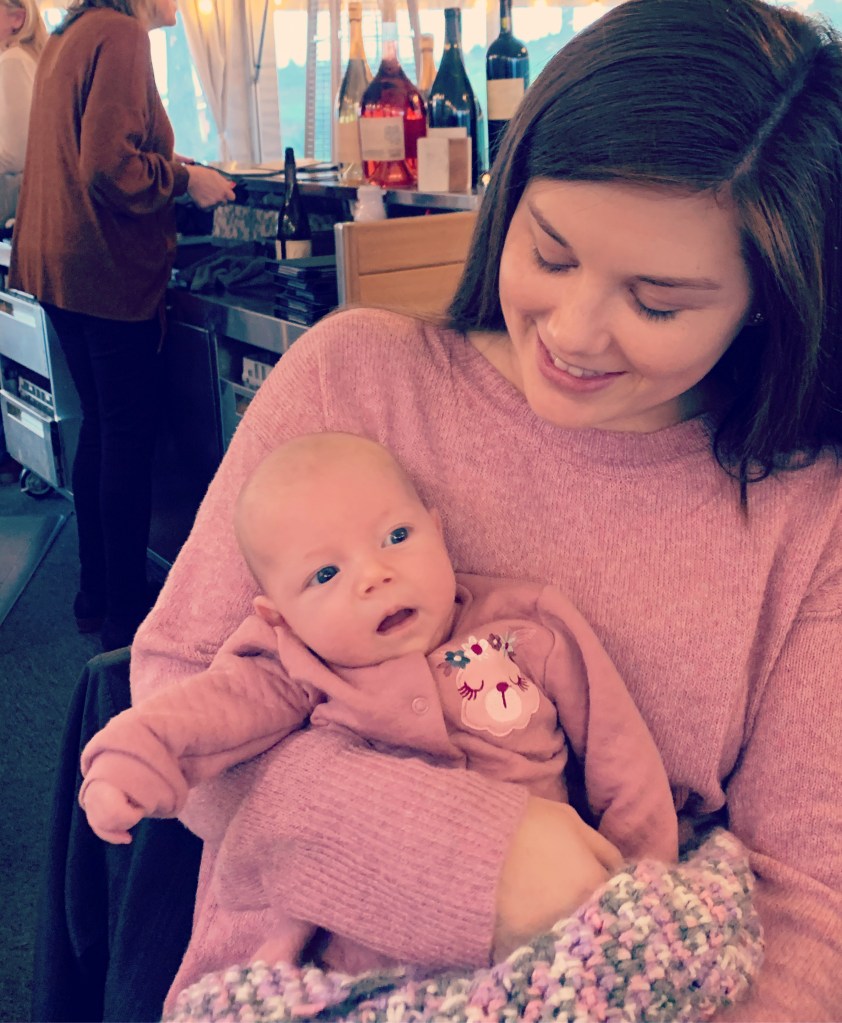
A month of snuggles
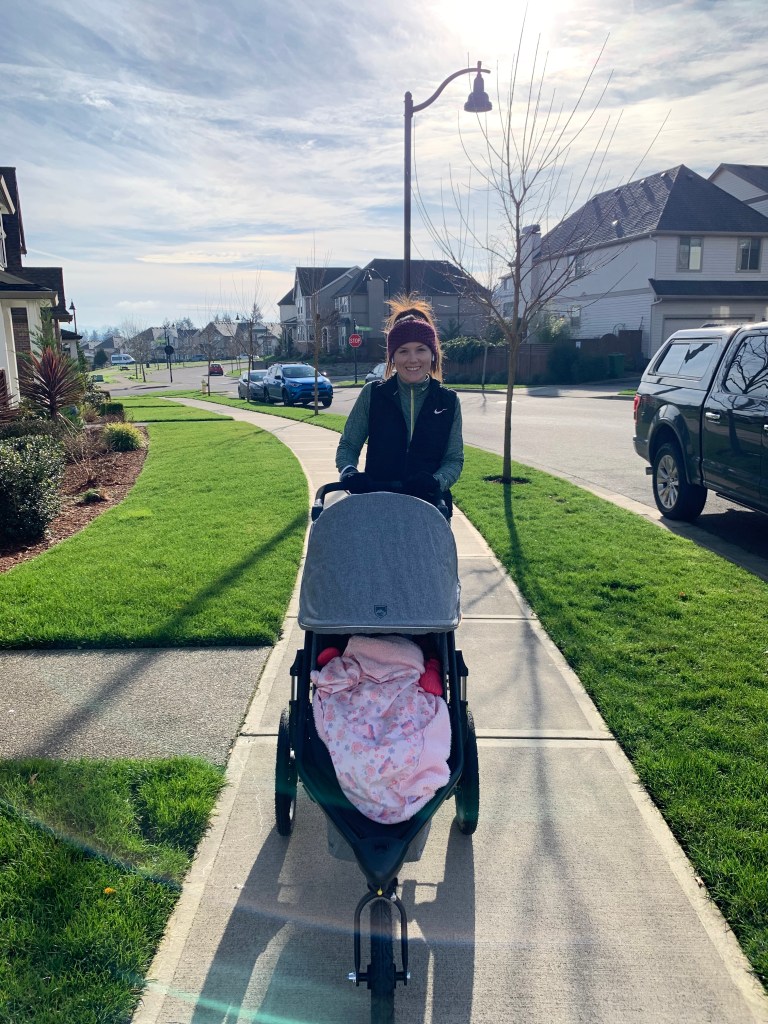
That was over two years ago and my fitness and health goals have only grown. The beginning of my postpartum was focused on healing, as it should be, and small amounts of activity like getting outside on daily walks. That was it! I didn’t focus on looking good in a bikini again or even fitting into my favorite skinny jeans, I just wanted to make sure I was healthy so I could take care of my daughter and myself. Eventually, that turned into, “ok, I got this new body thing, let’s see what it can do”. That’s where everything changed.
I began to run, slowly, and incorporated some strength training to my routine which began to bring some results. I felt strong again, my mind felt awake, and I felt like I was showing my daughter how to live more optimally. That is the mindset I have continued to bring to my fitness and diet goals.
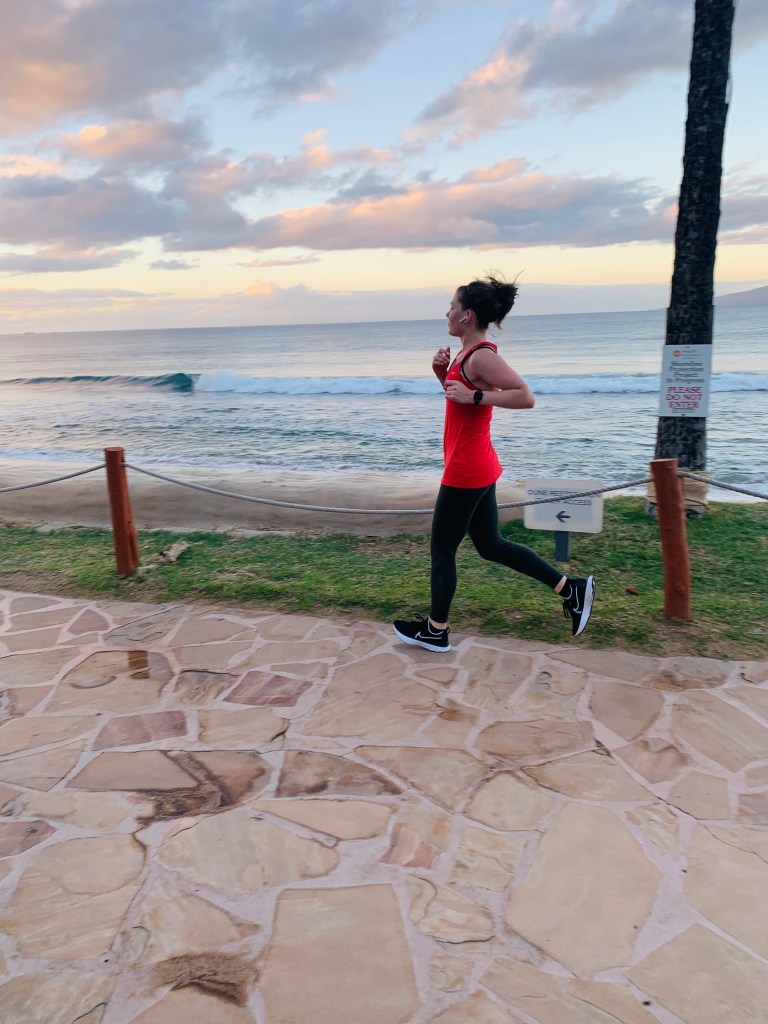
I run because I enjoy it, I workout because I love to see how far I can push my body, I eat healthy because I like the way it makes me feel. I do all these things in front of my daughter to show her what she is also capable of and what a well rounded life can look like.
I know it can be hard to find time and energy to live a healthy lifestyle but know that if you put in the work now, that time you put into it will translate into more energy to accomplish it. It will also become part of your normal routine and you won’t think about any other way to live, this is what feels natural to you. There is also something motivating about catching a glimpse of your toned muscles in a mirror for the first time and realizing you are making progress. Keep at it!!


Leave a comment